
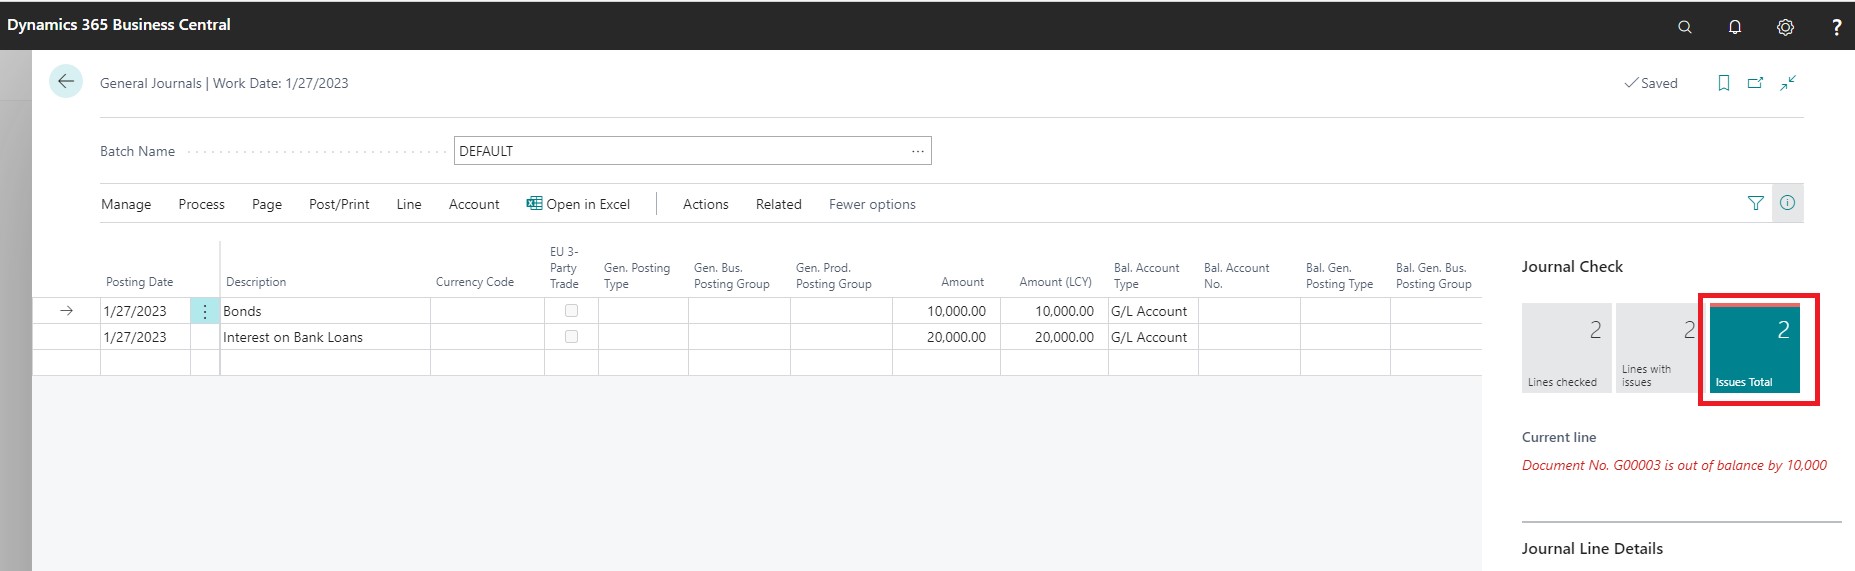
You can do correction by reversing the journal or creating a credit memo for the document, which will be time consuming and can attract to even more errors.
Now you can correct dimensions for general ledger (G/L) entries to ensure your financial reports is providing you with accurate insights. For G/L entries, you can now
- change the dimension values
- add new dimensions
- remove wrong ones
You can also trace a history of the corrections that you have done and can undo corrections in case you had made a mistake in the corrections itself.
Before you continue let me remind you:
Although the Dimension Correction feature only updates general ledger entries, still it can be helpful in many cases with creating accurate financial reports.
You must decide when to use the corrections because when you perform correction, it will result in differences between the dimensions in finance and sub-ledgers. The earlier you decide on what corrections to use, the less manual corrections you’ll need to do in the future.
I am using BC18 Demo database.
How to run the Dimension Correction
General Ledger Entries. You can change the dimensions for single or multiple entries just by selecting the entries.

G/L Register. You can change the dimension per batch posting. By using “From Entry No.”, “To Entry No.” as a filter for General Ledger Entries.
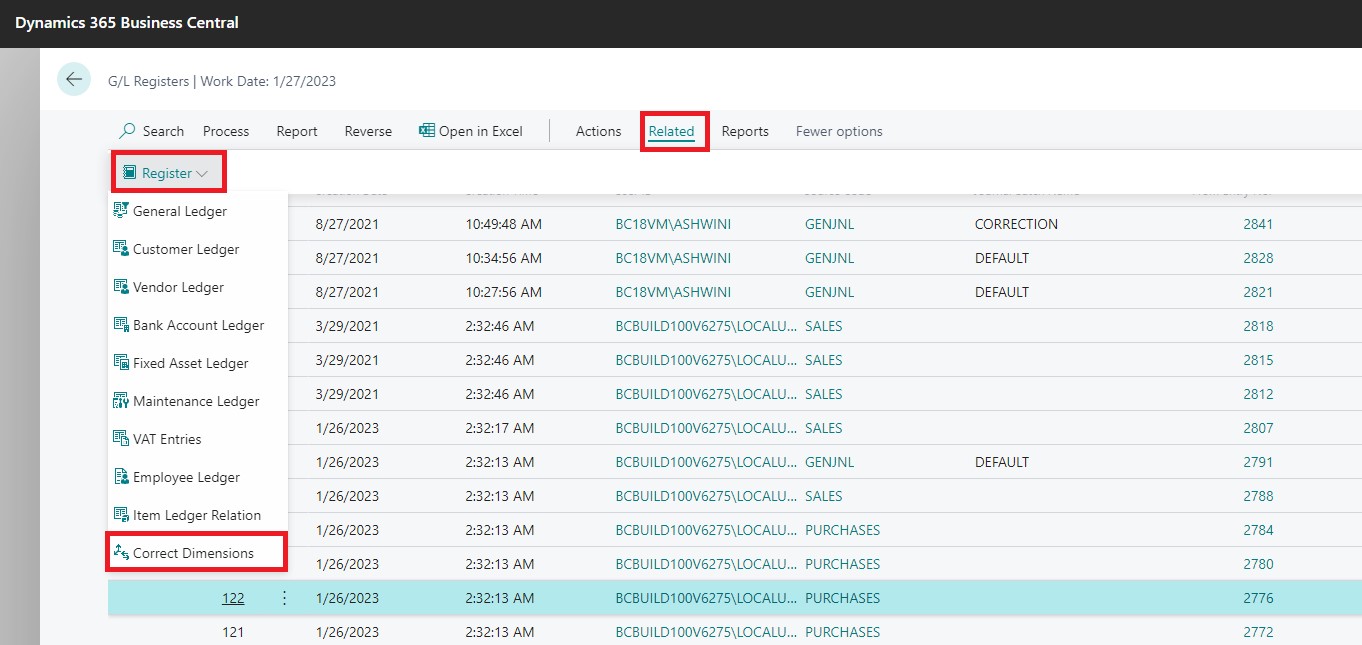
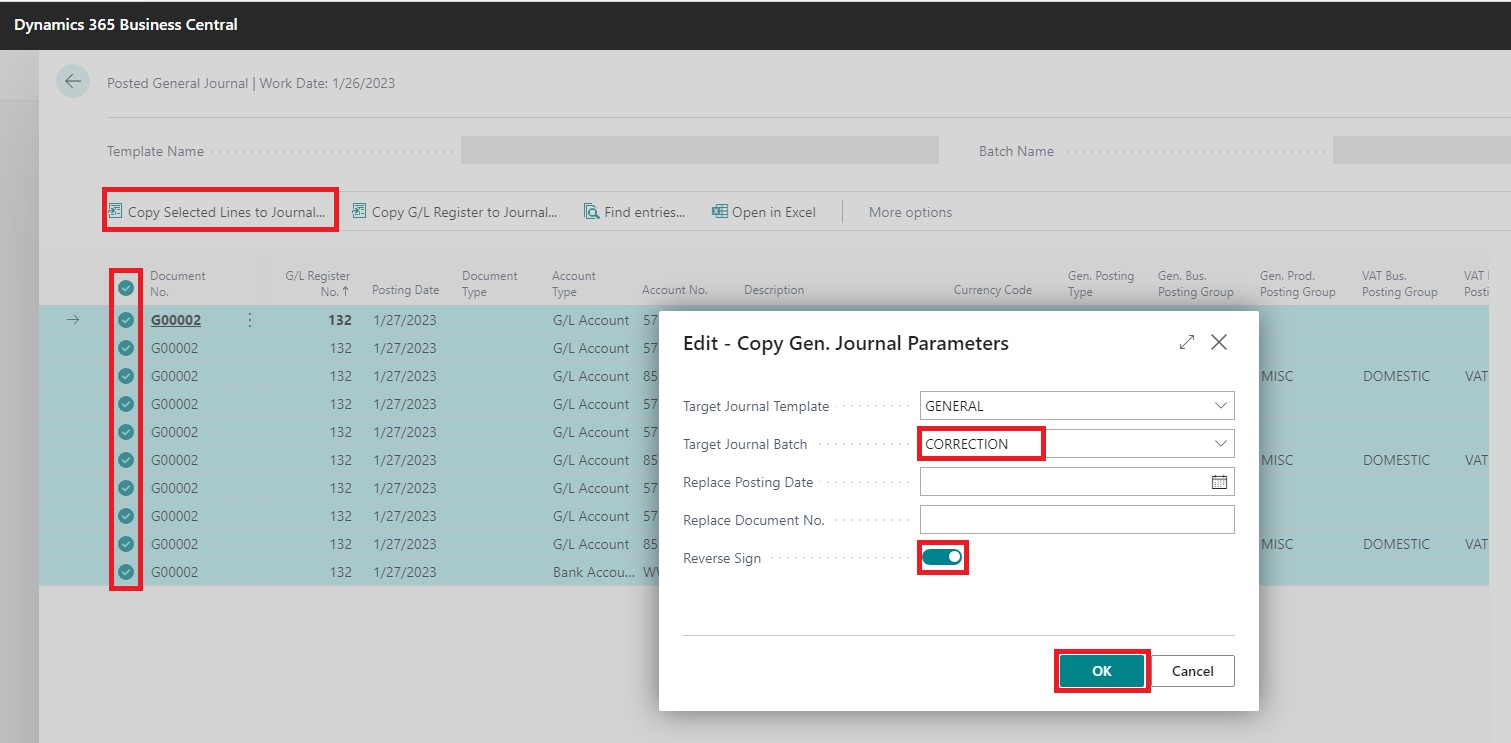
Posted General Journal. You can use “Document No.” and “Posting Date” as filters for General Ledger Entries.

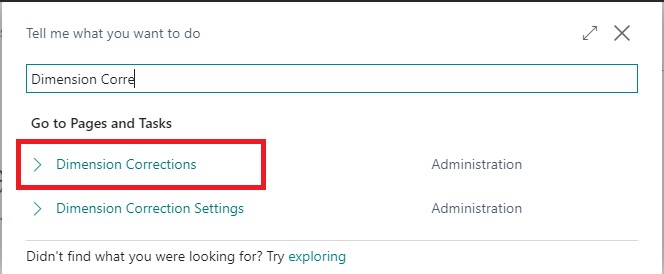
Search for Dimension Corrections Page.
Draft Dimension Correction Screen:

Depending upon from where you Launched the Dimension Correction, it may come with pre-filled or as blank screen.
You have several options to work with dimensions:
- You can Add New Dimensions
- You can Remove existing Dimensions
- You can Change the existing Dimensions

For Selecting Entries to which above changes applies you have different options to work with.
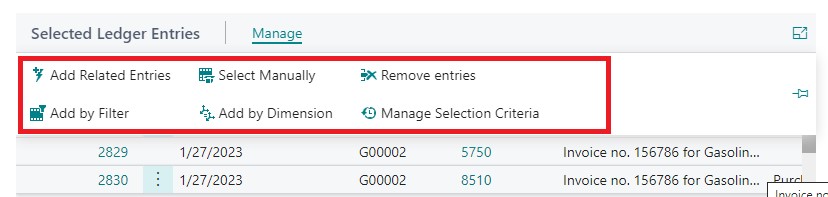
- Add related entries. This requires at least 1 G/L Entry already to be selected, and then it adds all other G/L Entries with the same “Transaction No”.
- Select Manually. You can manually select in the G/L Entries by just choosing them.
- Add by Filter. Here you have all freedom of choice, how to filter your G/L Entries for the dimension corrections.
- Add by Dimension. This can be useful if you want to change the dimension value Sales to Admin for all G/L entries. So, you find all G/L Entries with the Dimension Sales.
You can omit/remove selected entries, or change selection criteria for your entries to be applied with changes.
Updating Dimension Values
Above we create a Dimension Correction, the Status is initially DRAFT, it means the G/L Entries Dimension is NOT yet updated.
Once you are done in the Dimension change to move forward you have two option to go thru:
- Click the Validate dimension change then click RUN.
- Click RUN.

Validate change
This will check if it’s possible to make the dimension changes you specified.
- Check Dimension Correction Setup.
- Check Dimension Combinations.
Once the validation run successfully you can see it in the Validation status.

You can choose to run the job immediately or schedule in case you are operating on larger data set.
Next you can now use the Run action button. This will Apply changes to the General Ledger Entry Dimensions.
How to trace the correction
General Ledger Entries. You can see all the dimension corrections that you’ve done for the selected entries.
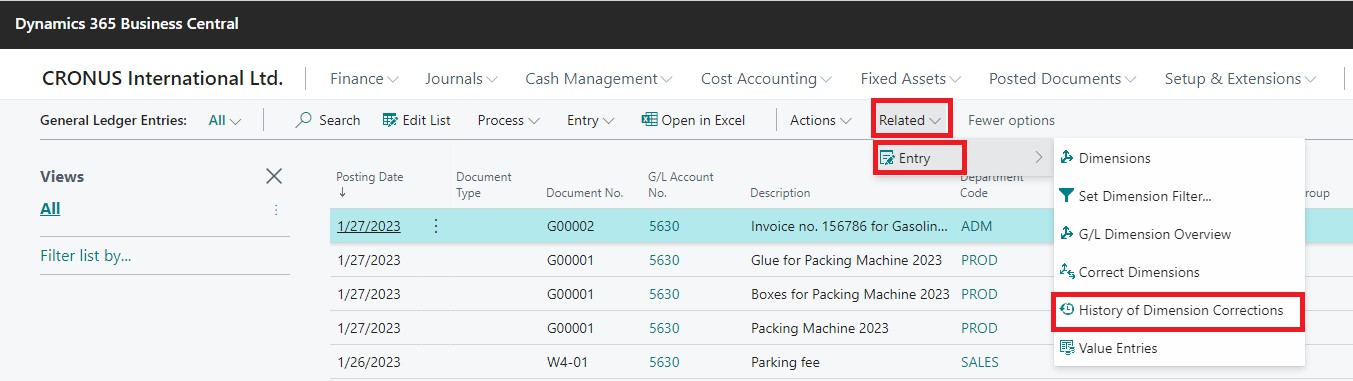
Search the Dimension Corrections. You can see all the Dimension corrections that you’ve done even the ongoing dimension corrections will be listed here.

Undo a Correction
In the dimension correction page just click the UNDO. This will be executed as a Job. The user will have to choose, how he wants to apply changes: running the job immediately or schedule it.
It is recommended to run the schedule if you are working with larger data set, to avoid the table locking during posting of other transactions.
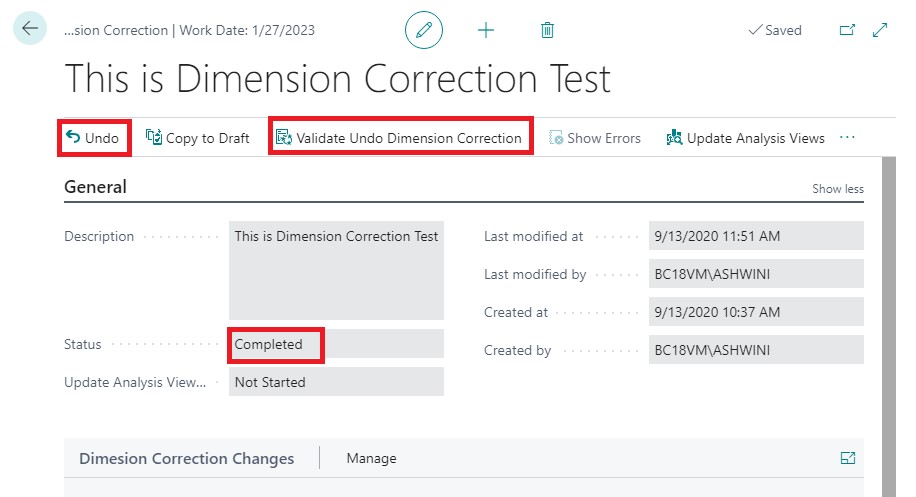
Once the Job execution completes, you will see the status change to UNDO COMPLETED.

How to Update the Analysis Views
From the Dimension Correction page, you can also update you’re Analysis Views by clicking the Update Analysis Views button. This will be executed as a Job. You will have to choose, how you want to apply changes: running the job immediately or schedule it.
It is recommended to run the schedule if you are working with larger dataset, to avoid the table locking during posting of other transactions.

Hope you enjoyed the information. Will come with more similar information in my next posts. Till then keep exploring, learning and sharing your knowledge with others.
Remain safe, take care of your loved ones, put your mask, maintain safe distance and don’t forget to get vaccinated.


You must be logged in to post a comment.