Always Ask, Autoinsert, Automatic, BC18, Business Central, Customer, Dynamics 365, Functional Tips, Get Recurring Lines, How To, Information, Lines, Manual, Notification, Purchase Documents, Recurring, Sales Documents, Tip & Tricks, Vendor, What's New

Auto-insert Recurring Sales and Purchase Lines in Business Central

Today in this post we will see how you can automatically insert frequently used sales and purchases more quickly and conveniently in Dynamics365 Business Central.

I am using BC18 Demo Database.

If your company uses repeat orders for customer and vendors, this feature can be helpful to you.

Open your Vendor Card, Select Related-> Purchases-> Recurring Purchase Lines.

In Recurring Purchase Line Setup, Create Code and way you want them to be available on your Purchase Documents.

Next you need to setup the Card for lines that will be part of this code for Purchase Lines.

Navigate to the Recurring Code Setup Page.

Choose the Card.

Enter the lines associated with this Code, that should be entered on Purchase Lines.

Options on Recurring Code Setup.

** Manual, Will be normal Std. Behavior

** Automatic, Lines will be inserted automatically.

Key in the Vendor Code and press Enter.

This will be helpful if you have single Recurring code setup, as automatic, rest all as manual.

Else Notification will be raised and you have to choose from the list.

** Always Ask, will give you Notification to add.

Key in the Vendor Code and press Enter.

This is helpful when you have multiple setups, and want to choose from the list.

From Notification click on Get Recurring Lines, and select desired code.

Once Lines are inserted on Purchase Lines you can edit the lines as usual in any open orders. Add or Remove Lines, Change the other field values etc.

Similarly, you can setup for Sales Documents too.

Hope you enjoyed the information. Will come with more similar information in my next posts. Till then keep exploring, learning and sharing your knowledge with others.

Remain safe, take care of your loved ones, put your mask, maintain safe distance and don’t forget to get vaccinated.

Advertisement
BC18, Business Central, Dynamics 365, Functional Tips, How To, Information, Sales Documents, Track Package, Wave 2, What's New

Track Packages from Sales Documents in Business Central

Today in this post we will see how you to track items on shipping documents in Business Central.

I am using BC18 demo database.

Before we begin, we need to ensure our Shipping Agent is configured:

Open your Shipping agent and fill the Package Tracking URL you received from your agent.

It is obvious if agent do not provide this feature to track package from website, this will be of no use for that particular agent.

Save the changes and go to Sales Order.

Scroll to Shipping and Billing Fast Tab and fill agent details, as in above screenshot.

Next you post your shipment.

Navigate to your shipment and update tracking information you obtained from your agent.

On Posted Sales Shipment Select Process-> Update Document.

Update the Package Tracking No. you received after shipment from your agent, and save the information.

Now you can track the status of the shipment and keep informed to your customer regarding delivery status.

From Posted Shipment page select Process-> Track Package.

This will land you to the agent web page and update you about the current status of delivery.

Since we are using invalid Tracking Information, you will get your actual status if you provide valid Information.

This feature is available on other Sales Documents type too.

Hope you enjoyed the information. Will come with more similar information in my next posts. Till then keep exploring, learning and sharing your knowledge with others.

Remain safe, take care of your loved ones, put your mask, maintain safe distance and don’t forget to get vaccinated.

Dynamics 365, Information, Tip & Tricks

Microsoft Dynamics 365 – Overview

As we are aware of release of Dynamics 365 in November 2016.

Dynamics 365 for Financials is based on Project “Madeira” which was in public preview in the US and Canada since April 2016.

Dynamics 365 for Financials launched on November 1, 2016 in the United States and Canada, and intends to expand to additional countries in CY2017.

Dynamics 365 for Sales, Dynamics 365 for Marketing, and Dynamics 365 for Customer Service within the Business edition will also be optimized for SMB customers.

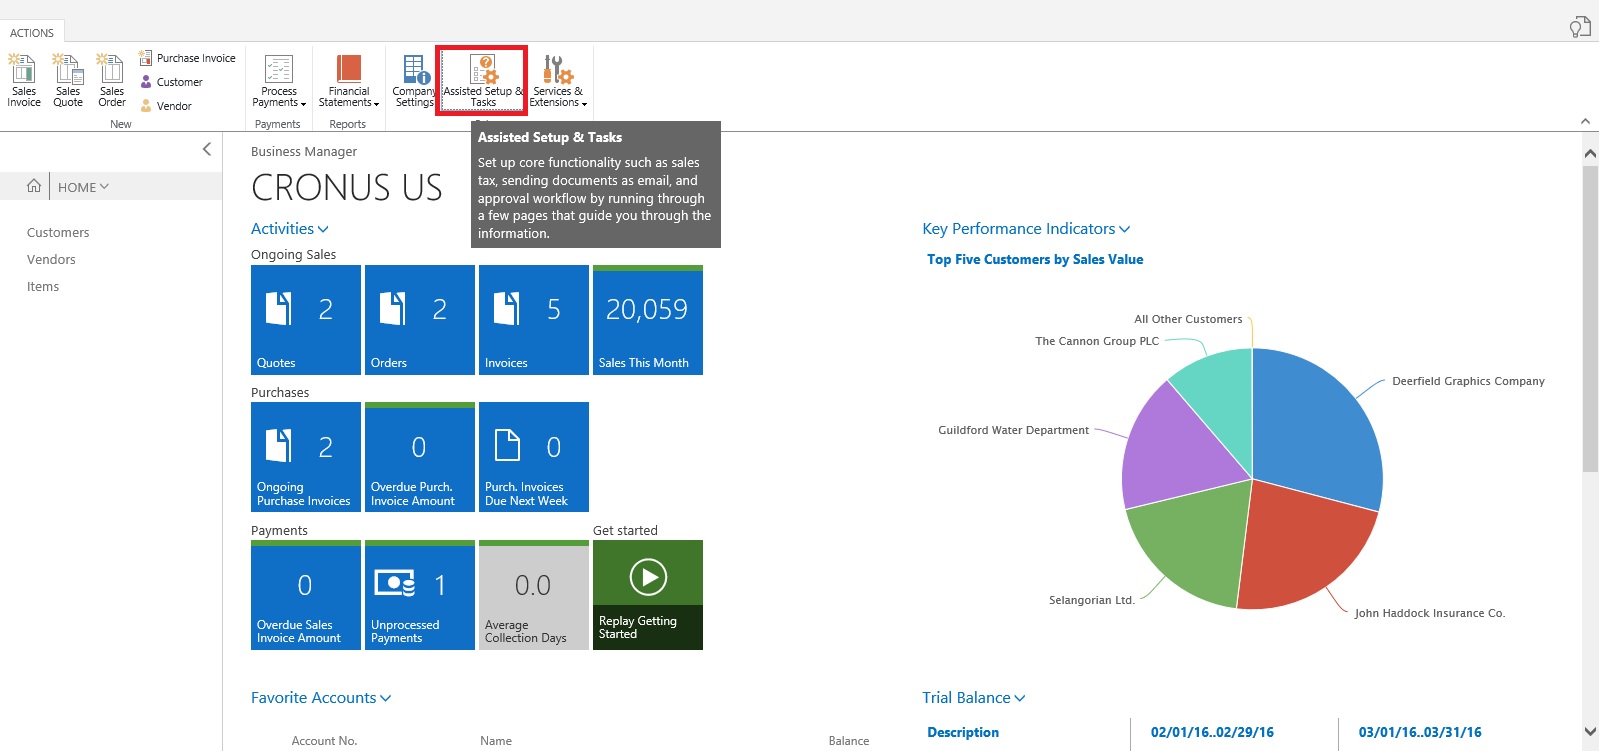
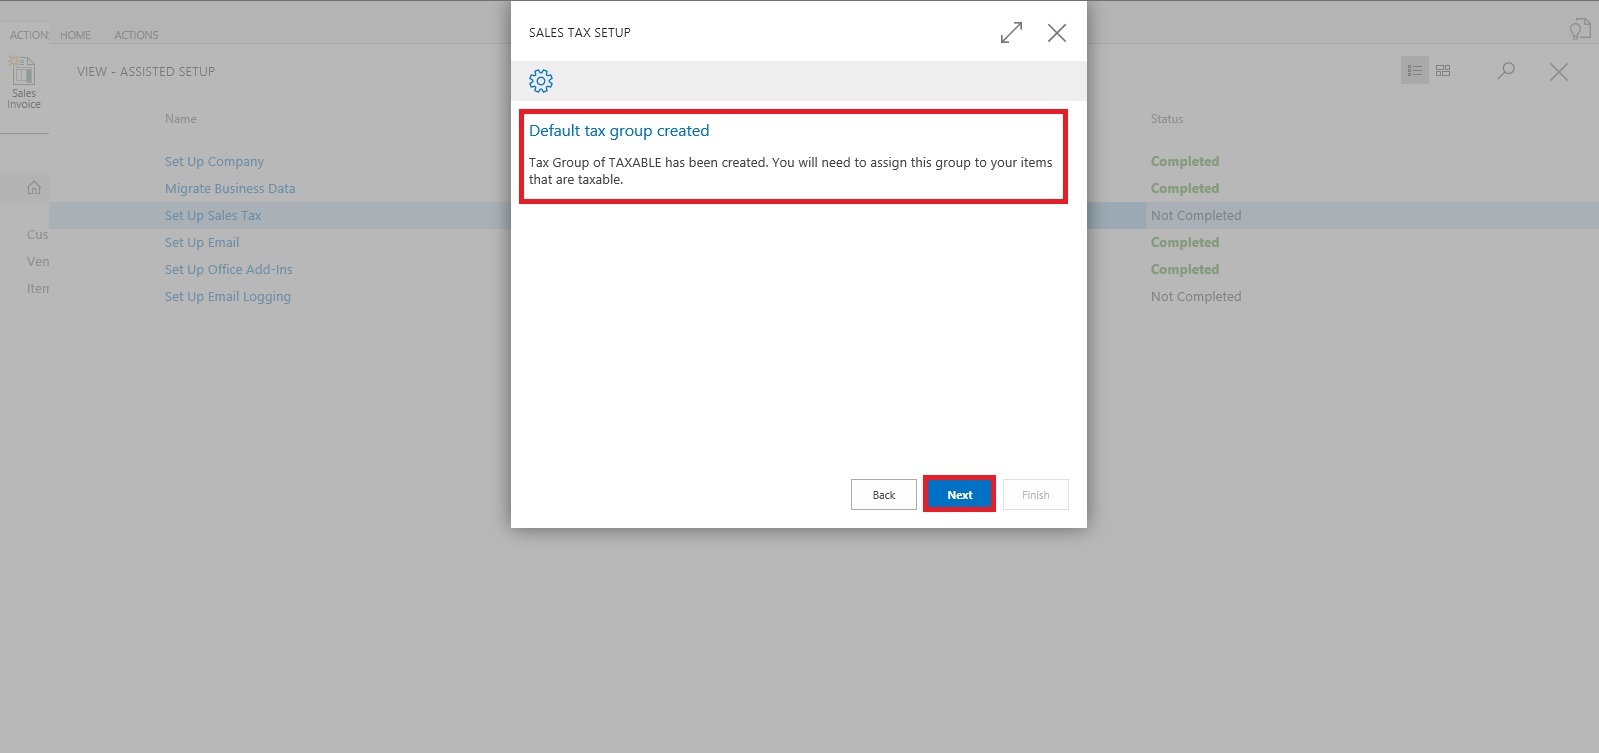
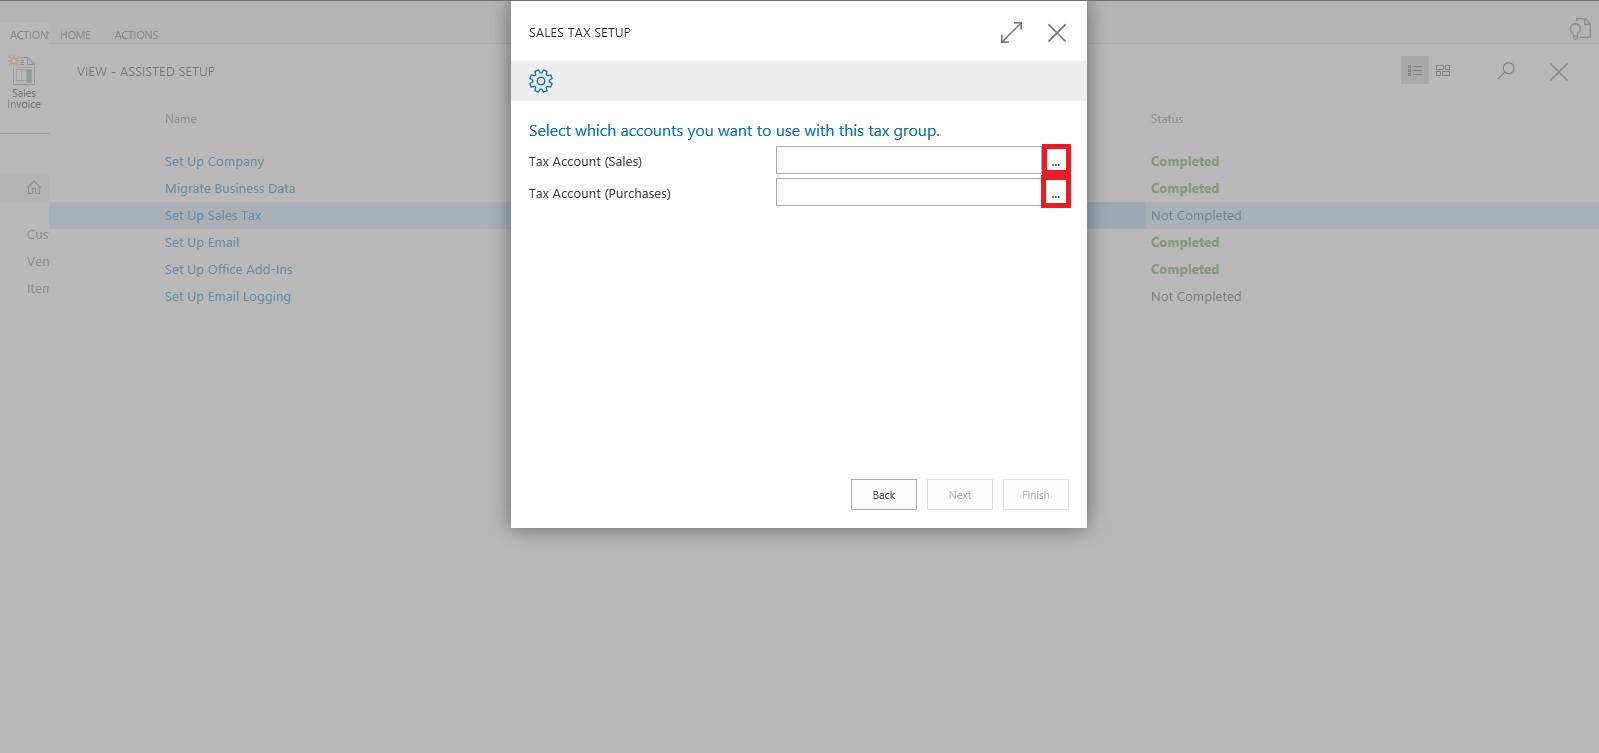
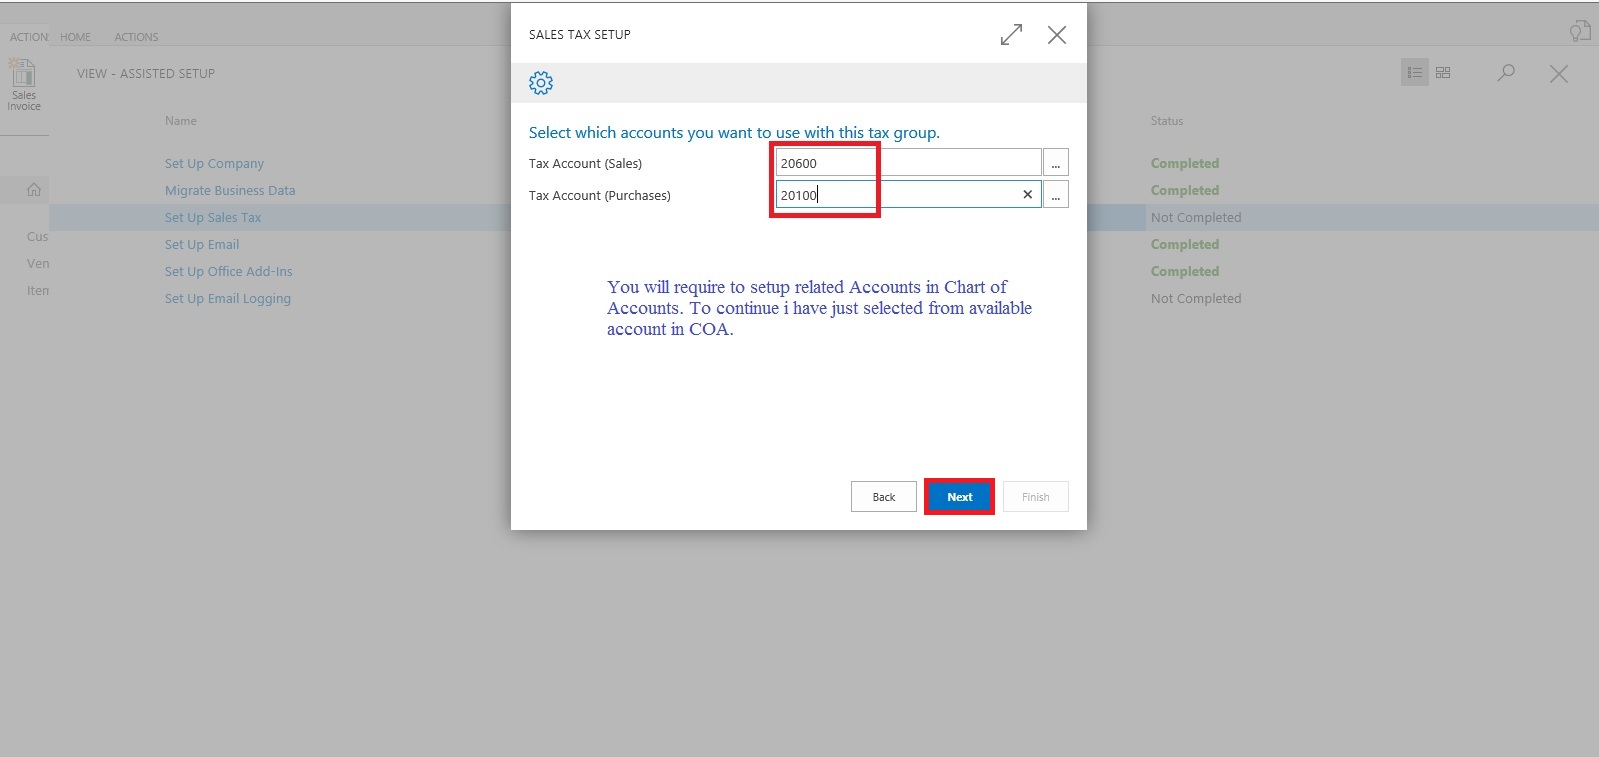
Microsoft Dynamics 365 for Financials, Business edition, has launched in the US and Canada! Microsoft Dynamics 365 for Financials is a business management solution that seamlessly connects people and processes.

It’s deeply integrated with Office 365 and includes built-in intelligence. With Microsoft Dynamics 365 for Financials, customers can easily connect their businesses; make better business decisions; and get started quickly, while easily managing growth. From day one, it makes ordering, selling, invoicing, and reporting easier and faster.

Dynamics 365 for Financials is only available as a SaaS offering from Microsoft.

Software as a service is a software licensing and delivery model in which software is licensed on a subscription basis and is centrally hosted. It is sometimes referred to as “on-demand software”. SaaS is typically accessed by users using a thin client via a web browser.

With intelligent business applications across CRM and ERP, Microsoft Dynamics 365 gives you choice.

Start with just what you need to run your business and delight your customers.

2-1

Say start with Financials.

And then add apps as your needs change.

2-2

In short evolve your business on your terms.

You can add more apps from AppSource as required for selected Products, Categories or Industries.

2-3

Each application solves real problems and delivers real value. But combine them and you get the power and possibilities to transform your business.

2-4

Dynamics 365 haves 2 Editions:

  • Enterprise
  • Business

Dynamics 365, Enterprise edition is optimized for organizations with 250+ employees.

Dynamics 365, Business edition is optimized for organizations with 10 – 250 employees.


Applications available in Business for:

Dynamics 365 for Financials is optimized to meet the needs of SMBs with roughly 10 – 250 employees.

These companies typically need more robust capabilities than the financial and accounting packages they started with, but are not yet ready to make a significant investment in highly customized ERP systems.

Dynamics 365 for Financials capabilities span financials management, reporting, fixed assets, supply chain and inventory management, contact/opportunity management, and project management. It also offers multi-company and multi-currency capabilities.


Applications available in Enterprise for:

  • Sales – Turn relationships into revenue with digital intelligence in each deal.
  • Customer Service – Earn customers for life with world-class customer service.
  • Field Service – Optimize your scheduling and use predictive tools to master the service call.
  • Project Service Automation – Create more profitable customer relationships using intelligent tools.
  • Operations – Make data-driven decisions for smarter, more efficient operations.

Other Applications:

  • Marketing – Deliver powerful customer experiences using Adobe Marketing Cloud.


Microsoft Dynamics 365 for Financials is an app in the Dynamics 365, Business edition. Additional apps within the Business edition (Dynamics 365 for Sales, Dynamics 365 for Marketing, and Dynamics 365 for Customer Service) are currently planned to be available in CY2017.


What is the difference between Microsoft Dynamics NAV and Microsoft Dynamics 365 for Financials?

Dynamics NAV is software, available via perpetual, subscription, and/ or SPLA licensing, that can be deployed on-premises or in the cloud and extended using Dynamics NAV Customizations or extensions.

Dynamics 365 for Financials is a new SaaS (cloud – only) service, available only via CSP, which can be extended via apps (validated extensions) in Microsoft AppSource.

Many of the capabilities available in Dynamics NAV will also be available in Dynamics 365 for Financials. However, they will be available in a way that is customer – ready out of the box, so these capabilities may surface differently in Financials than Dynamics NAV.

Microsoft Dynamics 365 for Financials is based on the Microsoft Dynamics NAV platform and several other Microsoft technologies.

It is not compulsory but for seamlessly experience Dynamics 365 for Financials from within Office 365, customers must have an Office 365 subscription that includes Exchange Online.

I will come up with more details in my up coming posts till then keep exploring and learning.


Dynamics 365, Information

Microsoft Dynamics 365 for Sales

Areas covered and Features available in Dynamics 365 for Sales:

  • Intelligence
    • Analyze with Power BI
    • Azure Machine Learning
    • Customer Insights
    • Data Export Service
    • Relevance Search
  • Mobile
    • Mobile Management Enhancements
    • Mobile Offline Data API
    • Mobile UI Enhancements
    • Mobile Authenticated Mashups
  • Social
    • No features released
  • Others
    • Dynamics 365 connector for Flow, Logic Apps, and Power Apps
    • Document suggestions
    • Dynamics 365 (online) administrator role in Office 365
    • Dynamics 365 App for Outlook
    • Exchange booking integration
    • Customer Insights
    • 3rd party S2S Inbound Authentication
    • Data Export Service
    • Editable grids
    • Modular business apps, app designer, and site map designer
    • Office 365 Groups
    • Partner portal
    • Portal service
    • Relationship Insights
    • Scheduling unification
    • Task-based experiences
    • Visual process designer
Corfu Navision 2016, Functional Tips, How To, Information, Tip & Tricks

Create Production Orders for/from Sales Order

One of my reader have requested to demonstrate how he can create Sales Order which is directly associated with Sales Order.

Let us start with creating a Sales Order:

ProdOrder-1

Here you can see we don’t have Available Inventory to fulfil the demand of this Order.

ProdOrder-2

To fulfil the demand we will create Production Order for this Order.

Select Planning from Action TAB on Ribbon.

Sales Order Planning Window Opens, Select Create Production Order.

ProdOrder-3

Select the Status for Production Order as desired.

For Order Type you have 2 Options

  1. Item Order – Production Order is created for each Item on Lines
  2. Project Order – Single Production order for Entire Order

Select the desired option and respond to Yes.

ProdOrder-4

I have Selected Released & Project Order in my case.

ProdOrder-5

You can check that Quantity to be produced is reserved for this Order.

There could be the situation where you may have few Inventory available, in that case you need to reserve the quantity from Function before creating Production Order else all quantity will be created. In other case only short quantity will be a quantity of Production Order.

ProdOrder-6

Select the line from available lines in Item Ledger Entries (e.g. on hand inventory) and by using the ‘Reserve from Current Line’ function you can reserve those against the sales order line.  The ‘Reserved Quantity’ then gets updated and you can see the rest in the ‘Unreserved Quantity’ field.

ProdOrder-7

Although in this case entire line is already reserved from the Production Order.

But in case you want to reserve from any available Inventory in hand from Ledger entry.

This was one of the way how you can perform Creating Production Order and Reserving for Sales Order.

We can do the same by another way as below, directly creating Production Order for this Sales Order.

ProdOrder-8

Create a Production Order Select Source Type as Sales Header and Source No as Sales Order No.

Then Refresh the Production Order.

ProdOrder-9


ProdOrder-10


This way we can create and Reserve the Item for required demand.

I will come with more details in my upcoming posts.


Development Tips, Functional Tips, How To, Maderia, Tip & Tricks

How do I process Sales Return? – In Maderia

We have seen in our previous post the feature where if a posted sales invoice has not yet been paid, then you can use the Correct or Cancel functions on the posted sales invoice to automatically reverse the involved transactions.

There could be the situation where customer wants partial refund or return of sales.

You can create the Credit Memo from the Posted Sales Invoice, which will create the Credit Memo for you and leave to you to modify and post the credit memo.

Most fields on the sales credit memo header are filled with the information from the posted sales invoice. You can edit all the fields, with new information that reflects the return agreement.

You can apply the Customer Entries via selecting the line with the posted sales document that you want to apply the sales credit memo to.

The posted sales documents that you applied the credit memo to are now reversed, and a refund payment can be created for the customer.

The sales credit memo is removed and replaced with a new document in the list of posted sales credit memos.

Let us see how we can achieve this in Madeira.


CorrectCancelSalesInvoice-12

Select the Sales Invoice and open it for action.

CorrectCancelSalesInvoice-13

Select Create Corrective Credit Memo.

CorrectCancelSalesInvoice-14

Perform the required correction and choose Apply Entries.

CorrectCancelSalesInvoice-15

Select the document to which you want this Credit Memo to be adjusted.

CorrectCancelSalesInvoice-16

Once Application is done, Post the Credit Memo.

Respond to Yes to post the Credit Memo.

Respond to Yes to Open the posted Credit Memo.

CorrectCancelSalesInvoice-17

This is the posted Credit Memo for the Invoice.

Let us check the Ledger for this Customer:

CorrectCancelSalesInvoice-18

Here you can see the net effect of the Credit Memo on Invoice.

Thats all for this post will come up with more features and details in my upcomming posts.


Development Tips, Functional Tips, How To, Maderia, Tip & Tricks

Correct or Cancel Unpaid Sales Invoices – in Madeira

Sometimes Invoices are posted in mistake or customer demands changes in invoice after posting.

Once the payment is initiated, partially or fully paid correction or cancellation is not allowed from Posted Sales Invoice itself. In such case you need to follow traditional way of doing so by passing Sales Credit Memo to Cancel the Sale and reimburse to customer manually.


What happens when you select Correct Action?

The Posted Invoice for which you say correct that invoice gets cancelled and new Sales Invoice with same information is created.

Naturally to maintain the integrity of data new Sales Invoice is created with new Document No.

A Sales Credit Memo for previous Invoice is created to void the effect of initial posted Sales Invoice.

The Canceled and Paid is marked on initial posted Sales Invoice document.


What happens when you select Cancel Action?

The Posted Invoice for which you say correct that invoice gets cancelled.

A Sales Credit Memo for previous Invoice is created to void the effect of initial posted Sales Invoice.

The Canceled and Paid is marked on initial posted Sales Invoice document.


Important Points:-

If the Canceled check box is selected, then you cannot correct or cancel the posted sales invoice because it has already been corrected or canceled.

Once the payment is initiated, partially or fully paid correction or cancellation is not allowed from Posted Sales Invoice itself.


Let us see how it works in Madeira:-

Login with your credentials to Madeira project.


CorrectCancelSalesInvoice-1

From the Navigation Bar choose Sales.

CorrectCancelSalesInvoice-2

Select Posted Sales Invoice. And choose to open the posted Sales Invoice.

CorrectCancelSalesInvoice-3

Select Correct to Modify the Invoice.

CorrectCancelSalesInvoice-4

Select Yes to continue with the process.

CorrectCancelSalesInvoice-5

Make the required modification to the Invoice and post it.

CorrectCancelSalesInvoice-6

Select Yes to continue with posting.

CorrectCancelSalesInvoice-7

Select Yes to continue.

CorrectCancelSalesInvoice-8

This is new modified Invoice that got posted.

Let us move to the original Invoice which we corrected.

CorrectCancelSalesInvoice-9

Select Show Corrective Credit Memo.

CorrectCancelSalesInvoice-10

This is the Credit Memo posted against the Invoice which we corrected.

CorrectCancelSalesInvoice-11

You can see the Closed and Canceled is Marked to TRUE.


How To, Information, Instalation & Configuration, Maderia, Tip & Tricks

Assisted Setup (Sales Tax) – in Madeira

Today we will see how Sales Tax setup is done in Madeira. Since preview is limited to US so many of the information may not apply or some different options will be available for other countries. 

Whatsoever may be in final release we will see at that time when finally it will be released. Lets look what is available in this preview.

Login to Madeira using your credentials.

From Action Tab on landing/ Role Center Page on Ribbon click on Assisted Setup & Task.

SalesTax-1

List with available options page is opened.

SalesTax-2

Select Setup Sales Tax to continue.

Welcome Screen appears click on Next Button.

SalesTax-3

Default tax group is created and you can start with other setup, click on Next.

SalesTax-4

We are only talking about Tax since this preview is only for US so options relevant to them only available. 

SalesTax-5

Select the Account for Tax Account (Sales & Purchase) using the Assist button which lists you the Available Accounts in COA.

SalesTax-6

Next City, Country & State related information need to be filled, and then click Next Button to proceed.

SalesTax-7

Depending upon Information provided in Previous Screen it suggests Tax Area Code, click on Next Button to continue.

SalesTax-8

We are done with Setup now we will assign this to Customer, Vendor and Company.

Click on Next to continue.

SalesTax-9

You can Assign the Tax Information to Customer as per entering simple query.

We can assign or we can leave this activity for later.

We have option to schedule a reminder for this activity. Click on Schedule to continue.

SalesTax-10

Enter the Date and Time for Start & Expiry of this reminder.

This will setup a Job for this and keep reminding you so that you have track of, that this activity is still pending and need to be completed.

Once done choose OK Button to continue.

SalesTax-11

You can see this in Jobs Entry Page.

SalesTax-11-1

Similarly you can do for Vendor too.

SalesTax-12

For company it will be applicable if you selected, so no separate screen for same for query based assignment.

Select OK to Continue.

SalesTax-13

We are done with our Tax Setup for Company, Customer & Vendor.


That’s all for today, will come up with more information in my next post.

Till then keep exploring and learning.


Corfu Navision 2016, Functional Tips, How To, Information, Tip & Tricks

How do I: Enable the Invoice Rounding Function

If you want your sales and purchase invoices are rounded automatically, you will have to activate the invoice rounding function.

To activate the invoice rounding function

  1. In the Search box, enter Sales & Receivables Setup or Purchases & Payables Setup, and then choose the related link.
  2. On the General Fast Tab, select the Invoice Rounding check box.

InvoiceRounding-4

InvoiceRounding-5

You can activate invoice rounding separately for sales and purchase invoices.

Functional Tips

Preventing Posting of Sales Invoices that Are Not on Stock – in Navision 2015

By default, Microsoft Dynamics NAV 2015 is set up so that you are allowed to post sales invoices that contain items that you currently do not have on stock.

You can change that behavior to allow posting an invoice only if all the items on the lines are on stock. In this scenario, you will learn how to do it through the Inventory Setup page.

  • On the Role Center, o the Home tab, in the Setup group, choose Setup.
  • On the drop-down menu, choose Inventory Setup. The Inventory Setup window opens.

PrevNegSIPosting-1

  • In the Inventory Setup window, select the Prevent Negative Inventory check box.
  • Choose the OK button..