Development Tips, Functional Tips, How To, Information, Maderia, Tip & Tricks

How Do I : Setup or Adjust Item Cost in Madeira


In this post we will see how we can Setup Adjust Cost and how to Run Manually Item Cost Adjust Batch or Schedule the same.

ItemCost-1

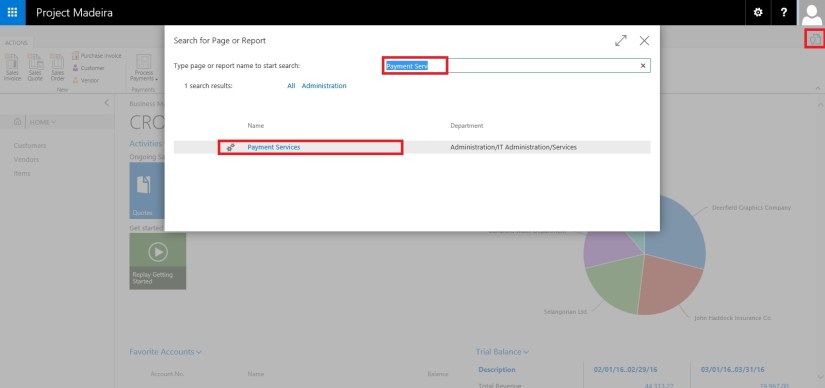
Search the Page Inventory Setup using Search Page in Right top corner of your screen.

Search for Inventory Setup Page.

ItemCost-2

Make Sure Automatic Cost Posting is Setup as required.

Also Setup frequency of Automatic Cost Adjustment.

ItemCost-3

Option Behavior
Never Costs are not adjusted when posting
Day Costs are adjusted if posting occurs within one day from the work date
Week Costs are adjusted if posting occurs within one week from the work date
Month Costs are adjusted if posting occurs within one month from the work date
Quarter Costs are adjusted if posting occurs within one quarter from the work date
Year Costs are adjusted if posting occurs within one year from the work date
Always Costs are always adjusted when posting, irrespective of the posting date

Now we will Run the Adjust cost Item Entries Batch.
ItemCost-4

Apply the desired filter for Item or Category as desired.

Next you can run Immediately or can schedule for later execution.

If you require Immediately choose OK.

If you wish to schedule for Later Run choose Schedule.

ItemCost-5

Enter your Date & Time and click OK.

ItemCost-6

To check the status of the Scheduled Run, Search and open the Page Job Queue Log Entries.

ItemCost-7

You can find the Status of your Scheduled Job for Adjust Cost Entries.

ItemCost-8

It’s easy na.

I will come up with more details in my upcoming posts.

Till then keep Exploring & Learning.


Development Tips, Functional Tips, How To, Information, Maderia, Tip & Tricks

How do I : Adjust Inventory in Madeira

Do you know, it is very easy to Adjust Inventory in Madeira.

Let us see how this action can be done.

Start with Login to Madeira using your credentials.

InvAdj-1

From Landing page, choose Item from Navigation Bar in Left.

InvAdj-2


From the list of Item choose Edit or View to access the Card of selected Item.

InvAdj-3

Now from action choose Adjust Inventory.

InvAdj-4

Enter your New Inventory Value. Like in Below screen I want to Add 50 more Inventory.

I Enter 150 including Existing Inventory in System.

InvAdj-5

Select OK.

Inventory now increases by 50 adding 100 to existing inventory making total of 150 available inventory.

InvAdj-6

We are done with our task, Adjusting Inventory.

I will come with more details in my upcoming posts.

Till then keep exploring and learning.


How To, Information, Instalation & Configuration, Maderia, Tip & Tricks

Using Payment Services – in Madeira

It’s obvious you know we can include link in PDF documents, if you don’t know no issues everything is not known to every one until he uses it or someone inform them. Today we will be learning this feature for making payments using links in your PDF invoices generated from Madeira.

If you had setup the preview this feature is already available in CRONIUS US demo company.

How do we Setup:

Login to Madeira Project using your Credentials.

Click on Search Page from right top corner.

Search for Payment Services page.

PayPalPayment-1


PayPalPayment-2

Open the Page.

Click on Setup and enter your details as shown in above screen.

Click on Maximize button and Show more to see more details.

PayPalPayment-3

Payment Service Link:

In the CRONUS US demonstration company, the payment link inserted into invoices will link to the PayPal test site.

For your actual Company, we will set so that the payment link will point to the real PayPal site, where payments can be made.

It is advisable that not to do this up for the Actual Company until Project “Madeira” is generally available for purchase. And authorized documentation on this feature is released from Madeira.

If you have setup Always Include on Document then you need not to perform any additional step, but in case you want to add the Payments Service Link to individual invoices that too can be done.

Manually Selecting Payment Services:

Open your Invoice on which you want to include this option.

PayPalPayment-4

As you can see in above Invoice no Payment Service is included.

Click on the Lookup on right side of the field.

PayPalPayment-5

Select the Payment Service from the list of available Services, and click on OK.

PayPalPayment-6

When you send the invoice to your customer the Payment Service Link will be included in the Invoice PDF.

PayPalPayment-7


PayPalPayment-8


PayPalPayment-9


PayPalPayment-10

How it will look in Invoice:

The PDF will contain the link to your selected Payment Service using which your customer can do the payment.

PayPalPayment-11

Stay tuned for more Information in upcoming posts.

Till then keep exploring and learning.


Development Tips, How To, Information, Instalation & Configuration, Maderia, Office Integration, Tip & Tricks

Assisted Setup (Office Add-Ins) in Madeira

In this post we will discuss about how to setup Office Add-Ins.

Select Assisted Setup & Tasks from the ribbon of Action Tab.

SetupOfficeAddIn-1

Select Setup Office Add-Ins from the list.

SetupOfficeAddIn-2

Click on Next Button on Welcome Screen.

SetupOfficeAddIn-3

Select Setup for (Organization or you only) and click on Next Button.

SetupOfficeAddIn-4

Enter your E-mail id and Password, click on Next to continue with next step.

SetupOfficeAddIn-5

If you wish to receive few sample mails in your Mail box click on the check box or leave it blank, click on Next Button.

SetupOfficeAddIn-6

That’s it. click on Finish to complete the setup.

SetupOfficeAddIn-7

SetupOfficeAddIn-8

That’s all for this post.

Will come with more details in my upcoming posts.

Till then keep exploring & learning.


Development Tips, How To, Information, Instalation & Configuration, Maderia, Office Integration, Tip & Tricks

Assisted Setup (Email) in Madeira

In this post we will discuss how to setup Email.

Its very easy and single user intervention required.

SetupEmail-1

From Action Tab click on Assisted Setup & Task from the ribbon.

SetupEmail-2

On Welcome screen click on Next Button.

SetupEmail-3

Select the Email Provider and click on Next to continue.

SetupEmail-4

Enter your Email id and password, click on Next Button.

SetupEmail-5

That’s it, click on Finish.

SetupEmail-6


SetupEmail-7


Just required to enter Email id and password, setup is done.

Will come with other option in my next post.

Till then keep exploring and learning.


How To, Information, Instalation & Configuration, Maderia, Tip & Tricks

Assisted Setup (Sales Tax) – in Madeira

Today we will see how Sales Tax setup is done in Madeira. Since preview is limited to US so many of the information may not apply or some different options will be available for other countries. 

Whatsoever may be in final release we will see at that time when finally it will be released. Lets look what is available in this preview.

Login to Madeira using your credentials.

From Action Tab on landing/ Role Center Page on Ribbon click on Assisted Setup & Task.

SalesTax-1

List with available options page is opened.

SalesTax-2

Select Setup Sales Tax to continue.

Welcome Screen appears click on Next Button.

SalesTax-3

Default tax group is created and you can start with other setup, click on Next.

SalesTax-4

We are only talking about Tax since this preview is only for US so options relevant to them only available. 

SalesTax-5

Select the Account for Tax Account (Sales & Purchase) using the Assist button which lists you the Available Accounts in COA.

SalesTax-6

Next City, Country & State related information need to be filled, and then click Next Button to proceed.

SalesTax-7

Depending upon Information provided in Previous Screen it suggests Tax Area Code, click on Next Button to continue.

SalesTax-8

We are done with Setup now we will assign this to Customer, Vendor and Company.

Click on Next to continue.

SalesTax-9

You can Assign the Tax Information to Customer as per entering simple query.

We can assign or we can leave this activity for later.

We have option to schedule a reminder for this activity. Click on Schedule to continue.

SalesTax-10

Enter the Date and Time for Start & Expiry of this reminder.

This will setup a Job for this and keep reminding you so that you have track of, that this activity is still pending and need to be completed.

Once done choose OK Button to continue.

SalesTax-11

You can see this in Jobs Entry Page.

SalesTax-11-1

Similarly you can do for Vendor too.

SalesTax-12

For company it will be applicable if you selected, so no separate screen for same for query based assignment.

Select OK to Continue.

SalesTax-13

We are done with our Tax Setup for Company, Customer & Vendor.


That’s all for today, will come up with more information in my next post.

Till then keep exploring and learning.


How To, Information, Maderia, Tip & Tricks

User Experience Settings – Madeira

Based on the needs of your company you can change the way all your employees experience Project “Madeira”.

Open the Company Information Page:

Experience-1

In the Company Information window, you can set the application experience that your users will have on User Experience FastTab as shown in the following screen:

Experience-2

The following table describes the impact of the experience setting:

Experience setting Description
Basic This is the setting to choose if you only want the bare essentials to do the bookkeeping for a smaller company.

You’ll have sales quotes, order, invoices and purchase invoices for your business transactions with customers and vendors, and journals to do the finance.

You’ll be able to use Project “Madeira” as your business inbox in Outlook, and you can also use services such as PayPal and Yodlee.

Basic + Relationship Management This is the default setting for the demonstration version.

It has the essential features (Basic) for you to get an idea of how Project “Madeira” works – you can do bookkeeping for a smaller company as well as doing common tasks in customer relationship management.

Suite This is Project “Madeira” in full. You’ll have all the features offered in Project “Madeira”, in addition to Basic + Relationship Management you will get the following features:

  • Multiple Currencies
  • Dimensions
  • Workflows (incl. Document Approvals)
  • Budgets
  • OCR service (Incoming Documents)
  • Deferrals
  • Recurring Journals
  • Electronic Documents
  • Analysis reports (G/L, Sales, Purchase, Items)

Will come up with more details in my upcoming posts.

Till Then keep exploring and Learning.


Data Migration, How To, Information, Instalation & Configuration, Maderia, Tip & Tricks

Assisted Setup (Data Migration) – Madeira

Login to Madeira using your credentials.

From Home page Action Tab Ribbon choose Assisted Setup & Tasks.

AssistSetup-1.1

From Assisted Setup Window select Migrate Business Data Task to continue.

AssistSetup-2.1

From Welcome Screen select Next.

AssistSetup-3

Here you can choose source using which you want to Import Data using Assist Edit Button.

AssistSetup-4

Select Import from Excel option and say OK.

AssistSetup-5

Select Download Template file.

AssistSetup-6

Save the File to desired path.

AssistSetup-7

From Settings Select the Templates you wish to Apply to your Data for Customer, Vendor & Item and choose close to proceed.

AssistSetup-8

Below is the format of Template downloaded in above step. Fill in the data to Import.

AssistSetup-9

When we don’t select any template in above step for Customer, Vendor & Item will give confirmation message as below. Choose Yes to proceed.

AssistSetup-10

From next screen Select choose button to specify the Excel file which we prepared in above step using downloaded Template.

AssistSetup-11

This will fetch the data from the file and show you no of records in each table which is going to be imported.

AssistSetup-12

Here if you are familiar with the Rapid Start you can select Advance and perform action accordingly or can skip and proceed to Next Step by selecting Next. Here I am selecting Advance to show the screen.

AssistSetup-13

Confirm with Yes to proceed.

AssistSetup-14

Your Package page will open as shown in above screen, choose Apply Package and handle any import issue with the data to complete the step.

AssistSetup-15

Confirm with Yes to continue.

AssistSetup-16

After processing it will show the status of data, review and fix the issues to continue.

AssistSetup-17

You can drilldown and review the issues and take required steps to proceed with issue fixing and importing of data. Here I choose close to return to previous step of simple import without using Package option.

AssistSetup-18

Select Next to continue with next step.

AssistSetup-19

After processing it will show status of data and errors in data. Say OK to continue.

AssistSetup-20

Here we can choose Show Errors to review the Errors.

AssistSetup-21

We find that in my data most of the issues is related to Gen. Bus. Posting Group, Customer Posting Group, Vendor Posting Group, etc… We can fix these issues later, so just respond Close to continue with Next step.

AssistSetup-22

Our data is now Imported with errors, we will take care of issues with data as reviewed above. Respond Finish to complete this step & Process.

AssistSetup-23

Now you can see this step is marked as completed in Status.

Our data is imported we will access the data and fix the issues accordingly.

I will come up with more details in my upcoming posts.

Till then keep exploring and Learning.


How To, Information, Instalation & Configuration, Maderia, Tip & Tricks

Assisted Setup – Madeira

When you want to explore Project “Madeira” on your own, you can always go back to the Getting Started tour. See in cubes area marked.

AssistSetup-1

At Home page you will find the Assisted Setup & Tasks action. See in Ribbon marked in above screen.

Here you see a list of assisted setup that can help you getting started.

AssistSetup-2

You can migrate data such as vendors, customers, and items from your existing financial system using the Migrate Business Data assisted setup. Once you are done with this piece you are good to go ahead exploring more.

Depending on your need, check if the other assisted setup can help you in any manner.

In the Assisted Setup window, you will find the followings:


ASSISTED SETUP

Set Up Company: – Creates a new trial company for you to enter data and try out Project “Madeira”. If you went through the Getting Started tour this step is probably already completed.

Migrate Business Data: – Lets you import your existing company data such as vendors, customers, and items from Excel or QuickBooks.

Set up Sales Tax: – Gets you started with default tax groups and assigning tax area codes that you can assign to customers and vendors in order to automatically calculate sales tax in sales or purchase documents.

Set up Email: – Gets you ready for sending email messages directly from sales orders or contacts in Project “Madeira”.

Set up Office Add-Ins: – Sets up the ability to use and launch Project “Madeira” from Outlook.

Set up Email Logging: – Sets up the capability to log email correspondence in Project “Madeira” to follow up on interactions.


Will come up with more details in my upcoming posts.

Till then keep exploring and learning.


Maderia, Office Integration, Tip & Tricks

Madeira – Look & Feel – Part-I

Hi Friends I am providing this Blog to my readers who are yet not able to give try to the Project Madeira First Preview. But wish to have the Look and feel how it looks.

Today I will be showing few Look & Feel changes. Up till Now only Preview is available we need to wait for some more time to hear more about the product and features.

How ever below I am presenting few details, Login to the Project Madeira using your credentials provided while Setup.

Preview-1

Here is the Landing Screen which you get post Logging in to Madeira.

Top right corner is the Search,  that we usually use to search pages.

Preview-2

Here you type the Page you wish to switch to, in my example I am trying to search Role Center Page. It will be similar to one below screen shot.

Preview-3

If you click on action Tab it will show you the ribbon having actions available on Page. You can hide it to gain more space on screen by clicking on ^ at the bottom right corner of the Ribbon Tab.

Preview-4

Lets have a Look on Item List, you have 3 View available as below

  1. Large Picture Card View

Preview-5

2. Small Picture Card View

Preview-6

3. Simple List view as usually we have in earlier Versions.

Preview-7

Let’s have a view of Customers List Page. On the right side you can see History Card Fact Box in form of Cues.

Preview-8

Here is the Vendor List Page. On the right side you can see History Card Fact Box in form of Cues.

Preview-8

Here is the Page search when you click on Magnifying search it will provide you the text box to enter you search, I am trying to search Items containing lo in its Name/ Description.

Preview-9

Click on Home to see Drop Menu to select sub Items defined under it. You can Minimize the same clicking on ^. This is available on almost all Pages and Ribbons to hide unwanted information to gain more space on Screen to view only required information. Some places it acts as hiding the Tab where as other places it serves as showing Sub-Menus.

Preview-10

Here is the example of Sub-Menu.

Preview-12


Preview-13


Preview-14

This is how Page appears you select from Sub-Menu.

On Page at Right Top corner arrow are used to Minimize or Maximize the page.

Preview-15

View of above Page in Maximized form.

Preview-16

You can use Menu on Page to send data to Excel.

Preview-17

Preview-18

Here is how line action menu is shown.

Preview-19

Below is the Matrix Page type View.

Preview-20

Picture Card Menu. Now on Pages Information and divided in respective small pages.

Preview-21


I will come up with more Look and Feel of New Project Madeira.

Till then keep exploring and Learning. You can find more information on other Blogs too.

However official Blog for same is : https://madeira.microsoft.com/en-us/blog/welcome-to-project-madeira/