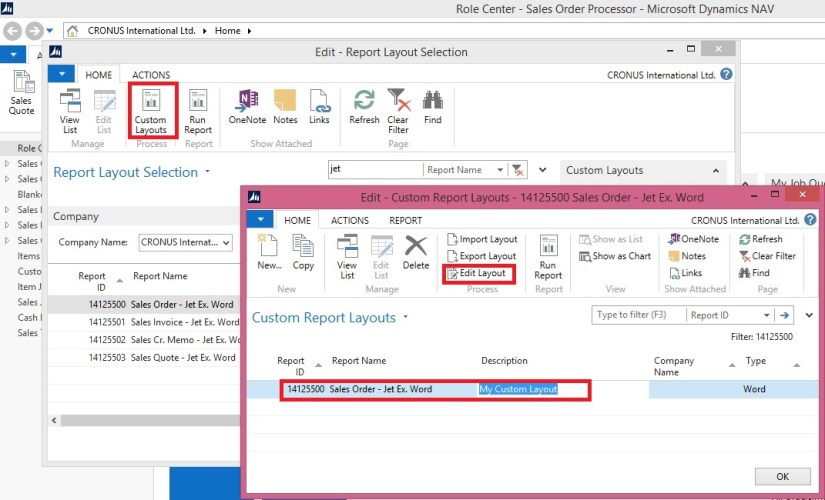
Click Edit Layout to customize this layout
The Jet Express for Word action panel may automatically open when this word file is opened.
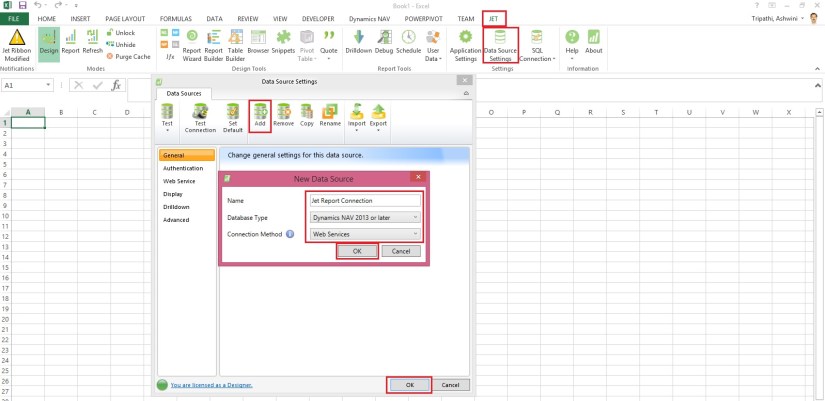
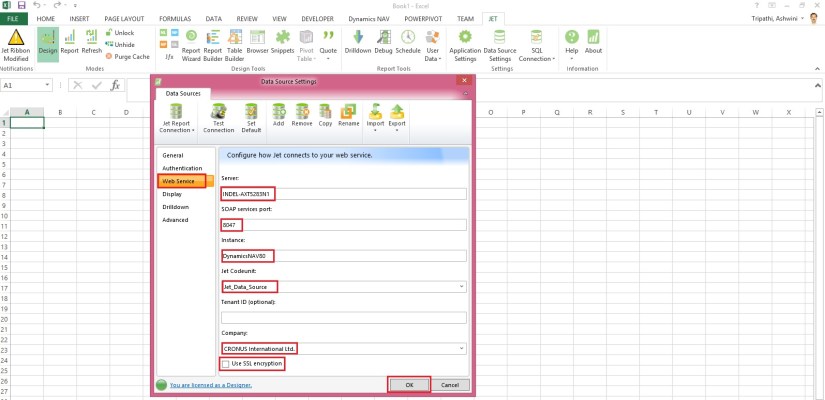
If not, select the Jet Ribbon
Click on the Design icon
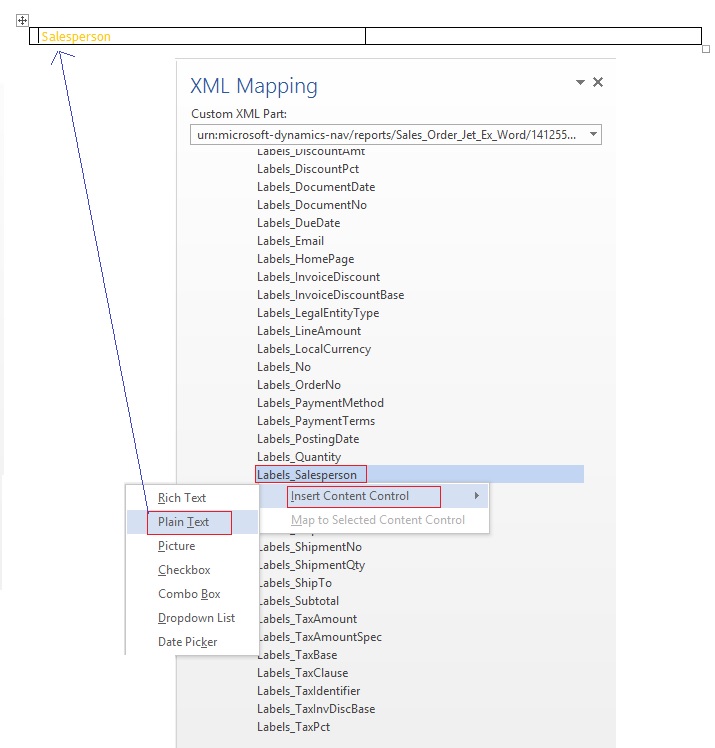
This presents a tree hierarchy of the fields from the selected report.

Click on the icons on the hierarchy to expand or contract the lists.
The Search field makes it easy to find the fields you need.
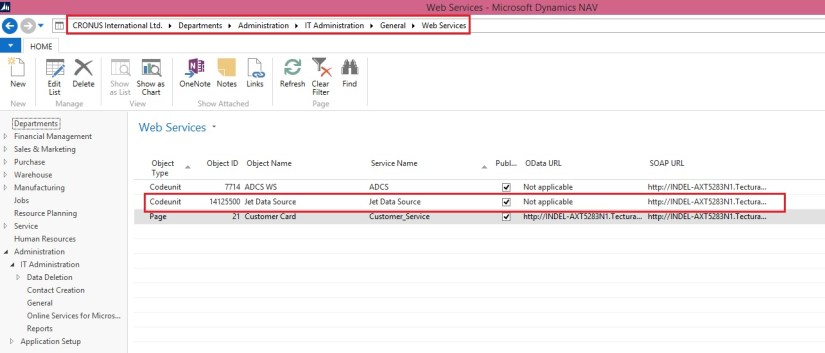
Labels – NAV reports which were created by Jet Reports include a section for Labels. These fields are the descriptions of the fields themselves.
If you have multiple languages in your NAV instance, these labels can be helpful for creating multi-language documents.
Other Groupings – NAV reports which were created by Jet Reports include sections for Company, Customer, etc. These fields include the values of the fields.
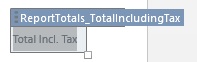
The user can select from fields including Header or Lines in the hierarchy and insert an item, typically into a table in the Word document.

To add a field select the desired location in the Word document and double-click on the field.
Alternatively, you can select the field and click on the Insert button in the Jet Express for Word action panel.
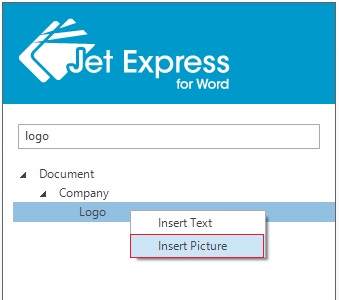
To Add a picture to a document, right-click on the item and select Insert Picture
The Lines fields are also inserted as text and can be replicated by a Right-click, and choosing “Insert Repeater”.
Repeating items (such as Sales lines on a Sales order) can be added to a document.

Best practice for this is to create a table in Word that is two rows high.
The first row contains the Labels of the fields that you wish to include.
The second row contains the values of the fields.
Select the entire second row- include the area just to the right of the last column.
Right-click on the item in the hierarchy that you want to repeat and select Insert
To delete an item, click on it, and then click on its Title.
When you click on the Title it will change color.
Then press the Delete Button on your keyboard.
Note: It’s important to select the Title when deleting to avoid any leftover data.
When you have completed your changes Save your Word document

This will return you to NAV and prompt you to import the report layout changes.

Click Yes
You can Run Report to review your changes.

Here is the output for the report below.

We are done with customization of the report using Jet Reports.
I will come up with more details in my upcoming posts.
28.620561
77.437322


You must be logged in to post a comment.