AL, Business Central, Development Tips, Extension Package, How To, Information, Language Module, Modern Development Tool, Multilanguage, Tip & Tricks, Translations, V2, Visual Studio Code

Enabling Multilanguage Support to Extensions – Business Central

Microsoft Dynamics 365 Business Central is Multilanguage enabled, which means that you can display the user interface (UI) in different language.

To add a new language to the extension you have built, you must first enable the generation of XLIFF files.

The XLIFF file extension is .xlf.

The support for using the ML properties, such as CaptionML and TooltipML, is being deprecated, so it is recommended to refactor your extension to use the corresponding property, such as Caption or Tooltip, which is being picked up in the .xlf file.

You can use the .xlf translation files approach only for objects from your extension.

It’s an XML-based format used to standardize localization.

Step – 1

To be able to work with translation files, you need to add a Feature to the app.json file.

Trans-1

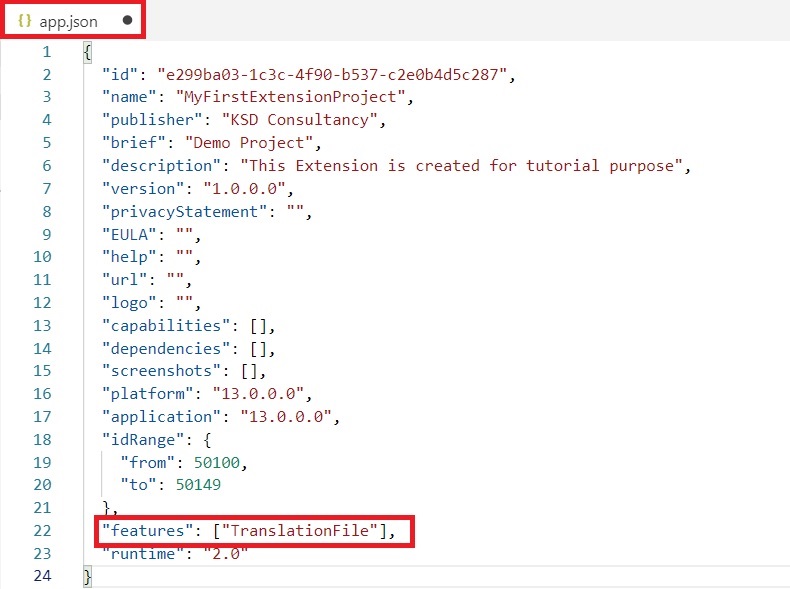
This Feature is TranslationFile.

Step – 2

When we save our app.json file, we can see immediately that we get some warnings.

Trans-2

This warning is telling us that the Multilanguage syntax is being deprecated and that we have to update to the new syntax.

The new syntax requires us to remove all the ML properties, such as the caption ML and the option caption ML, and we have to use a regular Caption and OptionCaption properties.

We use Labels at place of Text Constants.

Trans-3

Let’s fix these issues. Any ML properties like Caption ML, Option Caption ML or Text Constants. Replace them with Caption and Label.

Before we start some important points:

  • The New translation process decouples translation from development.
  • New Label syntax – Default translation & Some attributes.
  • Translation file can be combined with the extensions to support Multilanguage.
  • Caption & CaptionML cannot be used simultaneously.
  • Label syntax have comment, locked and maxLength optional parameters.
  • Same syntax for Captions and Labels.

Here after fixing the above errors:

Trans-4

All errors resolved from my Project.

In Nutshell use only Caption, OptionCaption & Label, all translation will be done outside developer environment in xlf file, no more defining in objects.

Step – 3

Build your Package, choose AL:Package.

Trans-5

Once your Package is created error free, you will see new Folder Translations with one xlf file is created.

Every time you build your Package this file gets overwritten. So be cautious.

When you perform your translation make a copy of this file and save with new Name then perform your translation.

Means Translation task will be last process in your Extension building process.

If you add more Captions or Labels later then you will have to take care of them and populate in all of your Language translation Files.

No of Languages your extension supports, you will have that much of translation files and is packaged with your package, no separate installation like in older versions is required to enable MultiLanguage.

Step – 4

Let’s see what this xlf file looks like:

Trans-6

It is in xml format.

If you see “<file datatype=”xml”” you will get your Source-language & target-language. Source & Target is set to same Language.

“<trans-unit id” Specifies each of you Caption and Labels defined in you objects.

“<source>” node specifies Caption or Label in source Language.

You will have to add your “<target>” language translation.

Step – 5

Let make copy of this file in all the supported languages you want.

For example:

Trans-7

I have made 2 files en-US & nl-BE. Naming convention is for your understanding purpose only.

Now you can handover these files to translator and he can perform translation in required language outside your development environment.

You code/IP is safe from external agencies whom you give for translation.

Only what is required for this will be:

[1] Update your Target Language in below line as:

<file datatype=”xml” source-language=”en-US” target-language=”en-US” original=”MyFirstExtensionProject”>

To

<file datatype=”xml” source-language=”en-US” target-language=”nl-BE” original=”MyFirstExtensionProject”>

[2] For every

<source>…</source> add <target>…</target>

<source>Loadout Point</source>

<target>Loadout-punt</target>

There are number of tools available on internet which supports xlf file and give ease your work of translation.

Step – 5

Once you are done with your translation, copy all the translated file to the Translation folder and Build your Solution and deploy on Server.

Change the Language of Client to Dutch and run your Object:

Trans-8

I have translated only one caption shown in red-box.

Please read the points mentioned in the post carefully.

Now you can enable MultiLanguage support for your Extensions.

I will come up with some other topic in my future post.

Till then keep exploring and Learning. Take Care of yourself.

Advertisement
Report

Designing Report Layouts from the Microsoft Dynamics NAV Development Environment

After you have created a dataset for a report, you design the report layout. The report layout determines how the report looks when it is viewed, printed, and saved from the Microsoft Dynamics NAV client. The report layout specifies which fields of the dataset are included in the report and how they are arranged, the format of text that appears on the report (such as font type and color), margins, background images, and more.

You generally display most data in the body of a report, and you use the header to display information before any dataset fields are displayed. For example, you can display a report title, company, and user information in the header of a report.

Report Layout Types

There are two types of report layouts: Word and Client Report Language Definition (RDLC). Word report layouts are based on a Word document (.docx file type) and are created and modified by using Word 2013. RDLC report layouts are .rdlc or .rdl file types that are created and modified by using Visual Studio 2013 or SQL Server Report Builder 3.0.

Built-in and Custom Report Layouts

In the Microsoft Dynamics NAV Development Environment, you can create both an RDLC report layout and Word report layout on a report. These layouts are referred to as built-in layouts because they are part of the report object in the database. This means, for example, if you export the report object as a .fob or .txt file, the RDLC report layout and Word report layout are included. A report can only have one built-in RDLC report layout and one built-in Word report layout. By default, the built-in RDLC report layout is used when the report is run in the Microsoft Dynamics NAV client unless there is only a built-in Word report layout, in which case, the built-in Word report layout is used.

Microsoft Dynamics NAV users can specify whether to use the built-in RDLC or Word report layout on a report from the Microsoft Dynamics NAV Windows client and Microsoft Dynamics NAV Web client. From the client, users can also create custom report layouts that are based on the built-in report layouts. This enables users to have several different layouts for the same report which they can switch among. Custom report layouts are managed from page 9650 Report Layouts in the Microsoft Dynamics NAV client. Unlike built-in report layouts, which are part of the report object, custom report layouts are stored in table 9650 Report Layouts of the database.

Report Layouts in a Multitenant Deployment

In a multitenant Microsoft Dynamics NAV deployment, the built-in report layouts are stored in the application database because they are part of the report objects. Therefore, built-in report layouts are available to all tenants. Custom report layouts are stored in the business data database; therefore they are specific to the tenant. This enables you to create separate report layouts for each tenant.

Report

Removing Label and Data Fields

Label and data fields of a report are contained in content controls in Word. The following figure illustrates a content control when it is selected in the Word document.

Label

The name of the label or data field name displays in the content control. In the example, the field name is CompanyAddr1.

To remove a label or data field

  1. Right-click the field that you want to delete, and then choose Remove Content Control.
  2. RemoveContentControl
  3. The content control is removed, but the field name remains as text.
    Delete the remaining text as needed.
Report

Add Fields from a Report Dataset to a Word Report Layout

A report dataset can consist of fields that display labels, data, and images. This topic describes procedure for adding fields of a report dataset to an existing Word layout of a report. You add fields by using the Word custom XML part for the report and adding content controls that map to the fields of the report dataset.

To display the Custom XML part for the Report in Word

  1. Open the Word report layout document in Word for editing.
  2. Show the Developer tab in the ribbon of Word.

By default, the Developer tab is not shown in the ribbon.

  1. On the Developer tab, choose XML Mapping Pane.
  2. In the XML Mapping pane, in the Custom XML Part list, choose the XML part for Microsoft Dynamics NAV report. The name of the XML part has the following format:

urn:microsoft-dynamics-nav/reports/report_name/ID

report_name is the name that is assigned to the report as specified by the report’s Name Property.

ID is the identification number of the report.
XMLDataSet
After you select the XML part, the XML Mapping pane displays the labels and field controls that are available for the report.

To add a label or data field

  1. Place your pointer in the document where you want to add the control.
  2. In the XML Mapping pane, right-click the control that you want to add, choose Insert Content Control, and then choose Plain Text.

AddDataField

Note

You cannot add a field by manually typing the dataset field name in the content control. You must use the XML Mapping pane to map the fields.

To add repeating rows of data fields to create a list

  1. If not already existing, add a table row that includes a column for each field that you want repeated.

This row will act as a placeholder for the repeating fields.

  1. Select the whole row.
  2. In the XML Mapping pane, right-click the control that corresponds to the report data item that contains the fields that you want repeated, choose Insert Content Control, and then choose Repeating.

AddRepeatingField

  1. Add the repeating fields to the row as follows:
    1. Place your pointer in a column.
    2. In the XML Mapping pane, right-click the control that you want to add, choose Insert Content Control, and then choose Plain Text.

InsertContentField

  1. For each field, repeat steps a and b.