For more details please see my earlier posts:
Managing Multilanguage support in Navision Overview
How do I translate my ResX Files?
Working with Partner Translation Toolkit
To support users with translated strings across conflicting text encoding formats, you must save the translations to a text file in UTF-8 text encoding format.
This converts the file to Unicode, which Microsoft Dynamics NAV Development Environment cannot import. Instead, you add the files to a dedicated Translations folder on the Microsoft Dynamics NAV Server computer.
The default location of this folder is
C:\Program Files\Microsoft Dynamics NAV\90\Service\Translations.
When you have more than one service instance, there is a Translations folder for each service instance, such as
C:\Program Files\Microsoft Dynamics NAV\90\Service\Instances\MyInstance\Translations.
Microsoft Dynamics NAV Server adds any strings in text files that you place in the relevant Translations folder to the metadata for Microsoft Dynamics NAV.
To add translated strings for a conflicting text encoding format:
In the development environment, export the strings for the objects that you want to translate.
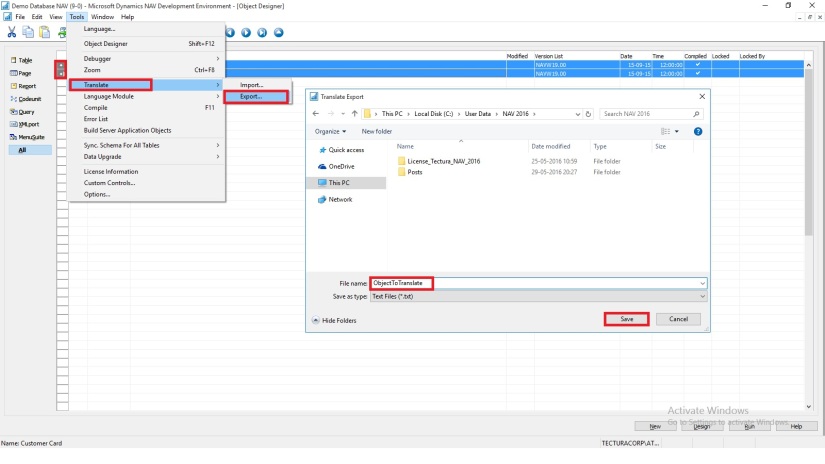
Select the Objects you wish to add translation, Export and save as text file.
Translate the strings in the resulting text file into desired Language by using your preferred translation process.
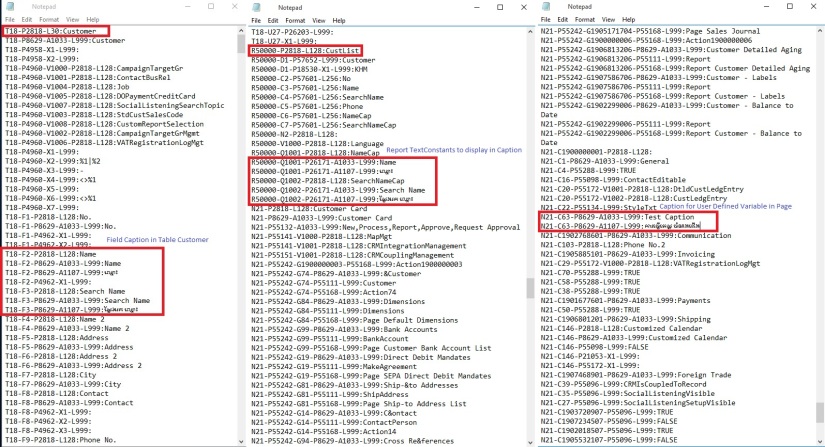
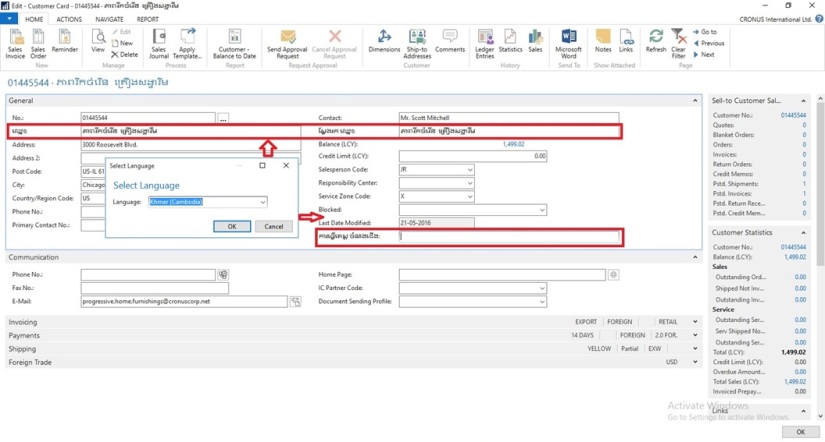
I have translated following Captions in Khmer language:
- For Field Name & Search Name in Table Customer (18)
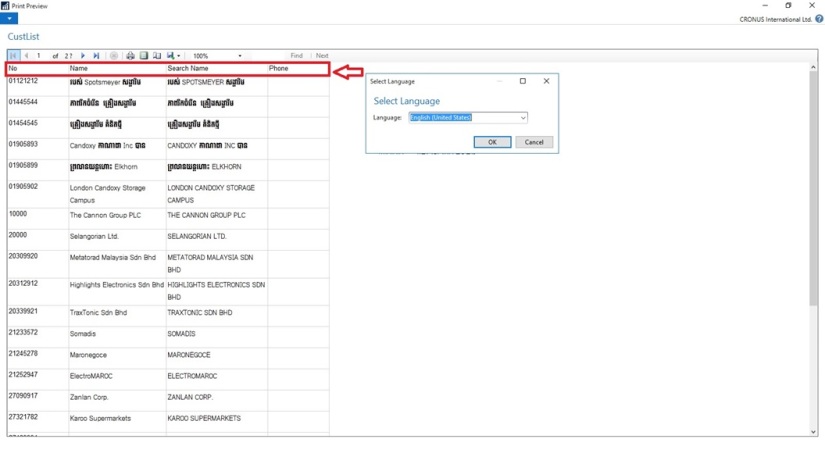
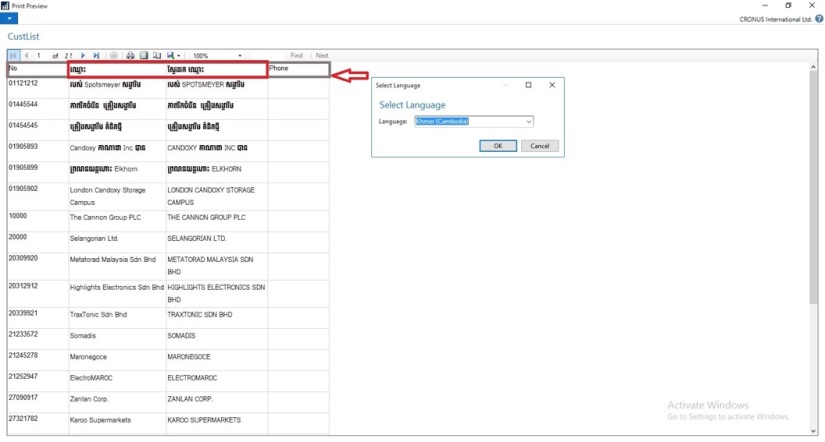
- TextConstant in Report CustList (50000) to display Caption for Name & Search Name
- Caption for User defined variable in Page Customer Card (21)
When translations are complete, save the translated strings into a text file in the UTF-8 text encoding format. The extension of the file must be .txt.
It is recommend that you remove the other Language strings from the Unicode file before you copy it to the Microsoft Dynamics NAV Server computer.
Microsoft Dynamics NAV Server queries the Translations folder for updated strings, and for performance reasons the folder should only contain strings that you cannot import into the development environment because of conflicting codepages.
Copy the UTF-8 file to the equivalent of
C:\Program Files\Microsoft Dynamics NAV\90\Service\Translations
on the Microsoft Dynamics NAV Server computer.
When you have more than one service instance, there is a Translations folder for each service instance, such as
C:\Program Files\Microsoft Dynamics NAV\90\Service\Instances\MyInstance\Translations.
Restart the Microsoft Dynamics NAV Server instance.
Microsoft Dynamics NAV Server adds the translated strings in the file to the metadata store for the Microsoft Dynamics NAV deployment.
Now Users of this Microsoft Dynamics NAV Server session can now change the user interface language from English to required Language.
The metadata store is updated whenever you add new strings to the Translations folder and then restart the Microsoft Dynamics NAV Server service instance. Cached strings are not deleted from the metadata store when you restart the service instance.
Let us see the effect of this translation. Let’s run the RTC to see the net effect of same.
[A] Customer List in English However Data Stored in Khmer Language
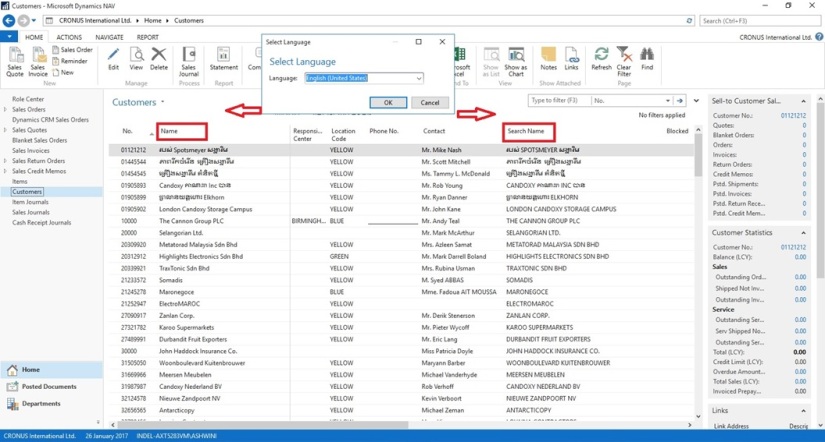
B] Two Captions Changed in Khmer Language for Name & Search Name

[C] Customer Card in English Language. Selected Captions are changed in Khmer Language
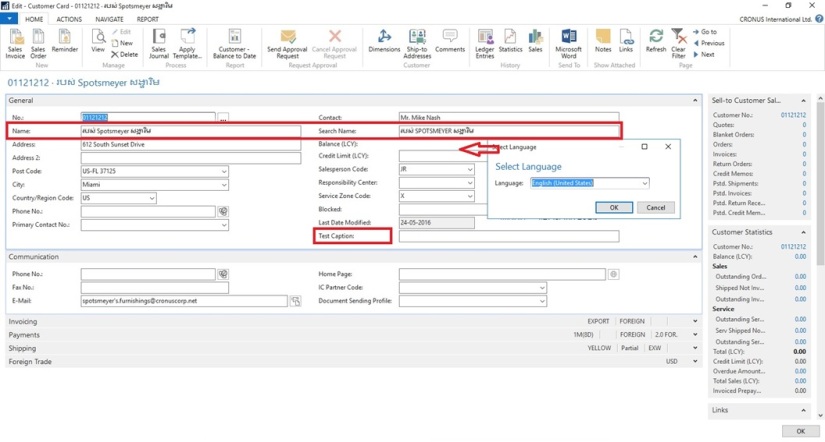
[D] Caption Changed for Name & Search Name to Support Khmer Language also for Field not available in Table the Test Caption
[E] Report Caption in English Language however data in Khmer Language
[F] Report Caption Changed to Khmer Language for Name & Search Name
You can manage Languages using above trick for translate strings across conflicting text encoding formats.
Will comeup with more details in my upcomming posts.


You must be logged in to post a comment.