
Category: Language Module
Enabling Multilanguage Support to Extensions – Business Central
Microsoft Dynamics 365 Business Central is Multilanguage enabled, which means that you can display the user interface (UI) in different language.
To add a new language to the extension you have built, you must first enable the generation of XLIFF files.
The XLIFF file extension is .xlf.
The support for using the ML properties, such as CaptionML and TooltipML, is being deprecated, so it is recommended to refactor your extension to use the corresponding property, such as Caption or Tooltip, which is being picked up in the .xlf file.
You can use the .xlf translation files approach only for objects from your extension.
It’s an XML-based format used to standardize localization.
Step – 1
To be able to work with translation files, you need to add a Feature to the app.json file.

This Feature is TranslationFile.
Step – 2
When we save our app.json file, we can see immediately that we get some warnings.

This warning is telling us that the Multilanguage syntax is being deprecated and that we have to update to the new syntax.
The new syntax requires us to remove all the ML properties, such as the caption ML and the option caption ML, and we have to use a regular Caption and OptionCaption properties.
We use Labels at place of Text Constants.
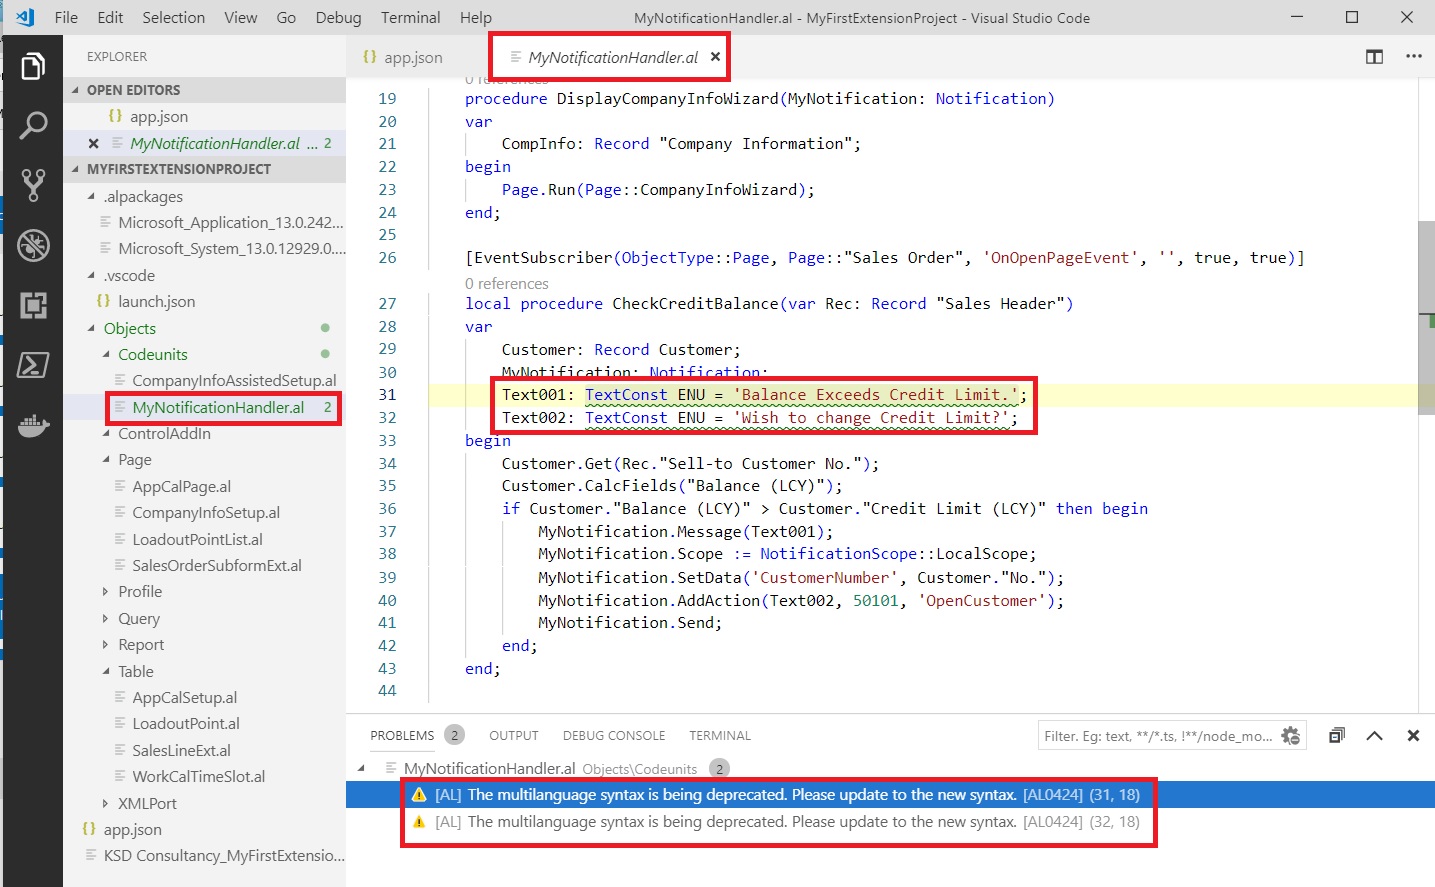
Let’s fix these issues. Any ML properties like Caption ML, Option Caption ML or Text Constants. Replace them with Caption and Label.
Before we start some important points:
- The New translation process decouples translation from development.
- New Label syntax – Default translation & Some attributes.
- Translation file can be combined with the extensions to support Multilanguage.
- Caption & CaptionML cannot be used simultaneously.
- Label syntax have comment, locked and maxLength optional parameters.
- Same syntax for Captions and Labels.
Here after fixing the above errors:

All errors resolved from my Project.
In Nutshell use only Caption, OptionCaption & Label, all translation will be done outside developer environment in xlf file, no more defining in objects.
Step – 3
Build your Package, choose AL:Package.

Once your Package is created error free, you will see new Folder Translations with one xlf file is created.
Every time you build your Package this file gets overwritten. So be cautious.
When you perform your translation make a copy of this file and save with new Name then perform your translation.
Means Translation task will be last process in your Extension building process.
If you add more Captions or Labels later then you will have to take care of them and populate in all of your Language translation Files.
No of Languages your extension supports, you will have that much of translation files and is packaged with your package, no separate installation like in older versions is required to enable MultiLanguage.
Step – 4
Let’s see what this xlf file looks like:

It is in xml format.
If you see “<file datatype=”xml”” you will get your Source-language & target-language. Source & Target is set to same Language.
“<trans-unit id” Specifies each of you Caption and Labels defined in you objects.
“<source>” node specifies Caption or Label in source Language.
You will have to add your “<target>” language translation.
Step – 5
Let make copy of this file in all the supported languages you want.
For example:

I have made 2 files en-US & nl-BE. Naming convention is for your understanding purpose only.
Now you can handover these files to translator and he can perform translation in required language outside your development environment.
You code/IP is safe from external agencies whom you give for translation.
Only what is required for this will be:
[1] Update your Target Language in below line as:
<file datatype=”xml” source-language=”en-US” target-language=”en-US” original=”MyFirstExtensionProject”>
To
<file datatype=”xml” source-language=”en-US” target-language=”nl-BE” original=”MyFirstExtensionProject”>
[2] For every
<source>…</source> add <target>…</target>
<source>Loadout Point</source>
<target>Loadout-punt</target>
There are number of tools available on internet which supports xlf file and give ease your work of translation.
Step – 5
Once you are done with your translation, copy all the translated file to the Translation folder and Build your Solution and deploy on Server.
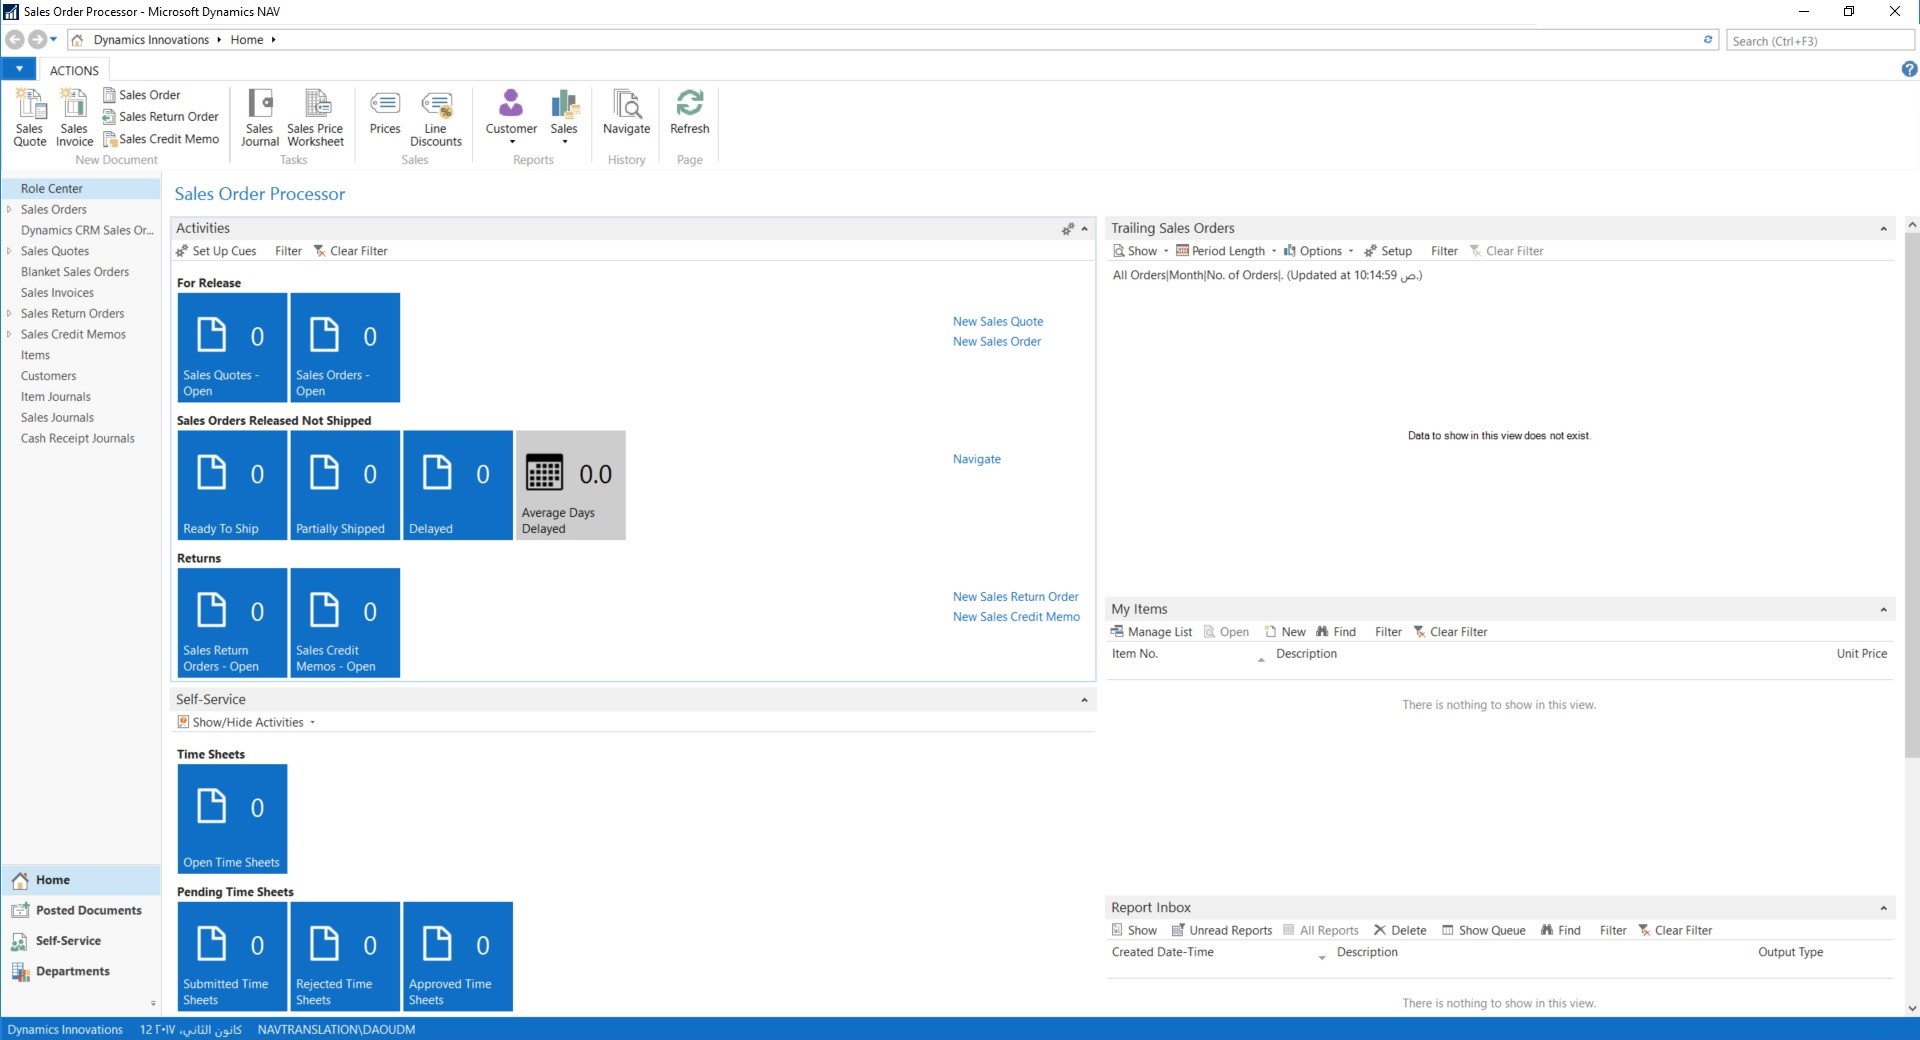
Change the Language of Client to Dutch and run your Object:

I have translated only one caption shown in red-box.
Please read the points mentioned in the post carefully.
Now you can enable MultiLanguage support for your Extensions.
I will come up with some other topic in my future post.
Till then keep exploring and Learning. Take Care of yourself.
Now Download Available Microsoft Dynamics NAV 2018
Below are few important links which can be helpful gathering information about new release of Dynamics Navision 2018.
It is suggested for updated details please visit authorized link in future to find updated information and links not available at the time of wring this post.
If you want to find out more about this release, Please check these links:
-
PDF version of Microsoft Dynamics NAV 2018 What’s New document (partner-only)
-
PowerPoint presentation of NAV 2018 What’s New
and find loads of supporting materials.
Products Downloads
| Microsoft Dynamics NAV 2018 | Partner Translation Toolkit |
|---|---|
| Download AU-Australia | Available in NAV 2018 |
| Download AT-Austria | Available in NAV 2018 |
| Download BE-Belgium | Available in NAV 2018 |
| Download CA-Canada | Available in NAV 2018 |
| Download CZ-Czech Republic | Available in NAV 2018 |
| Download DK-Denmark | Available in NAV 2018 |
| Download FI-Finland | Available in NAV 2018 |
| Download FR-France | Available in NAV 2018 |
| Download DE-Germany | Available in NAV 2018 |
| Download IS-Iceland | Available in NAV 2018 |
| Download IT-Italy | Available in NAV 2018 |
| Download MX-Mexico | Available in NAV 2018 |
| Download NL-Netherlands | Available in NAV 2018 |
| Download NZ-New Zealand | Available in NAV 2018 |
| Download NO-Norway | Available in NAV 2018 |
| Download ES-Spain | Available in NAV 2018 |
| Download SE-Sweden | Available in NAV 2018 |
| Download CH-Switzerland | Available in NAV 2018 |
| Download UK-United Kingdom | Available in NAV 2018 |
| Download US-United States | Available in NAV 2018 |
| Download NA-North America | Available in NAV 2018 |
| Download RU-Russia | Available in NAV 2018 |
| Download W1 | Available in NAV 2018 |
Partner Translation Toolkit
- Download (coming soon) the Partner Translation Toolkit
Language Modules
Ordering
New customers:
-
Microsoft Dynamics NAV 2018 can be ordered online using Order Central starting December 1, 2017.
-
Customers will be able to deploy Microsoft Dynamics NAV 2017 or Dynamics NAV 2016, if desired, by using the Microsoft Dynamics NAV 2018 license key that will be issued through downgrade rights.
Existing customers:
-
The licenses of Microsoft Dynamics NAV customers with an active enhancement plan will be automatically upgraded to Microsoft Dynamics NAV 2018 in early December 2017.
-
Existing Microsoft Dynamics NAV 2009 customers with an active enhancement plan are entitled to request a transition upgrade of their license to Microsoft Dynamics NAV 2018 through Order Central from December 1, 2017.
License Information
In order to run Microsoft Dynamics NAV 2018, you must have a valid Microsoft Dynamics NAV 2018 license file. You will find more information about how to correctly license Microsoft Dynamics NAV 2018 in the license guide (partner-only).
Microsoft Dynamics NAV 2018 Resources
-
Released Cumulative Updates for Microsoft Dynamics NAV 2018 (Coming soon)
Support Information
If you are experiencing issues downloading the install file or documentation, please contact ITMBSSUP@microsoft.com.
For technical support questions, contact your partner or, if enrolled in a support plan directly with Microsoft, you can enter a new support request to Microsoft Dynamics Technical Support from PartnerSource under Support >> New Support Request.
You can also contact Microsoft Dynamics Technical Support by phone using these links for country specific phone numbers:
- Global Support Contacts for partners – requires PartnerSource login
For updated details please visit authorized link in future to find updated information and links not available at the time of wring this post.
How to Add my Custom Language Pack to W1 Version?
Post you build the PartnerTranslation solution from inside Visual Studio, choose Build Solution from the Build menu.
This will pick up all translated artifacts, and create three installer files (.msi):
- Server.msi – Located in the Server\Bin\Debug folder.
- RTC.msi – Located in the RTC\Bin\Debug folder.
- WebClient.msi – Located in the WebClient\Bin\Debug folder.
You can check my earlier post for more details:
How do I translate my ResX Files?
Managing Multilanguage support in Navision Overview

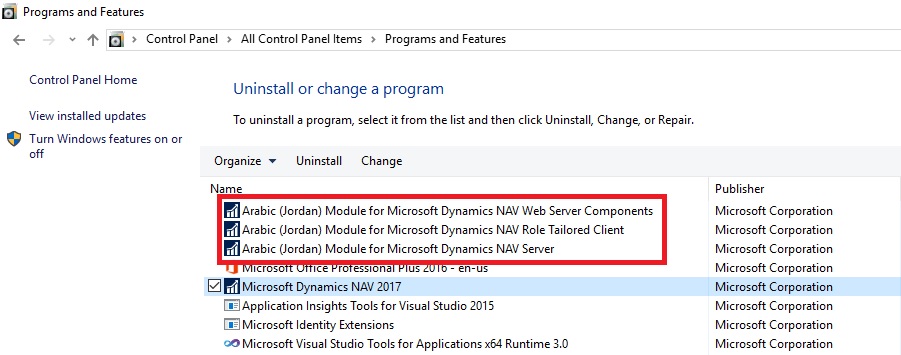
Install the new language pack on the target computer with W1. To do this, select and click each of the three .msi files listed below, one after the other. The order is not significant:
- Server\Bin\Debug\Server.msi
- RTC\Bin\Debug\RTC.msi
- WebClient\Bin\Debug\WebClient.msi
Each installer quickly shows a dialog, which disappears when the installer has completed.
The language pack is now installed, but you must make some final configuration.
Next step is to register root assemblies with strong name key token in the Add-ins table
Microsoft Dynamics NAV cannot load untrusted assemblies. To enable your custom resource assemblies as trusted, you must register the strong name key in the database:
- Open the Microsoft Dynamics NAV Development Environment.
- On the View menu, choose Object Designer, and then choose Table.
- Navigate to the Add-in table, table 2000000069, and then choose Run.
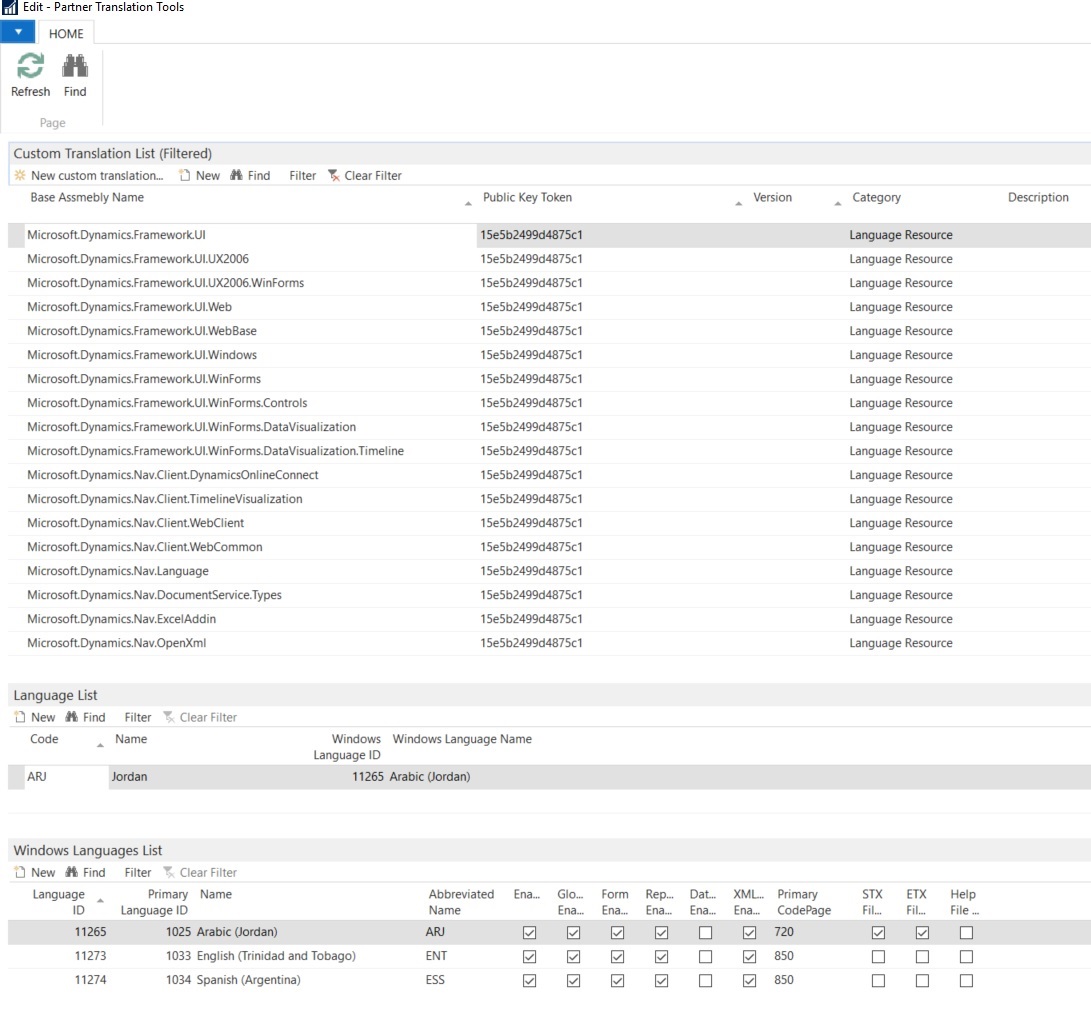
- For each assembly, enter the name and the public key token used when signing the files. The assemblies to add can be found in the Output folder of Partner Translation Tool Project.
To find the public key token, use the Strong Name tool (sn.exe) with the -T parameter.
At the command prompt, enter the following command: sn.exe –T
For example, enter the following command to find the public key token for the Microsoft.Dynamics.Framework.UI.dll file:
sn.exe –T Microsoft.Dynamics.Framework.UI.dll.
The sample assemblies that are included in the Partner Translation solution have the following signature: 15e5b2499d4875c1.
Optionally, you can use PowerShell to register a strong name key for the custom resource assemblies.
New-NAVAddIn -AddInName -PublicKeyToken -Category LanguageResource
Next step is, you need to update the Languages page:
- In the Object Designer, choose Pages.
- Navigate to the Languages page, page 9, and then choose Run.
- Add the Arabic Jordan (ARJ) language to it.

Restart the Microsoft Dynamics NAV Server service
To enable the newly added language, you must restart the Microsoft Dynamics NAV Server service:
- Choose the Start button, point to Administrative Tools, and then choose Services.
- In the Services window, right-click Microsoft Dynamics NAV Server, and on the shortcut menu, choose Restart.
Connect to the Microsoft Dynamics NAV Server and select the new language
After you have restarted the Microsoft Dynamics NAV Server service, you can then open the Microsoft Dynamics NAV Client and select the new language:
- Choose the Start button, and then choose Microsoft Dynamics NAV.
- Choose Microsoft Dynamics NAV, and then choose Select Language.
- In the Language Selection field, select the new language, Arabic (Jordan), and then choose the OK button.

Complete Captions are not translated for this project yet at the time of writing of this post and it is in progress, but the sample screen will look like one shown below.
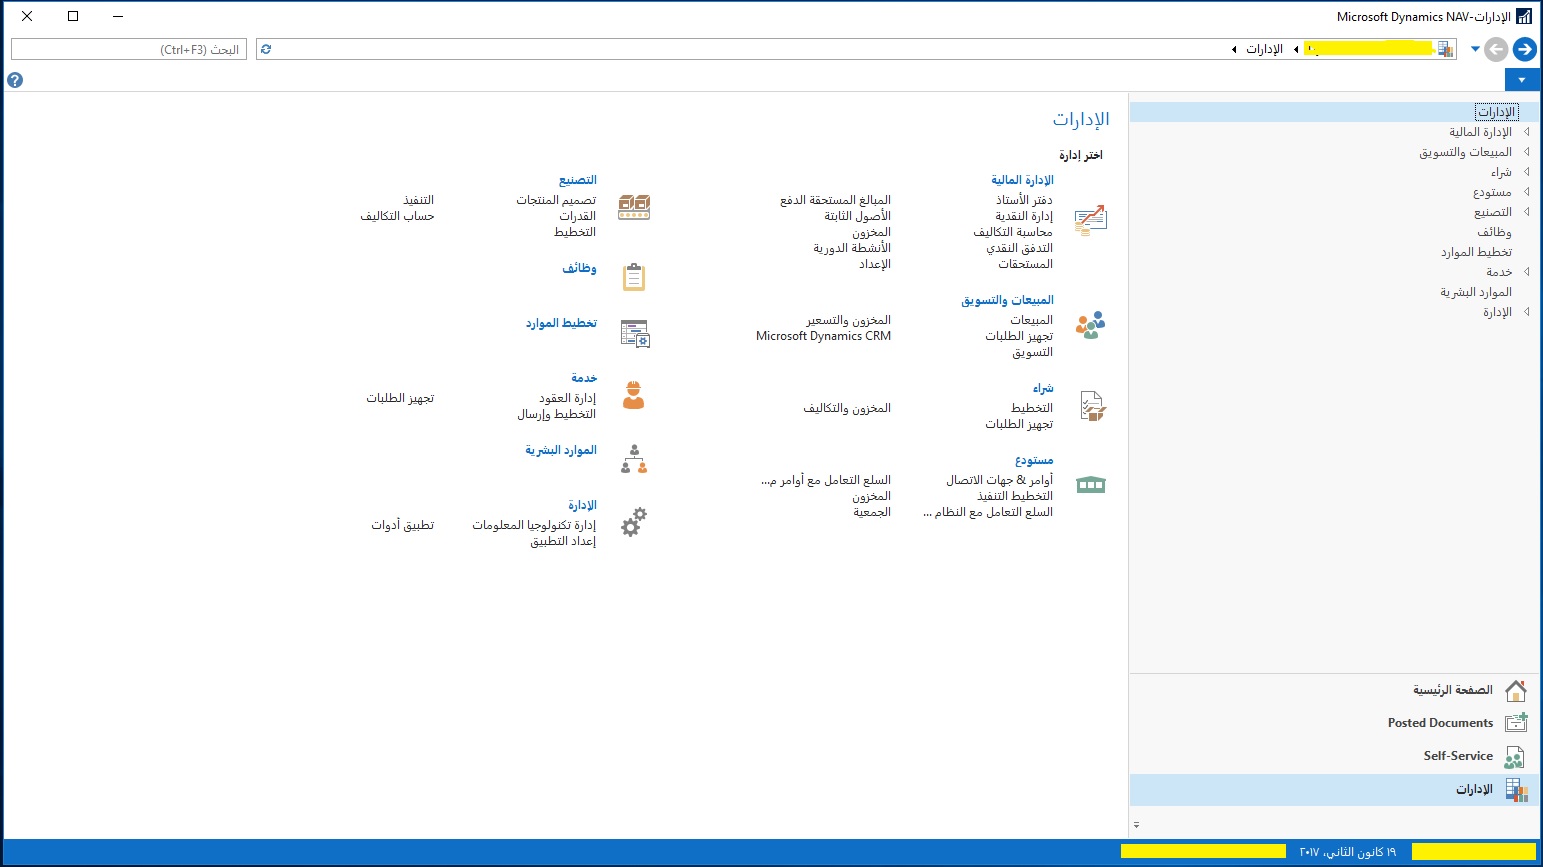
Will come up with more details in my upcoming posts, till then keep exploring and learning.
Translating Multilanguage Files in Navision 2017 for Arabic Jordan
Captions and other user interface text that you define for objects in the Microsoft Dynamics NAV Development Environment can be exported to a text file. You can then add new translations to the text file and import the new translations in the development environment. You can add translations manually using Notepad, Microsoft Excel, and so on.
The exported text files contain an entry for each translatable user interface element for the objects that you selected in the development environment. However, the text file also includes entries that cannot be translated. For example, if you export the strings for table 18, the resulting text file contains hundreds of entries, of which fewer than 170 can be translated. The translatable strings include the captions of for all fields and the error messages that you have defined. The non-translatable strings include names of variables, and so on.
In CRONUS International Ltd. demonstration database, all objects are multilanguage enabled, and they include strings with captions in the 1033 locale, English (US). The locale is specified by a multilanguage property such as P8629, but the ID of the actual property is different for different types of strings. However, the locale for the multilanguage property value always starts with the character A. For example, the English (US) captions are identified by the A1033 locale value for the relevant multilanguage property. You can identify which strings can be translated by opening the file in Microsoft Excel and then filter by the English locale.
If you export strings for objects of different types, the text file lists the strings by object type and then by object ID. For example, if you export strings for table 18, page 21, and report 111, the text file lists strings in the following order:
- Table 18
- Report 111
- Page 21
The format of the exported text files can be difficult to read, because for each type of object, the text file contains different types of strings. Each type of string is identified by a property that starts with the character P followed by an ID.
For example, for a table object and the fields on the table, the multilanguage property has the ID 8629.
For option values for fields on tables, the multilanguage property has the ID 8632.
This means that you can identify the type of string when you translate the strings. However, you should filter out all strings that are not translatable, which makes the remaining strings easier to understand.
The following table illustrates the translatable strings for table 18 in the CRONUS International Ltd. demonstration database.
| String | Description |
| T18-P8629-A1033-L999:Customer | The caption of the table object. |
| T18-F1-P8629-A1033-L999:No. | The caption of field 1. |
| T18-F7601-P8629-A1033-L999:Copy Sell-to Addr. to Qte From T18-F7601-P8632-A1033-L999:Company,Person | The caption of field 7601 and the captions of the option values for the field. |
| T18-Q1001-P26171-A1033-L999:Do you wish to create a contact for %1 %2? | A text constant that defines user interface text. |
For more information, see How to: Add Translated Strings By Importing and Exporting Multilanguage Files.
Here it is assumed that the Language Module Installer are prepared by translating resx files and Partner Translation Tool project is build and same is Installed.
You can check my earlier post for more details:
How do I translate my ResX Files?
Managing Multilanguage support in Navision Overview

After preparing Language Module Installer and installing the same our next step is to add the translated Captions to CaptionML.
You have other methods to do the same below is one which I have used to get my task done.
Export the objects in txt format from the database (ObjectToTranslate.txt).

My objects have ENU and want to add translation for ARJ.
You can use below PS Script to extract Language Layer from the objects.
Export-NavApplicationObjectLanguage -Source ObjectToTranslate.txt -LanguageId ENU, ARJ -Destination translated.txt
In our objects, we have ENU and we are supposed to add ARJ Caption translation.
Above command will extract the ENU Captions and add entries for ARJ where we can add our translated string for Arabic Jordan.
Open the translated.txt in notepad and save as translatedNew01.txt, make sure you select Encoding = UTF-8.
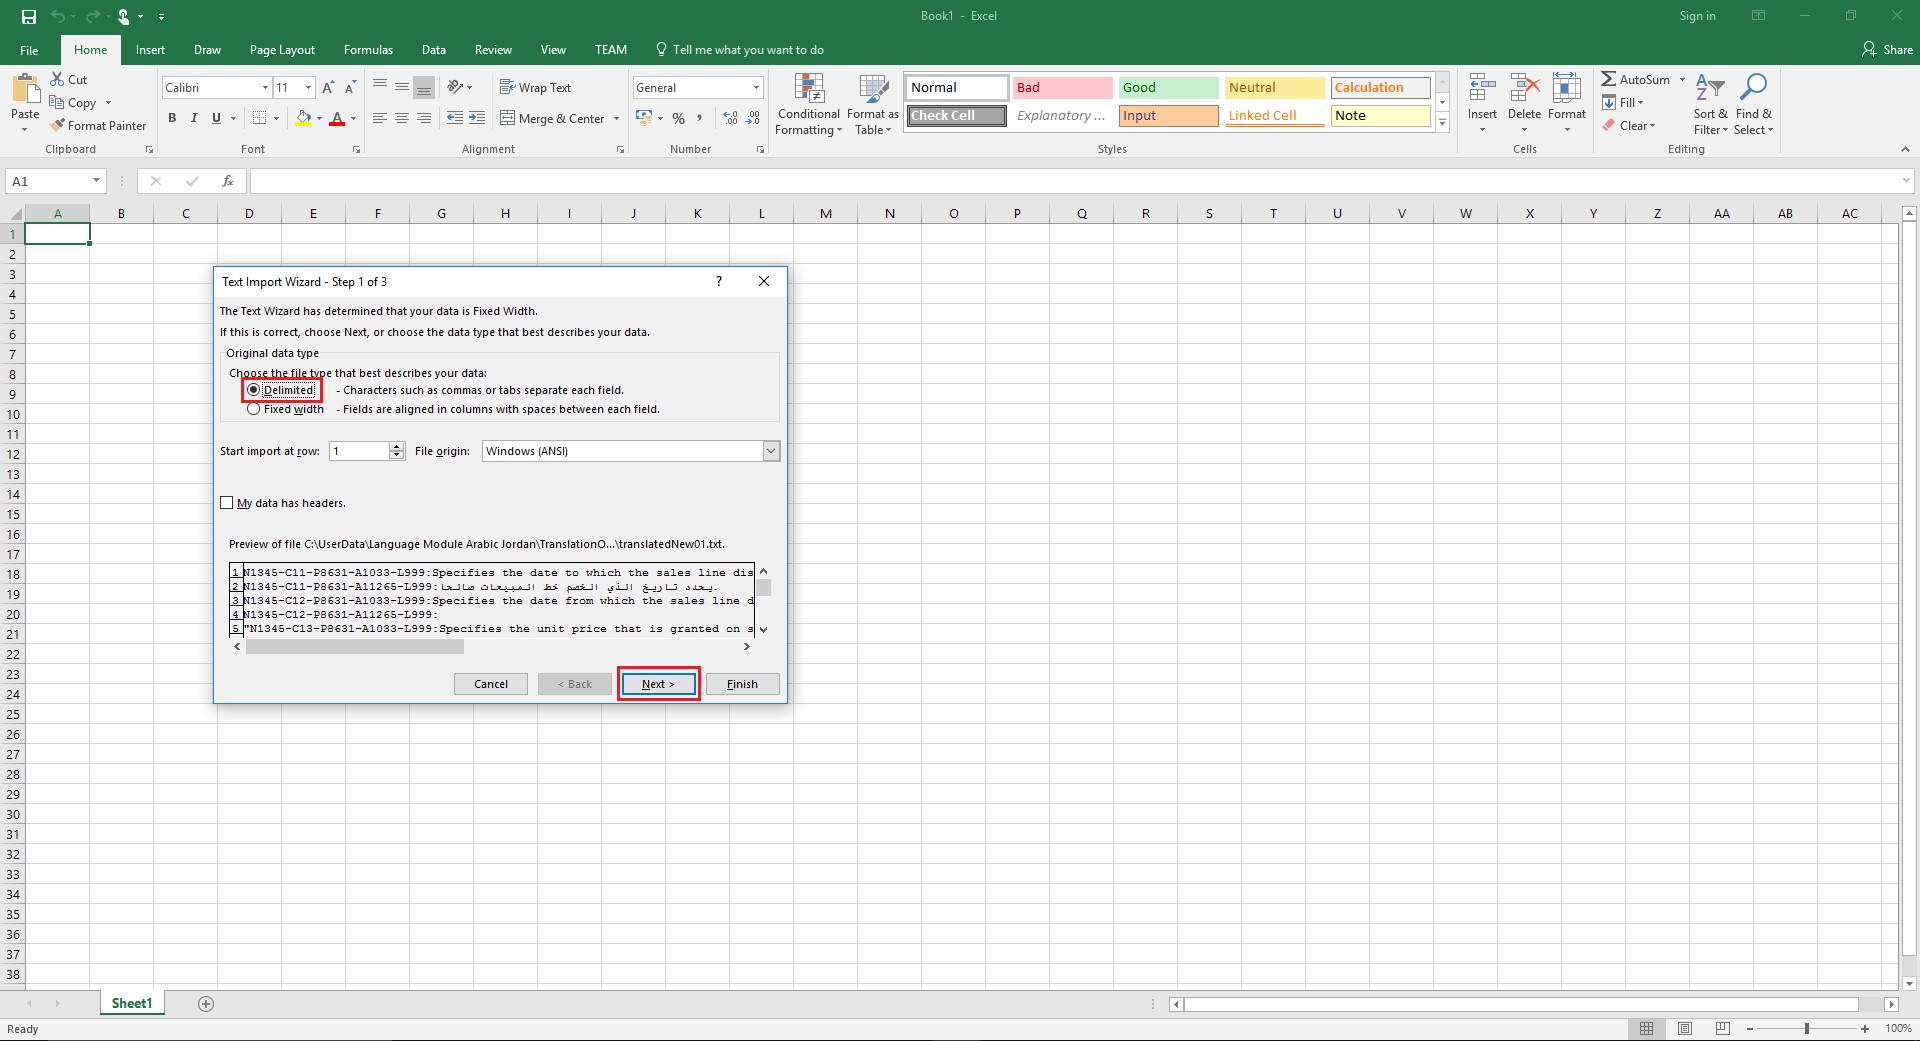
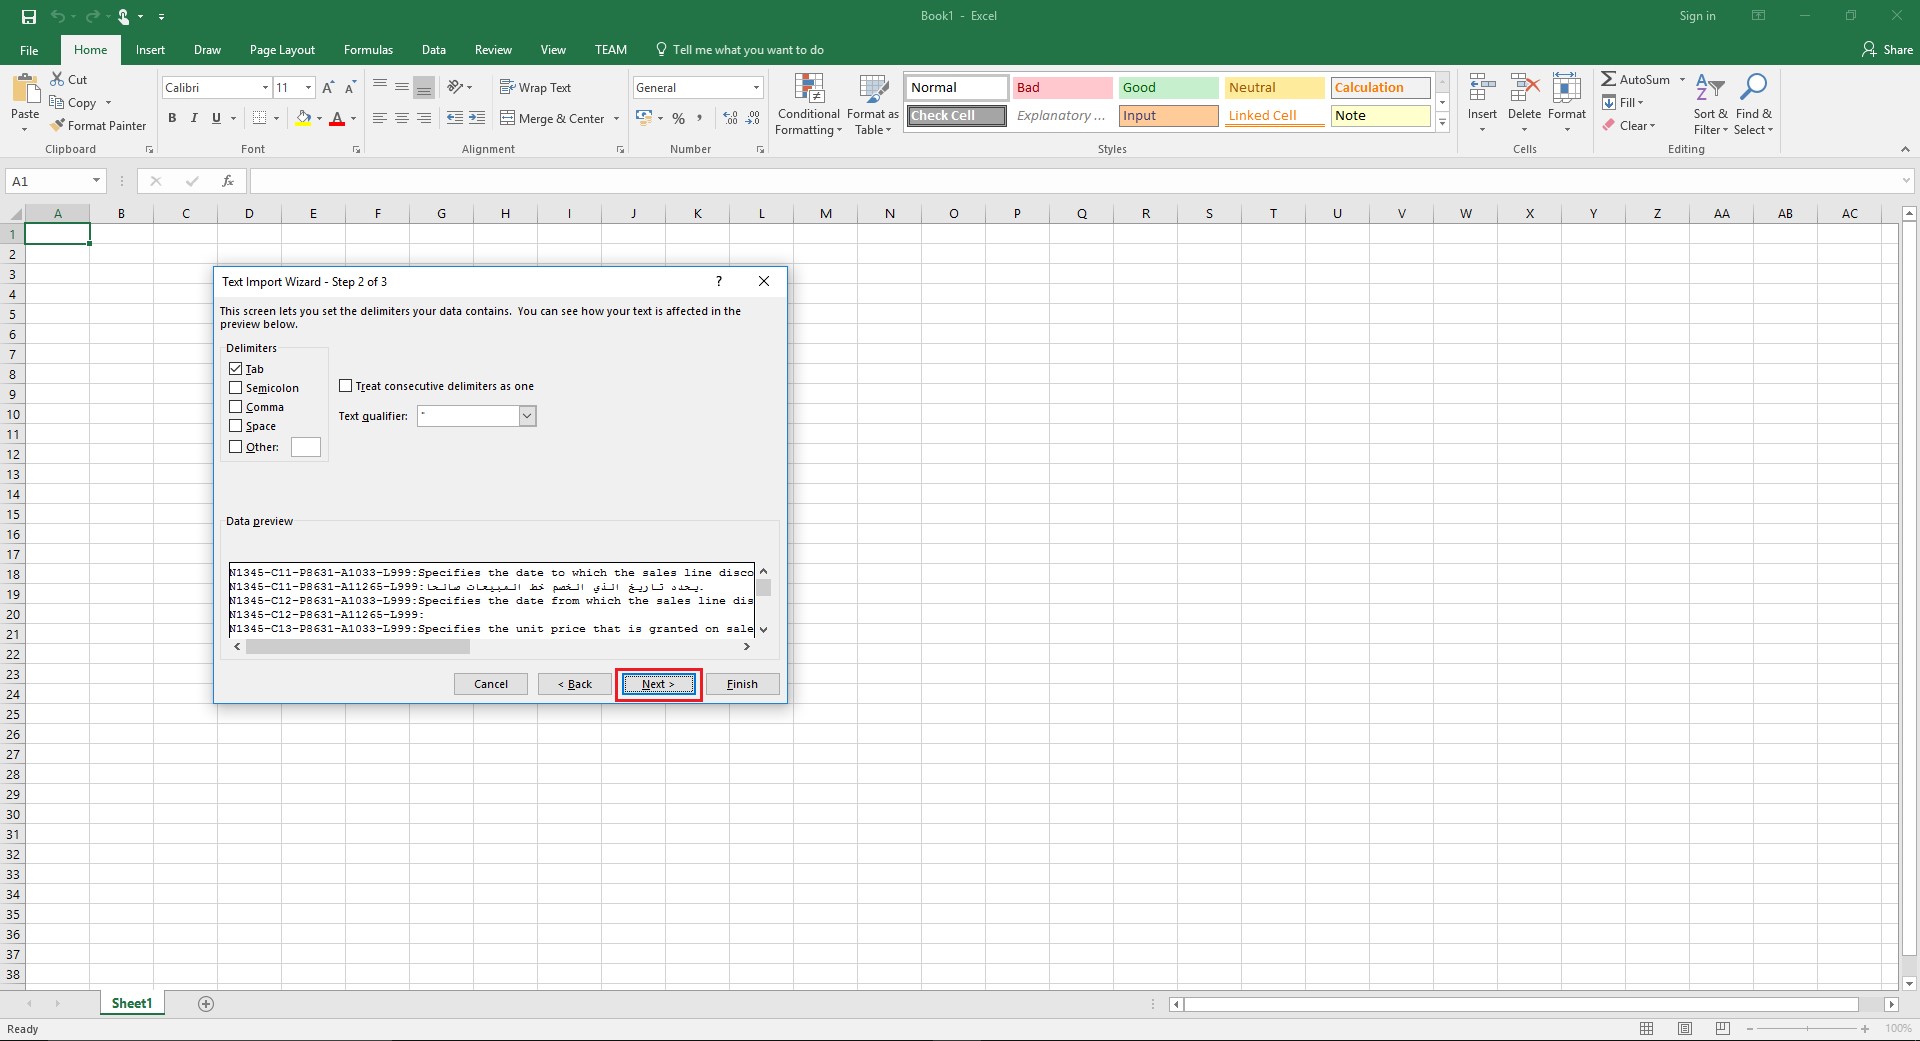
Open the File [translatedNew01.txt] in Excel as below defined step:


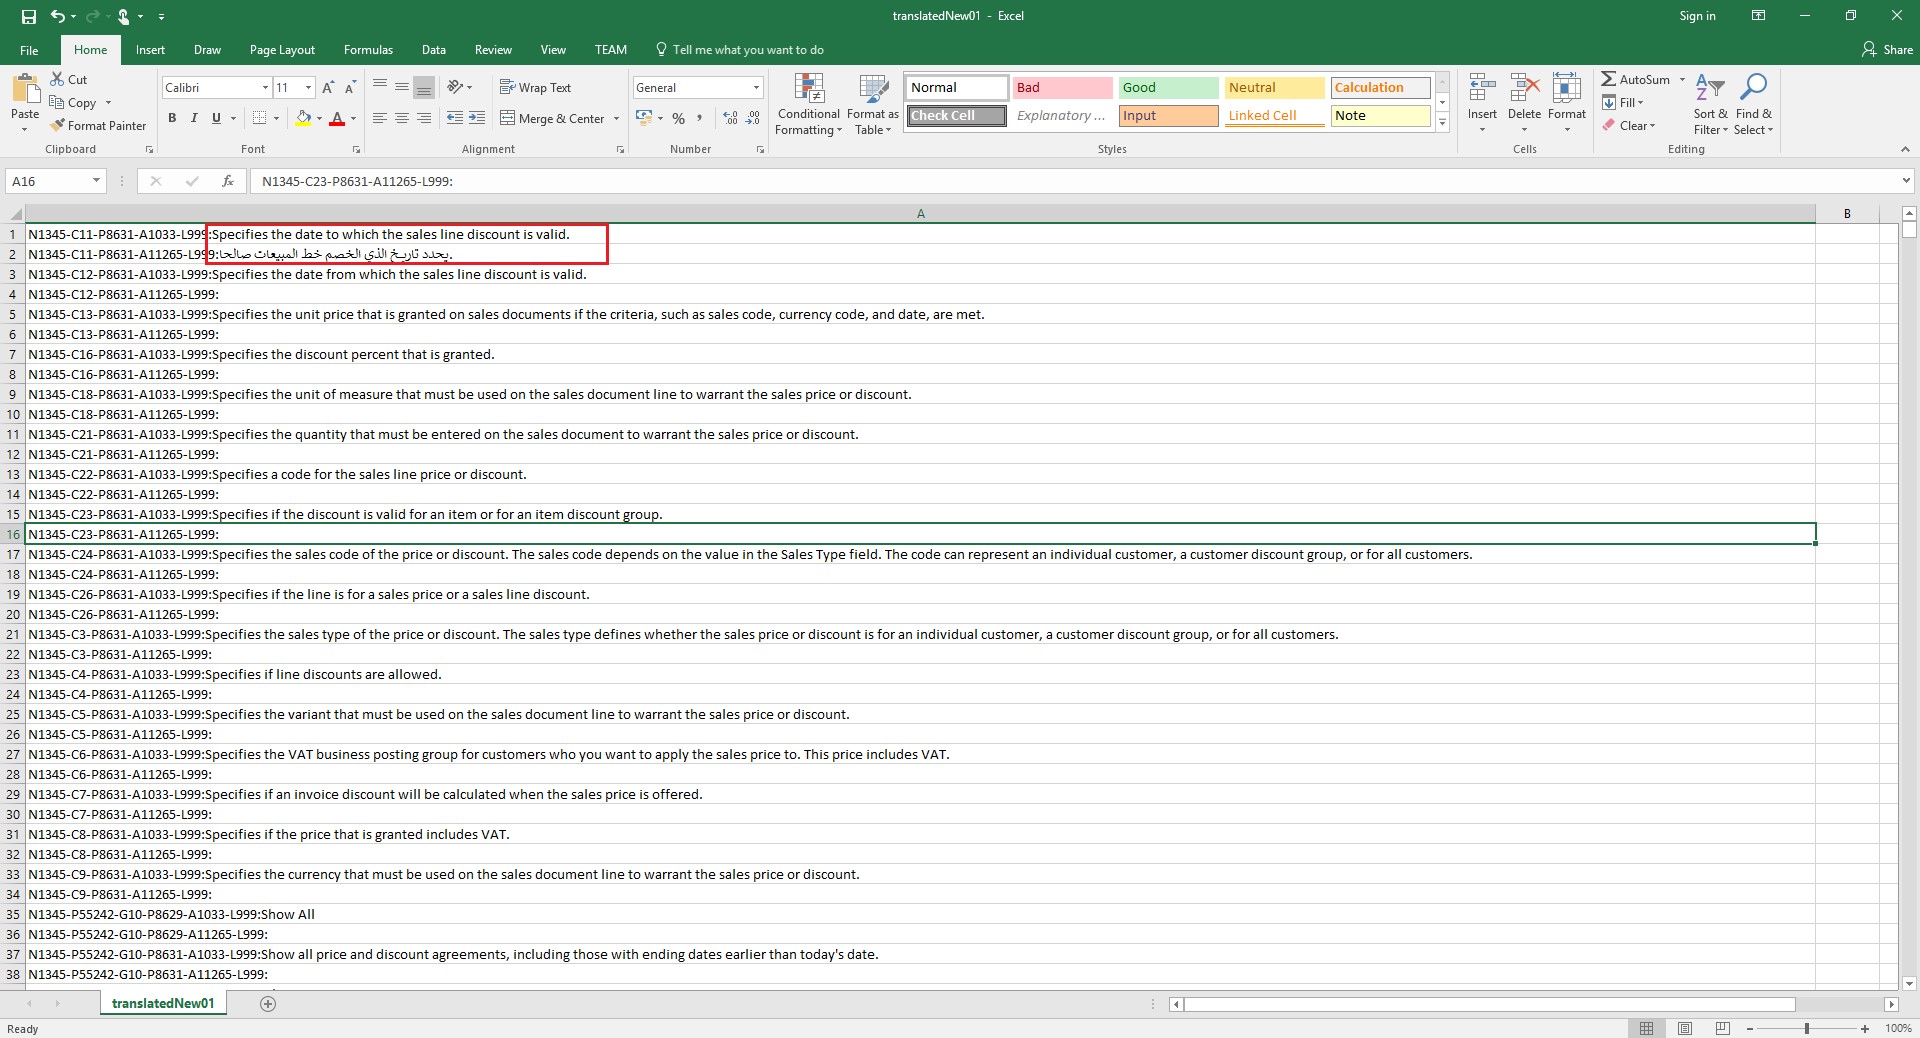
Translate to Arabic Jordan as one shown in above screen.
Add you translation after [ : ]
Once all done Save your file as shown below:

Open the file in Notepad to check format is not disturbed and output is as below:

Next step in upcoming post.
Till then keep exploring and learning.

You must be logged in to post a comment.