
Post you build the PartnerTranslation solution from inside Visual Studio, choose Build Solution from the Build menu.
This will pick up all translated artifacts, and create three installer files (.msi):
- Server.msi – Located in the Server\Bin\Debug folder.
- RTC.msi – Located in the RTC\Bin\Debug folder.
- WebClient.msi – Located in the WebClient\Bin\Debug folder.
You can check my earlier post for more details:
How do I translate my ResX Files?
Managing Multilanguage support in Navision Overview
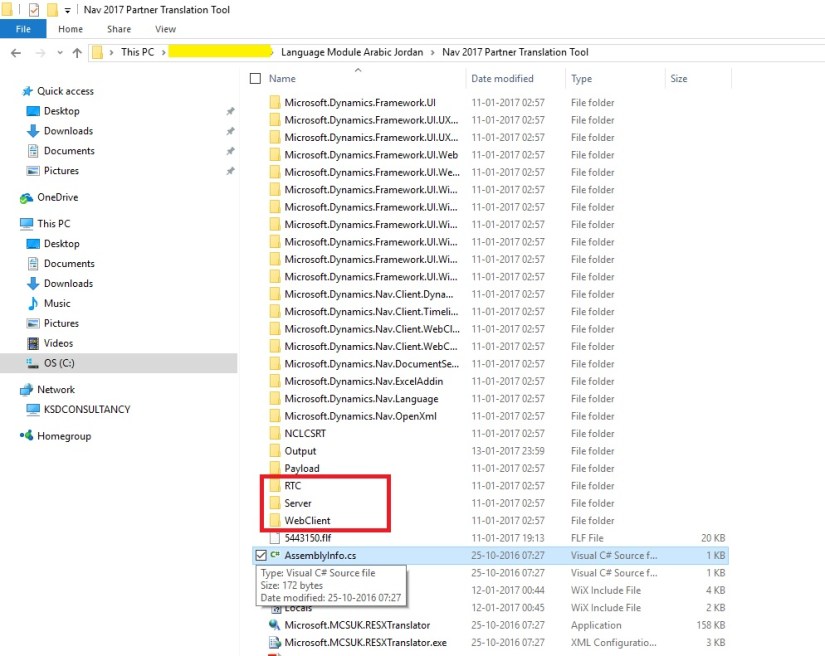
Install the new language pack on the target computer with W1. To do this, select and click each of the three .msi files listed below, one after the other. The order is not significant:
- Server\Bin\Debug\Server.msi
- RTC\Bin\Debug\RTC.msi
- WebClient\Bin\Debug\WebClient.msi
Each installer quickly shows a dialog, which disappears when the installer has completed.

The language pack is now installed, but you must make some final configuration.
Next step is to register root assemblies with strong name key token in the Add-ins table
Microsoft Dynamics NAV cannot load untrusted assemblies. To enable your custom resource assemblies as trusted, you must register the strong name key in the database:
- Open the Microsoft Dynamics NAV Development Environment.
- On the View menu, choose Object Designer, and then choose Table.
- Navigate to the Add-in table, table 2000000069, and then choose Run.
- For each assembly, enter the name and the public key token used when signing the files. The assemblies to add can be found in the Output folder of Partner Translation Tool Project.

To find the public key token, use the Strong Name tool (sn.exe) with the -T parameter.
At the command prompt, enter the following command: sn.exe –T
For example, enter the following command to find the public key token for the Microsoft.Dynamics.Framework.UI.dll file:
sn.exe –T Microsoft.Dynamics.Framework.UI.dll.
The sample assemblies that are included in the Partner Translation solution have the following signature: 15e5b2499d4875c1.
Optionally, you can use PowerShell to register a strong name key for the custom resource assemblies.
New-NAVAddIn -AddInName -PublicKeyToken -Category LanguageResource
Next step is, you need to update the Languages page:
- In the Object Designer, choose Pages.
- Navigate to the Languages page, page 9, and then choose Run.
- Add the Arabic Jordan (ARJ) language to it.

Restart the Microsoft Dynamics NAV Server service
To enable the newly added language, you must restart the Microsoft Dynamics NAV Server service:
- Choose the Start button, point to Administrative Tools, and then choose Services.
- In the Services window, right-click Microsoft Dynamics NAV Server, and on the shortcut menu, choose Restart.
Connect to the Microsoft Dynamics NAV Server and select the new language
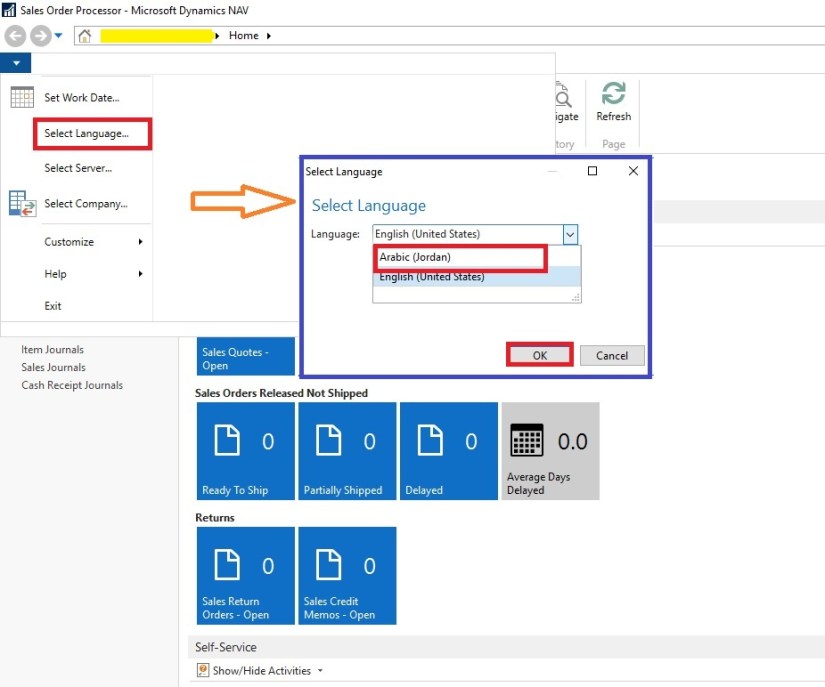
After you have restarted the Microsoft Dynamics NAV Server service, you can then open the Microsoft Dynamics NAV Client and select the new language:
- Choose the Start button, and then choose Microsoft Dynamics NAV.
- Choose Microsoft Dynamics NAV, and then choose Select Language.
- In the Language Selection field, select the new language, Arabic (Jordan), and then choose the OK button.
Complete Captions are not translated for this project yet at the time of writing of this post and it is in progress, but the sample screen will look like one shown below.
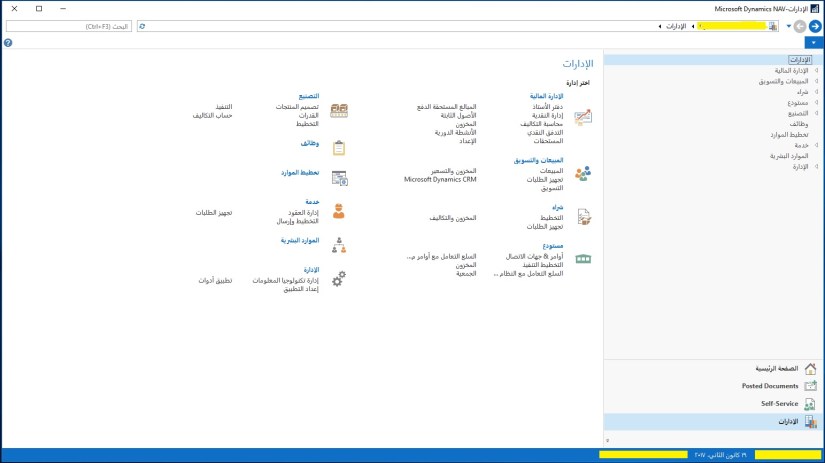
Will come up with more details in my upcoming posts, till then keep exploring and learning.

You must be logged in to post a comment.