

This is the Seventh post in the series. If you want to go to previous post click here.
From the series of steps this post is dedicated to Step-6:
As a Sixth Step we will Create Integration Codeunit in Business Central
codeunit 50120 CDSDataverseEvent
{
}
Add these Procedures
local procedure LookupCDSProspect(SavedCRMId: Guid; var CRMId: Guid; IntTableFilter: Text): Boolean
    var
        CDSProspect: Record "CDS cr95d_Prospects";
        OriginalCDSProspect: Record "CDS cr95d_Prospects";
        OriginalCDSProspectList: Page "CDS Prospect List";
    begin
        if not IsNullGuid(CRMId) then begin
            if CDSProspect.Get(CRMId) then
                OriginalCDSProspectList.SetRecord(CDSProspect);
            if not IsNullGuid(SavedCRMId) then
                if OriginalCDSProspect.Get(SavedCRMId) then
                    OriginalCDSProspectList.SetCurrentlyCoupledCDSProspect(OriginalCDSProspect);
        end;

        CDSProspect.SetView(IntTableFilter);
        OriginalCDSProspectList.SetTableView(CDSProspect);
        OriginalCDSProspectList.LookupMode(true);
        if OriginalCDSProspectList.RunModal = ACTION::LookupOK then begin
            OriginalCDSProspectList.GetRecord(CDSProspect);
            CRMId := CDSProspect.cr95d_ProspectsId;
            exit(true);
        end;
        exit(false);
    end;

local procedure AddEntityTableMapping(CRMEntityTypeName: Text; TableID: Integer; var TempNameValueBuffer: Record "Name/Value Buffer" temporary)
    begin
        TempNameValueBuffer.Init();
        TempNameValueBuffer.ID := TempNameValueBuffer.Count + 1;
        TempNameValueBuffer.Name := CopyStr(CRMEntityTypeName, 1, MaxStrLen(TempNameValueBuffer.Name));
        TempNameValueBuffer.Value := Format(TableID);
        TempNameValueBuffer.Insert();
    end;

local procedure InsertIntegrationTableMapping(var IntegrationTableMapping: Record "Integration Table Mapping"; MappingName: Code[20]; TableNo: Integer; IntegrationTableNo: Integer; IntegrationTableUIDFieldNo: Integer; IntegrationTableModifiedFieldNo: Integer; TableConfigTemplateCode: Code[10]; IntegrationTableConfigTemplateCode: Code[10]; SynchOnlyCoupledRecords: Boolean)
    begin
        IntegrationTableMapping.CreateRecord(MappingName, TableNo, IntegrationTableNo, IntegrationTableUIDFieldNo, IntegrationTableModifiedFieldNo, TableConfigTemplateCode, IntegrationTableConfigTemplateCode, SynchOnlyCoupledRecords, IntegrationTableMapping.Direction::Bidirectional, 'CDS');
    end;

procedure InsertIntegrationFieldMapping(IntegrationTableMappingName: Code[20]; TableFieldNo: Integer; IntegrationTableFieldNo: Integer; SynchDirection: Option; ConstValue: Text; ValidateField: Boolean; ValidateIntegrationTableField: Boolean)
    var
        IntegrationFieldMapping: Record "Integration Field Mapping";
    begin
        IntegrationFieldMapping.CreateRecord(IntegrationTableMappingName, TableFieldNo, IntegrationTableFieldNo, SynchDirection,
            ConstValue, ValidateField, ValidateIntegrationTableField);
    end;
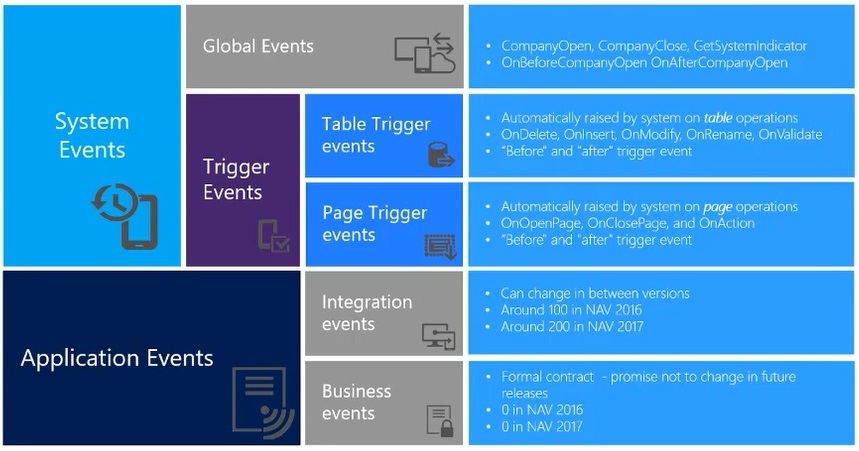
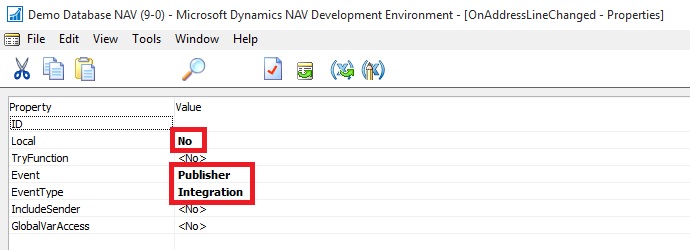
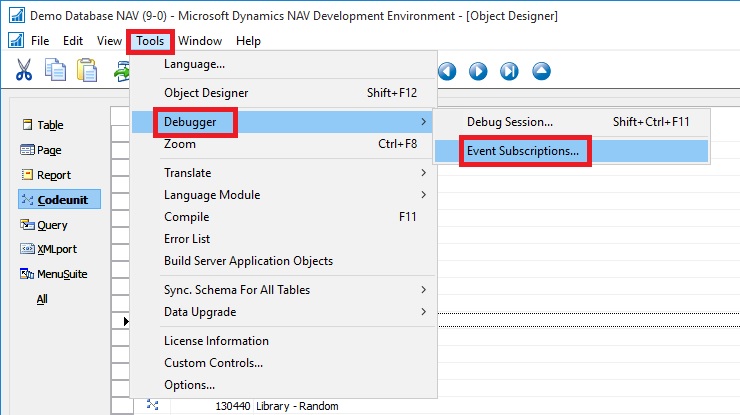
To Add Event Subscriptions, Use the new Shift+Alt+E shortcut in the AL code editor to invoke a list of all events.
Search for Event OnGetCDSTableNo – “CRM Setup Defaults”
[EventSubscriber(ObjectType::Codeunit, Codeunit::"CRM Setup Defaults", 'OnGetCDSTableNo', '', false, false)]

local procedure OnGetCDSTableNo(BCTableNo: Integer; var CDSTableNo: Integer; var handled: Boolean);
    begin
        if BCTableNo = DATABASE::"Prospect" then begin
            CDSTableNo := DATABASE::"CDS cr95d_Prospects";
            handled := true;
        end;
    end;
Search for Event OnLookupCRMTables – “Lookup CRM Tables”
[EventSubscriber(ObjectType::Codeunit, Codeunit::"Lookup CRM Tables", 'OnLookupCRMTables', '', false, false)]

local procedure OnLookupCRMTables(CRMTableID: Integer; NAVTableId: Integer; SavedCRMId: Guid; var CRMId: Guid; IntTableFilter: Text; var Handled: Boolean);
    begin
        if CRMTableID = Database::"CDS cr95d_Prospects" then
            Handled := LookupCDSProspect(SavedCRMId, CRMId, IntTableFilter);
    end;
Search for Event OnAddEntityTableMapping – “CRM Setup Defaults”
[EventSubscriber(ObjectType::Codeunit, Codeunit::"CRM Setup Defaults", 'OnAddEntityTableMapping', '', false, false)]

local procedure OnAddEntityTableMapping(var TempNameValueBuffer: Record "Name/Value Buffer");
    begin
        AddEntityTableMapping('Prospect', DATABASE::"CDS cr95d_Prospects", TempNameValueBuffer);
    end;
Search for Event OnAfterResetConfiguration – “CDS Setup Defaults”
[EventSubscriber(ObjectType::Codeunit, Codeunit::"CDS Setup Defaults", 'OnAfterResetConfiguration', '', false, false)]

local procedure OnAfterResetConfiguration(CDSConnectionSetup: Record "CDS Connection Setup");
    var
        IntegrationTableMapping: Record "Integration Table Mapping";
        IntegrationFieldMapping: Record "Integration Field Mapping";
        CDSProspect: Record "CDS cr95d_Prospects";
        Prospect: Record "Prospect";
    begin
        InsertIntegrationTableMapping(
            IntegrationTableMapping, 'Prospect',
            DATABASE::"Prospect", DATABASE::"CDS cr95d_Prospects", CDSProspect.FieldNo(cr95d_ProspectsId), CDSProspect.FieldNo(ModifiedOn), '', '', true);

        InsertIntegrationFieldMapping('Prospect', Prospect.FieldNo("No."), CDSProspect.FieldNo(cr95d_ProspectsId), IntegrationFieldMapping.Direction::Bidirectional, '', true, false);

        InsertIntegrationFieldMapping('Prospect', Prospect.FieldNo(Name), CDSProspect.FieldNo(cr95d_ProspectName), IntegrationFieldMapping.Direction::Bidirectional, '', true, false);

        InsertIntegrationFieldMapping('Prospect', Prospect.FieldNo(Probability), CDSProspect.FieldNo(cr95d_Probability), IntegrationFieldMapping.Direction::Bidirectional, '', true, false);

        InsertIntegrationFieldMapping('Prospect', Prospect.FieldNo("Contract Amount"), CDSProspect.FieldNo(cr95d_ContractAmount), IntegrationFieldMapping.Direction::Bidirectional, '', true, false);

        InsertIntegrationFieldMapping('Prospect', Prospect.FieldNo("Contract Amount (Base)"), CDSProspect.FieldNo(cr95d_contractamount_Base), IntegrationFieldMapping.Direction::Bidirectional, '', true, false);

        InsertIntegrationFieldMapping('Prospect', Prospect.FieldNo(Stage), CDSProspect.FieldNo(cr95d_Stage), IntegrationFieldMapping.Direction::Bidirectional, '', true, false);

        InsertIntegrationFieldMapping('Prospect', Prospect.FieldNo("Forecast Revenue"), CDSProspect.FieldNo(cr95d_ForcastedRevenue), IntegrationFieldMapping.Direction::Bidirectional, '', true, false);

        InsertIntegrationFieldMapping('Prospect', Prospect.FieldNo("Forecast Revenue (Base)"), CDSProspect.FieldNo(cr95d_forcastedrevenue_Base), IntegrationFieldMapping.Direction::Bidirectional, '', true, false);
    end;
Now you are good to proceed with Next Step.
You can jump to Next Step from here.


You must be logged in to post a comment.