
As per Dynamics 365 Team: News published Aug 22 2016
Microsoft is on a mission to help every organisation and every individual achieve more. To that end we’re seeking to reinvent personal productivity and business processes. Microsoft Dynamics 365 is the next step on our journey. Announced in July 2016 – Dynamics 365 will become generally available later this year. We’re keen to help existing Dynamics customers understand more about our ambition and how Dynamics 365 fits into our plans for the Dynamics products and services you are already using.
See more details on : https://mbs.microsoft.com/customersource/northamerica/news-events/news-events/news/MicrosoftDynamics365
The Dynamics portfolio
Later this year Dynamics CRM and Dynamics AX will come together to create the Microsoft Dynamics 365 Enterprise edition. The Business edition will be founded on “Project Madeira” which is currently in public preview.
Click to find out more about plans for particular product/service:
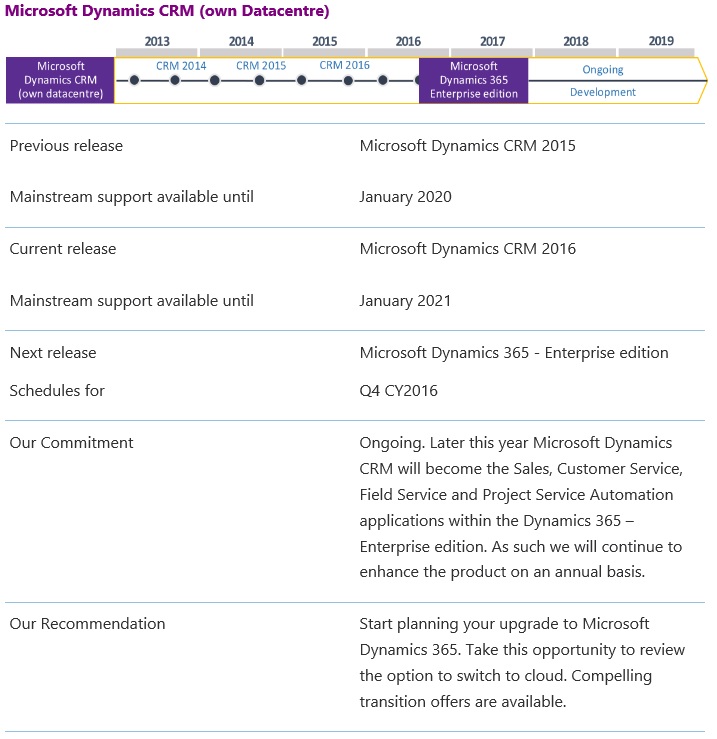
- Microsoft Dynamics CRM
- Microsoft Dynamics AX
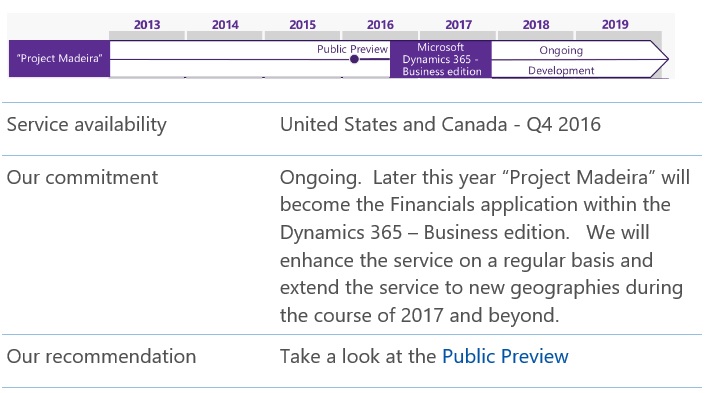
- Project Madeira
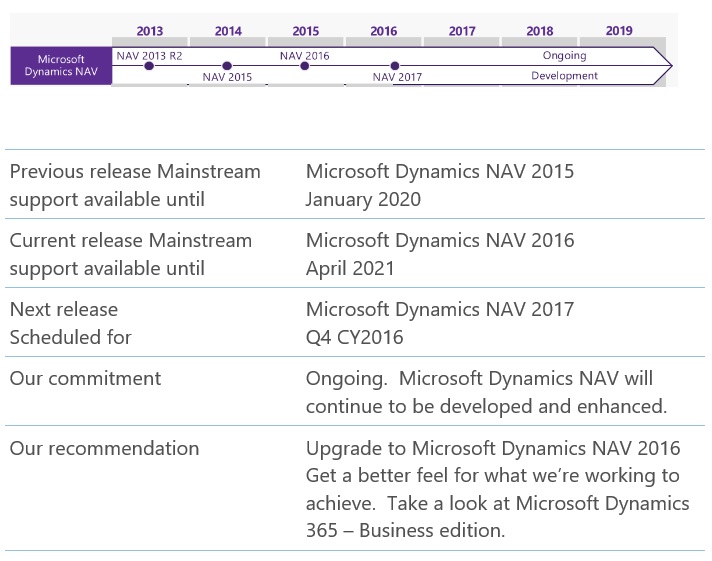
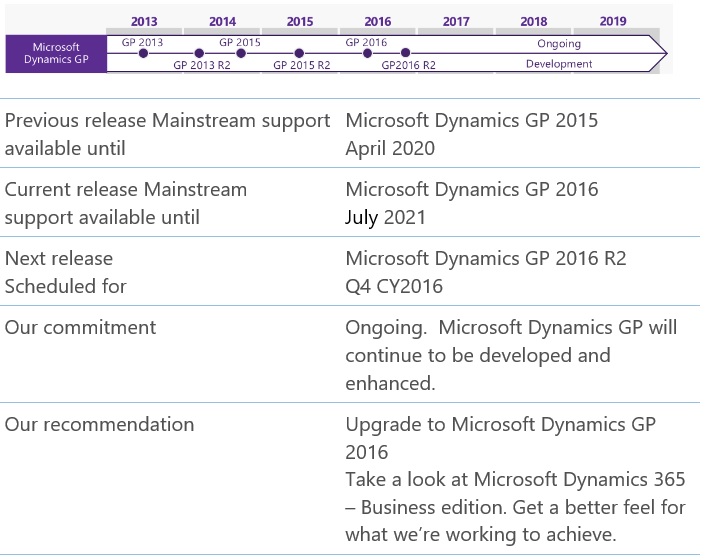
- Microsoft Dynamics GP
- Microsoft Dynamics NAV
- Microsoft Dynamics SL
Microsoft Dynamics 365 editions:
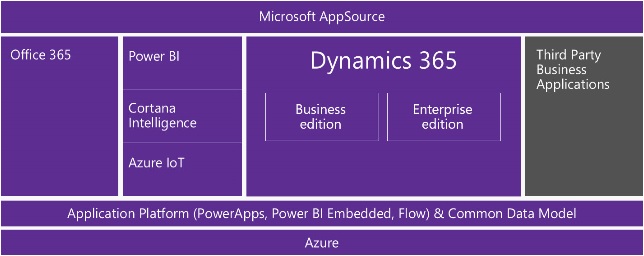
Microsoft Dynamics 365 Dynamics 365 comprises a range of end-to-end, cloud based, intelligent business applications. Dynamics 365 will be available in Business and Enterprise editions.
| Microsoft Dynamics 365 Business edition | Microsoft Dynamics 365 Enterprise edition |
|
Financials Sales * Marketing *
*Available Q2 CY 2017 |
Operations Sales Marketing Customer Service Field Service Project Service Automation |
|
Includes embedded intelligence, PowerApps and Flow |
Includes embedded intelligence, PowerApps and Flow |
Additionaly Dynamics 365:
- Uses a common data model, shared with Office 365, to simplify data management and integration across apps and business processes.
- Offers tech savvy business customers/analysts, aka “citizen developers,” (using Power Apps, Power BI Embedded and Microsoft Flow) and professional developers (using Azure platform services) a consistent way in which to compose new apps and easily extend and modify existing ones.
- Comes with connectors that let you integrate with applications and services from Microsoft and our partners – including custom API’s and on premise systems.
Roadmap :


All images are taken from Microsoft Site.
Information can change over the time, correct till posting of this post.
For accurate information please check on Microsoft customer source site in News & Events section, Links available above in post body.


You must be logged in to post a comment.