Corfu Navision 2016, Data, Development Tips, How To, Information, Instalation & Configuration, PowerShell, upgrade

Few Helpful PowerShell Commands which you can use for Upgrade Process in Navision 2016 – Part 2

You can use Windows PowerShell scripts to upgrade the latest version of Microsoft Dynamics NAV. Microsoft Dynamics NAV 2016 provides sample scripts that you can adapt for your deployment architecture.

Automating the Upgrade Process

When you upgrade to Microsoft Dynamics NAV 2016, you must first upgrade the application code, and then you upgrade the data.

In my earlier post I have explained this using PowerShell commands, you can find the link here: Helpful PowerShell Commands which you can use for Upgrade Process in Navision 2016

By using Windows PowerShell, you can automate both parts of the upgrade process. Also, you can use the same scripts to test each step in your upgrade process before you upgrade production databases.

You can combine this automated upgrade with a migration to multitenancy this makes maintenance easier for you.

The Sample Scripts for Code Upgrade

Microsoft Dynamics NAV includes sample scripts that illustrate how you can use Windows PowerShell cmdlets to upgrade your application to the latest version of Microsoft Dynamics NAV.

The sample scripts are located in the ApplicationMergeUtilities folder under the WindowsPowerShellScripts folder on the Microsoft Dynamics NAV product media.

However you can follow above post link steps explanation to get it done.

The Sample Scripts for Data Upgrade

Microsoft Dynamics NAV includes sample scripts that illustrate how you can automate the upgrade of data to the latest version of Microsoft Dynamics NAV.

The sample scripts are located in the Upgrade folder under the WindowsPowerShellScripts folder on the Microsoft Dynamics NAV product media. You can run the sample script using a partner license or a customer license.
PowerShell-3

To learn and follow MS suggested steps you can find details using this link. Automating the Upgrade Process using Windows PowerShell Scripts in Microsoft Dynamics NAV 2016

To run the sample script for the data upgrade of a Microsoft Dynamics NAV database, you must have a Microsoft Dynamics NAV 2013, Microsoft Dynamics NAV 2013 R2, or Microsoft Dynamics NAV 2015 database that is available on a SQL Server instance and is ready to be upgraded.

Here I present my version derived from above Steps:

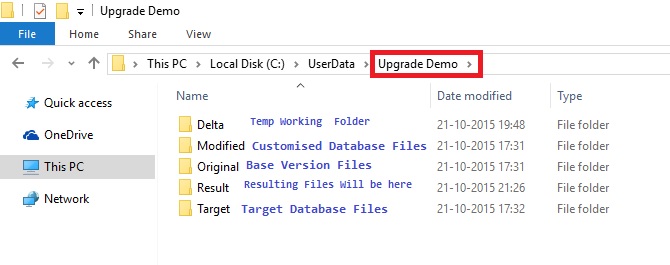
To continue we will do some setup. Copy the Upgrade folder from above path and save as DataUpgradePSKit.

PowerShell-4

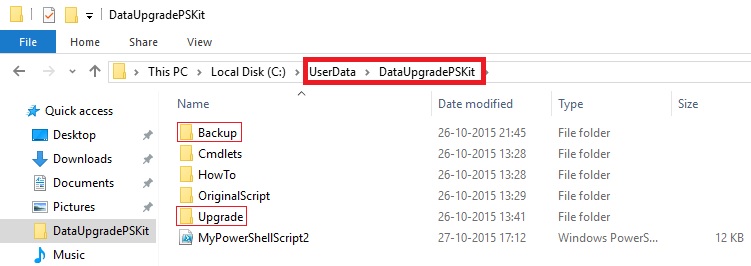
Create Folder OriginalScript and move the PS1 file on root to this folder although we don’t require for this exercise but you can safe copy for your reference. (Example, Set-PartnerSettings, Set-PowerShellEnvironment)

Create Backup folder, script will use to store backup of the database previous to start Upgrade process.

Create Upgrade Folder and place these files:

  • License File
  • New Merged Objects fob
  • Upgrade Toolkit / or your own prepared Upgrade Codeunits

PowerShell-5

  • Create ProcessLogs Folder, which will be used for recording log of Shell Script.

Here is the script which we will be using to perform our Data Upgrade process:

You can find this script here http://1drv.ms/1NyolVV or you can download from Menu of my Blog using Link Shared Files.


# Added below parameter values globally for ease of maintenance

# You just do correction on values here (as per your environment) and will be in effect for rest of below script

# No need to scan and change every occurrence for same value in different steps of the script.

# Select this section and Execute first so that these Variables value are available for rest of the script.

Import-Module ‘C:\Program Files\Microsoft Dynamics NAV\90\Service\NavAdminTool.ps1’

$NAVUpgrade_NAVServerInstance = “UpgradedDBfrom2013R2”

$NAVUpgrade_NAVServerServiceAccount = “NT AUTHORITY\NETWORK SERVICE”

$NAVUpgrade_FinSqlExeFile = “C:\Program Files (x86)\Microsoft Dynamics NAV\90\RoleTailored Client\finsql.exe”

$NAVUpgrade_IDEModulePath = “”

$NAVUpgrade_DatabaseServer = “INDEL-AXT5283VM”

$NAVUpgrade_DatabaseInstance = “”

$NAVUpgrade_DatabaseName = “Demo Database NAV (7-1)”

$NAVUpgrade_DatabaseToUpgradeBakFile = “C:\UserData\DataUpgradePSKit\Backup\DynamicsNAV70_BeforeUpgrade.bak”

$NAVUpgrade_NewVersionObjectsFobFilePath = “C:\UserData\DataUpgradePSKit\Upgrade\NewObjects.fob”

$NAVUpgrade_UpgradeToolkitObjectsFobFilePath = “C:\UserData\DataUpgradePSKit\Upgrade\Upgrade710900.FOB”

$NAVUpgrade_UpgradeObjectsFilter = “Version List=UPGTK9.00.00”

$NAVUpgrade_UpgradeLogsDirectory = “C:\UserData\DataUpgradePSKit\Upgrade\ProcessLogs”

#$NAVUpgrade_RapidStartPackageFile = ‘C:\UserData\DataUpgradePSKit\Upgrade\PackageSTCODES.rapidstart’

$NAVUpgrade_CurrentVersionLicenseFile = “C:\UserData\DataUpgradePSKit\Upgrade\DevLicense.flf”

$NAVUpgrade_PreviousVersionLicenseFilePath = “C:\UserData\DataUpgradePSKit\Upgrade\DevLicense.flf”


# Upgrade Steps:

Import-Module (Join-Path (Get-Location) ‘Cmdlets\NAVUpgradeCmdlets.psm1’) -DisableNameChecking

#1. Prepares the Windows PowerShell session by importing the required modules.

        # Import the NAV IDE Module.

Import-NAVIdeModule -IDEModuleSuggestedPath $NAVUpgrade_IDEModulePath -FinSqlExeFile $NAVUpgrade_FinSqlExeFile

Import-NAVManagementModule

Import-SqlPsModule


#2. Saves the current license from the Microsoft Dynamics NAV 2013, Microsoft Dynamics NAV 2013 R2, or Microsoft Dynamics NAV 2015 database.

# Backup current license from the application part of the database (table ‘$ndo$dbproperty’) , if it exists

        Export-NAVLicenseFromApplicationDatabase `

-DatabaseName $NAVUpgrade_DatabaseName `

-DatabaseServer $NAVUpgrade_DatabaseServer `

-DatabaseInstance $NAVUpgrade_DatabaseInstance `

-LicenseFilePath $NAVUpgrade_PreviousVersionLicenseFilePath


#3. Creates a backup of the Microsoft Dynamics NAV 2013, Microsoft Dynamics NAV 2013 R2, or Microsoft Dynamics NAV 2015 database, and then converts the database to Microsoft Dynamics NAV 2016.

        Backup-NAVSqlDatabase `

-DatabaseServer $NAVUpgrade_DatabaseServer `

-DatabaseInstance $NAVUpgrade_DatabaseInstance `

-DatabaseName $NAVUpgrade_DatabaseName `

-DatabaseBackupFilePath $NAVUpgrade_DatabaseToUpgradeBakFile

$NAVUpgrade_DatabaseSQLServerInstance = Get-SqlServerInstance -DatabaseServer $NAVUpgrade_DatabaseServer -DatabaseInstance $NAVUpgrade_DatabaseInstance

$NavServerInfo = New-Object PSObject

Add-Member -InputObject $NavServerInfo -MemberType NoteProperty -Name NavServerName -Value “$NAVUpgrade_DatabaseServer”

Add-Member -InputObject $NavServerInfo -MemberType NoteProperty -Name NavServerInstance -Value (Get-NAVServerConfigurationValue  -ServerInstance $NAVUpgrade_NAVServerInstance -ConfigKeyName “ServerInstance”)

Add-Member -InputObject $NavServerInfo -MemberType NoteProperty -Name NavServerManagementPort -Value (Get-NAVServerConfigurationValue -ServerInstance $NAVUpgrade_NAVServerInstance -ConfigKeyName “ManagementServicesPort”)


# Perform technical upgrade of the NAV database

        Invoke-NAVDatabaseConversion `

-DatabaseName $NAVUpgrade_DatabaseName `

-DatabaseServer $NAVUpgrade_DatabaseSQLServerInstance `

-LogPath $NAVUpgrade_UpgradeLogsDirectory\”Database Conversion”


#4. Connects the Microsoft Dynamics NAV 2016 Server instance to the converted database, imports the Microsoft Dynamics NAV 2016 license file, and then synchronizes the table schema.


# Connect the NAV Server to the NAV database

        Connect-NAVServerToNAVDatabase  `

-NAVServerInstance $NAVUpgrade_NAVServerInstance `

-NAVServerServiceAccount $NAVUpgrade_NAVServerServiceAccount `

-DatabaseServer $NAVUpgrade_DatabaseServer `

-DatabaseInstance $NAVUpgrade_DatabaseInstance `

-DatabaseName $NAVUpgrade_DatabaseName

# Import the new version license into the application database, and restart the server in order for the license to be loaded

        Import-NAVServerLicense -ServerInstance $NAVUpgrade_NAVServerInstance -LicenseFile $NAVUpgrade_CurrentVersionLicenseFile -Database NavDatabase

Set-NAVServerInstance -ServerInstance $NAVUpgrade_NAVServerInstance -Restart

# Synchronize the NAV database

        Sync-NAVTenant -ServerInstance $NAVUpgrade_NAVServerInstance -Mode Sync -Force


#5. Imports the application objects and upgrade toolkit objects from the specified .fob file, and then synchronizes the table schema again.

#   This updates the SQL Server database based on the new table schema that is defined by the imported application objects. Data that must be mapped to another table is saved in upgrade tables.

# Delete the tables from the previous version, using SynchronizeSchemaChanges Later.

# The new  objects we import will contain the new version of the tables.

        Delete-NAVApplicationObject `

-DatabaseName $NAVUpgrade_DatabaseName `

-DatabaseServer $NAVUpgrade_DatabaseSQLServerInstance `

-LogPath $NAVUpgrade_UpgradeLogsDirectory `

-Filter “Type=Table;ID=<2000000000” `

-SynchronizeSchemaChanges “No” `

-NavServerName $NavServerInfo.NavServerName `

-NavServerInstance $NAVServerInfo.NavServerInstance `

-NavServerManagementPort $NavServerInfo.NavServerManagementPort `

-Confirm:$false

# Import all the new objects and the upgrade objects, by delaying the schema synchronization

# If an $UpgradeToolkitObjects value has not been provided, then

#  the assumption is that the upgrade toolkit is within the same .FOB as the new objects

           if(!$UpgradeToolkitObjects)

{

# Import FOB file containing the new version of the application objects, including the upgrade toolkit

Import-NAVApplicationObject `

-Path $NAVUpgrade_NewVersionObjectsFobFilePath `

-DatabaseName $NAVUpgrade_DatabaseName `

-DatabaseServer $NAVUpgrade_DatabaseSQLServerInstance `

-LogPath $NAVUpgrade_UpgradeLogsDirectory `

-ImportAction “Overwrite” `

-SynchronizeSchemaChanges “No” `

-NavServerName $NavServerInfo.NavServerName `

-NavServerInstance $NAVServerInfo.NavServerInstance `

-NavServerManagementPort $NavServerInfo.NavServerManagementPort `

-Confirm:$false

}

else

{


# Import FOB file containing the new version of the application objects

Import-NAVApplicationObject `

-Path $NAVUpgrade_NewVersionObjectsFobFilePath `

-DatabaseName $NAVUpgrade_DatabaseName `

-DatabaseServer $NAVUpgrade_DatabaseSQLServerInstance `

-LogPath $NAVUpgrade_UpgradeLogsDirectory `

-ImportAction “Overwrite” `

-SynchronizeSchemaChanges “No” `

-Confirm:$false


# Import FOB file containing the upgrade codeunit and upgrade tables

Import-NAVApplicationObject `

-Path $NAVUpgrade_UpgradeToolkitObjectsFobFilePath `

-DatabaseName $NAVUpgrade_DatabaseName `

-DatabaseServer $NAVUpgrade_DatabaseSQLServerInstance `

-LogPath $NAVUpgrade_UpgradeLogsDirectory `

-ImportAction “Overwrite” `

-SynchronizeSchemaChanges “No” `

-Confirm:$false

}

# Synchronize the metadata changes to SQL

        Sync-NAVTenant -ServerInstance $NAVUpgrade_NAVServerInstance -Mode Sync -Force

#6. Calls the Start-NAVDataUpgrade cmdlet to verify the data upgrade preconditions and transfer data from the upgrade tables to the destination tables.

# Invoke the Data Upgrade process

        Invoke-NAVDataUpgrade -ServerInstance $NAVUpgrade_NAVServerInstance


#7. Deletes all obsolete tables and the upgrade toolkit objects.

# Delete Upgrade Toolkit objects

        Delete-NAVApplicationObject `

-DatabaseName $NAVUpgrade_DatabaseName `

-DatabaseServer $NAVUpgrade_DatabaseSQLServerInstance `

-LogPath $NAVUpgrade_UpgradeLogsDirectory `

-Filter “$NAVUpgrade_UpgradeObjectsFilter;ID=<2000000000” `

-SynchronizeSchemaChanges “Force” `

-NavServerName $NavServerInfo.NavServerName `

-NavServerInstance $NAVServerInfo.NavServerInstance `

-NavServerManagementPort $NavServerInfo.NavServerManagementPort `

-Confirm:$false


#8.       Initializes all companies in the upgraded database. If you specified a RapidStart package in the Set-PartnerSettings.ps1 file, the package is applied to all companies.

# Optionally, run RapidStart package import

        if($NAVUpgrade_RapidStartPackageFile)

{

Invoke-NAVRapidStartDataImport -ServerInstance      $NAVUpgrade_NAVServerInstance -RapidStartPackageFile $NAVUpgrade_RapidStartPackageFile


}


The sample script is intended to be run in the context of a Microsoft Dynamics NAV 2016 deployment, including the Microsoft Dynamics NAV Server instance.

The Microsoft Dynamics NAV Server instance cannot be multitenant. When the sample script runs successfully, the result is a Microsoft Dynamics NAV 2016 database that is connected to a Microsoft Dynamics NAV 2016 Server instance, and which uses a Microsoft Dynamics NAV 2016 license.

You may face some permission related issues, take help of you IT person if not sure about the nature of issue or use Administrator login.

I will come with more details in my next posts.


Advertisement
Corfu Navision 2016, Development Tips, How To, Information, upgrade

Helpful PowerShell Commands which you can use for Upgrade Process in Navision 2016

In today’s post we will see some Power Shell Commands which will be helpful while performing Upgrades using PowerShell. For below commands to exercise you will need to create/prepare Folder Structure as below else you will have to modify the path in below script as one which you will be using.

For your ease I have uploaded the below script in form of text file named ‘MyPowerShellScript.txt’ which you can get using this link http://1drv.ms/1OOf7If alternatively from Menu of my blog side use Shared Files to access the file.
PowerShell-1

Extract you objects in Text format from Base, Customized and Target Database and place in respective folders. One text file per object will be better option for getting more clear insight on Results. You can find the command for Splitting the File per object in below Script.

After opening the PowerShell or ISE change your folder to Upgrade Demo as in my case it will be:

PS C:\userdata\upgrade demo>
PowerShell-2
Select the Script and Press Button in Toolbar Run Selection (F8) in Windows PowerShell ISE (Desktop App).

#1. Start Import NAV Module

Import-Module “${env:ProgramFiles(x86)}\Microsoft Dynamics NAV\90\RoleTailored Client\Microsoft.Dynamics.Nav.Model.Tools.psd1” -force -DisableNameChecking

Get-Help “NAV”

This is must in order to run all below commands.

#2. Merge Objects

# Compare ORIGINAL and MODIFIED and merge onto TARGET, then put the merged files in RESULT

Merge-NAVApplicationObject -OriginalPath .\ORIGINAL\*.txt -ModifiedPath .\MODIFIED\*.txt -TargetPath .\TARGET\*.txt -ResultPath .\RESULT -Force

# Standard PowerShell table formatting with sorting on Object Type, Id

Merge-NAVApplicationObject -OriginalPath .\ORIGINAL\*.txt -ModifiedPath .\MODIFIED\*.txt -TargetPath .\TARGET\*.txt -ResultPath .\RESULT -Force -PassThru |

Sort-Object ObjectType, Id |

Format-Table

# Use PowerShell VARIABLE, PIPING, FILTER, and LISTS – capture result in variable, then list file names of ORIGINAL and TARGET files in conflict 

$myVariable = Merge-NAVApplicationObject -OriginalPath .\ORIGINAL\*.txt -TargetPath .\TARGET\*.txt `

-ModifiedPath .\MODIFIED\*.txt -ResultPath .\RESULT -Force

$myVariable.Summary

$myVariable |

Where-Object MergeResult –eq ‘Conflict’ |

Select Original, Target |

Format-List

# Open NOTEPAD for each CONFLICT file 

Merge-NAVApplicationObject -OriginalPath .\ORIGINAL\*.txt -TargetPath .\TARGET\*.txt `

-ModifiedPath .\MODIFIED\*.txt -ResultPath .\RESULT -Force -PassThru |

Where-Object MergeResult -eq ‘Conflict’ |

foreach { NOTEPAD $_.Conflict }

# Handling Documentation triggers: Merged by default, but conflict can either be treated as real conflict (Strict) or both inserted (ModifiedFirst or TargetFirst)

Merge-NAVApplicationObject -OriginalPath .\ORIGINAL\pagXXXX.txt -ModifiedPath .\MODIFIED\pagXXXX.txt `

-TargetPath .\TARGET\pagXXXX.txt -ResultPath .\RESULT\pagXXXX.txt -Force -DocumentationConflict Strict

Merge-NAVApplicationObject -OriginalPath .\ORIGINAL\pagXXXX.txt -ModifiedPath .\MODIFIED\pagXXXX.txt `

-TargetPath .\TARGET\pagXXXX.txt -ResultPath .\RESULT\pagXXXX.txt -Force -DocumentationConflict ModifiedFirst

#3. Merge Format Output

# Compare ORIGINAL and MODIFIED and merge onto TARGET, then put the merged files in RESULT

Merge-NAVApplicationObject -OriginalPath .\ORIGINAL\*.txt -ModifiedPath .\MODIFIED\*.txt -TargetPath .\TARGET\*.txt -ResultPath .\RESULT -Force

# Same: Capture the rich output in a PowerShell variable for further processing

$result = Merge-NAVApplicationObject -OriginalPath .\ORIGINAL\*.txt -ModifiedPath .\MODIFIED\*.txt -TargetPath .\TARGET\*.txt -ResultPath .\RESULT -Force

# Using the variable: Use standard PowerShell outputting of variable 

$result

# Using the variable: Use the Summary property of the result 

$result.Summary

# Using the variable: Use standard PowerShell table formatting 

$result | Format-Table

# Use standard PowerShell table formatting 

Merge-NAVApplicationObject -OriginalPath .\ORIGINAL\*.txt -ModifiedPath .\MODIFIED\*.txt -TargetPath .\TARGET\*.txt -ResultPath .\RESULT -Force -PassThru |

Format-Table

# Use standard PowerShell table formatting with sorting on ObjectType, Id 

Merge-NAVApplicationObject -OriginalPath .\ORIGINAL\*.txt -ModifiedPath .\MODIFIED\*.txt -TargetPath .\TARGET\*.txt -ResultPath .\RESULT -Force -PassThru |

Sort-Object ObjectType, Id |

Format-Table

# Use standard PowerShell graphical output (GridView) 

Merge-NAVApplicationObject -OriginalPath .\ORIGINAL\*.txt -ModifiedPath .\MODIFIED\*.txt -TargetPath .\TARGET\*.txt -ResultPath .\RESULT -Force -PassThru |

Out-GridView

#4. Merge Filter Output

 # Compare ORIGINAL and MODIFIED and merge onto TARGET, then put the merged files in RESULT

Merge-NAVApplicationObject -OriginalPath .\ORIGINAL\*.txt -ModifiedPath .\MODIFIED\*.txt -TargetPath .\TARGET\*.txt -ResultPath .\RESULT -Force

# Same: Plus use PIPING, PASSTHRU and FILTER – show objects with CONFLICT only

Merge-NAVApplicationObject -OriginalPath .\ORIGINAL\*.txt -TargetPath .\TARGET\*.txt `

-ModifiedPath .\MODIFIED\*.txt -ResultPath .\RESULT -PassThru -Force |

Where-Object MergeResult –eq ‘Conflict’

# Same: Plus use PIPING, PASSTHRU, FILTER, and COUNT – count MERGED objects

Merge-NAVApplicationObject -OriginalPath .\ORIGINAL\*.txt -TargetPath .\TARGET\*.txt `

-ModifiedPath .\MODIFIED\*.txt -ResultPath .\RESULT -PassThru -Force |

Where-Object MergeResult –eq ‘Merged’ |

Measure-Object

# Same: Plus use PIPING, PASSTHRU, FILTER, and LISTING FILES – list file names of ORIGINAL and TARGET files in conflict 

Merge-NAVApplicationObject -OriginalPath .\ORIGINAL\*.txt -TargetPath .\TARGET\*.txt `

-ModifiedPath .\MODIFIED\*.txt -ResultPath .\RESULT -PassThru -Force |

Where-Object MergeResult –eq ‘Conflict’ |

Select Original, Target |

Format-List

#5. Merge and open Conflicts files using External Tools

 # Compare ORIGINAL and MODIFIED and merge onto TARGET, then put the merged files in RESULT 

$result = Merge-NAVApplicationObject -OriginalPath .\ORIGINAL\*.txt -ModifiedPath .\MODIFIED\*.txt -TargetPath .\TARGET\*.txt -ResultPath .\RESULT -Force

# Open NOTEPAD for each CONFLICT file 

$result |

Where-Object MergeResult -eq ‘Conflict’ |

foreach { NOTEPAD $_.Conflict }

#6. Merge and Documentation Triggers

 # Compare object DOCUMENTATION modifications: Body-text (can be merged) and version list additions (potential conflict). 

Merge-NAVApplicationObject -OriginalPath .\ORIGINAL\pagXXXX.txt -ModifiedPath .\MODIFIED\pagXXXX.txt `

-TargetPath .\TARGET\pagXXXX.txt -ResultPath .\RESULT\pagXXXX.txt -Force -DocumentationConflict ModifiedFirst

# Same: But STRICT on conflicts. 

Merge-NAVApplicationObject -OriginalPath .\ORIGINAL\pagXXXX.txt -ModifiedPath .\MODIFIED\pagXXXX.txt `

-TargetPath .\TARGET\pagXXXX.txt -ResultPath .\RESULT\pagXXXXa.txt -Force -DocumentationConflict Strict

#7. Merge and import in CSIDE

# Compare ORIGINAL and MODIFIED and merge onto TARGET, then put the merged files in RESULT 

Merge-NAVApplicationObject -OriginalPath .\ORIGINAL\*.txt -ModifiedPath .\MODIFIED\*.txt -TargetPath .\TARGET\*.txt -ResultPath .\RESULT -Force

# Locate subset (code units) of partionally merged object files, combine them into a single file for performance, and import them into C/SIDE (parameter -Database for you to provide). All throught piping. 

Get-ChildItem .\RESULT\COD*.txt |

Join-NAVApplicationObjectFile -Destination .\RESULT\partially-merged.txt |

Import-NAVApplicationObject

#8. Merge and Export Result to Excel Output 

# Compare ORIGINAL and MODIFIED and merge onto TARGET, then put the merged files in RESULT 

$result = Merge-NAVApplicationObject -OriginalPath .\ORIGINAL\*.txt -ModifiedPath .\MODIFIED\*.txt -TargetPath .\TARGET\*.txt -ResultPath .\RESULT -Force

$AutoMerged = ($result | Where-Object MergeResult -eq ‘Merged’).Count

$Conflict   = ($result | Where-Object MergeResult -eq ‘Conflict’).Count

$Unchanged  = ($result | Where-Object MergeResult -eq ‘Unchanged’).Count

$Inserted   = ($result | Where-Object MergeResult -eq ‘Inserted’).Count

$Unknown    = ($result | Where-Object MergeResult -eq ‘Unknown’).Count

$Deleted    = ($result | Where-Object MergeResult -eq ‘Deleted’).Count

$Title      = “MySample”  # update Excel template file to allow blanks and special characters

$excelPath = “$(Get-ItemProperty ‘HKLM:\SOFTWARE\Microsoft\Windows\CurrentVersion\App Paths\excel.exe’ | select -exp Path)\Excel.exe”

& $excelPath “.\Merge Result Sample.xlsm” “/e/$Title/$AutoMerged/$Conflict/$Unchanged/$Inserted/$Unknown/$Deleted”

# Start-Process -FilePath “.\Merge Result Sample.xlsm” -ArgumentList “/e/BAS/$AutoMerged/$Conflict/$Unchanged/$Inserted/$Unknown/$Deleted”

#9. Compare

 # Compare ORIGINAL and MODIFIED and output MULTIPLE separate DELTA files 

Compare-NAVApplicationObject -OriginalPath .\ORIGINAL\*.txt -ModifiedPath .\MODIFIED\*.txt -DeltaPath .\DELTA -Force

# Compare ORIGINAL and TARGET, pipe the result into the Update-cmdlet (in particular the DELTA parameter) 

Compare-NAVApplicationObject -OriginalPath .\ORIGINAL\*.txt -ModifiedPath .\MODIFIED\*.txt -DeltaPath .\DELTA -Force -PassThru |

Update-NAVApplicationObject -TargetPath .\TARGET\*.txt -ResultPath .\RESULT -Force

#10. Compare Piped

 # Compare ORIGINAL and TARGET and output ONE summary DELTA file 

Compare-NAVApplicationObject -OriginalPath .\ORIGINAL\*.txt -ModifiedPath .\TARGET\*.txt -DeltaPath .\RESULT\sum-of-deltas.txt -Force

#11. Update Piped

# Compare ORIGINAL and MODIFIED and output MULTIPLE separate DELTA files, capture result in variable to apply multiple times 

$myDifferences = Compare-NAVApplicationObject -OriginalPath .\ORIGINAL\*.txt -ModifiedPath .\MODIFIED\*.txt -DeltaPath .\DELTA -Force

# Apply a captured set of differences to TARGET objects using the Update-cmdlet 

$myDifferences |

Update-NAVApplicationObject -TargetPath .\TARGET\*.txt -ResultPath .\RESULT -Force

#12. Join & Split Object Files

# Join all Codeunit-TXT-files into a single TXT-file

Join-NAVApplicationObjectFile -Source .\ORIGINAL\COD*.txt -Destination .\RESULT\all-codeunits.txt -Force

# Join list of Codeunit-TXT-files into a single TXT-file 

Join-NAVApplicationObjectFile -Source .\ORIGINAL\COD1.txt, .\ORIGINAL\COD2.txt, .\ORIGINAL\COD3.txt -Destination .\RESULT\3-codeunits.txt -Force

# Split a single TXT-file with multiple application objects into separate files in the DESTINATION folder 

Split-NAVApplicationObjectFile -Source .\RESULT\all-codeunits.txt -Destination .\SEPARATE -Force

Make sure you have created Separate Folder before executing this script.

#13. Get Application Properties 

# Show values of application properties in CODXXXX.TXT 

Get-NAVApplicationObjectProperty -Source .\RESULT\CODXXXX.txt

#14. Set Application Properties

# Set all object properties on named object COD1.TXT: VersionList to DemoV1, Modified as modified, and Date and Time to current date/time (show outcome) 

Set-NAVApplicationObjectProperty -TargetPath .\RESULT\COD1.txt -VersionListProperty “DemoV1” -ModifiedProperty Yes -DateTimeProperty (Get-Date -Format g)

Get-NAVApplicationObjectProperty -Source .\RESULT\COD1.txt

# Set date/time to a fixed, machine-locale agnostic date (January 1st, 2015) on Merged objects 

Merge-NAVApplicationObject -OriginalPath .\ORIGINAL\*.txt -ModifiedPath .\MODIFIED\*.txt -TargetPath .\TARGET\*.txt -ResultPath .\RESULT -Force -PassThru |

Where-Object MergeResult –eq ‘Merged’ |

foreach { Set-NAVApplicationObjectProperty -TargetPath $_.Result -DateTimeProperty (Get-Date -Year 2015 -Month 1 -Day 1 -Hour 0 -Minute 0 -Format g) }

# Capture merge-result in variable, set VersionList property as an concatenation of Modified and Target values with trailing ‘!’ 

$result = Merge-NAVApplicationObject -OriginalPath .\ORIGINAL\*.txt -ModifiedPath .\MODIFIED\*.txt -TargetPath .\TARGET\*.txt -ResultPath .\RESULT -Force

$result |

Where-Object MergeResult –eq ‘Merged’ |

foreach { Set-NAVApplicationObjectProperty -TargetPath $_.Result -VersionListProperty “$_.Modified.VersionList,$_.Target.VersionList!”;

Get-NAVApplicationObjectProperty -Source $_.Result }

# Display property VersionList of CODXXXX.TXT in MODIFIED, TARGET, and RESULT 

Get-NAVApplicationObjectProperty -Source .\MODIFIED\CODXXXX.txt | select VersionList

Get-NAVApplicationObjectProperty -Source .\TARGET\CODXXXX.txt | select VersionList

Get-NAVApplicationObjectProperty -Source .\RESULT\CODXXXX.txt | select VersionList

#15. Set Application Properties

# Set date/time to fixed date (January 31st, 2015) on Merged objects 

Merge-NAVApplicationObject -OriginalPath .\ORIGINAL\*.txt -ModifiedPath .\MODIFIED\*.txt -TargetPath .\TARGET\*.txt -ResultPath .\RESULT -Force -PassThru |

Where-Object MergeResult –eq ‘Merged’ |

foreach { Set-NAVApplicationObjectProperty -TargetPath $_.Result -DateTimeProperty “31-1-2015” }

#16. Export Language

# Export ONE language (Spanish) from a single object file.  

Export-NAVApplicationObjectLanguage –Source .\original\TAB14.TXT -LanguageId “ESP” -Destination .\result\TAB14-ESP.TXT -Force

# Export one language (Spanish) from a single object file with non-standard code page ENCODING.  

Export-NAVApplicationObjectLanguage –Source .\original\TAB14.TXT -LanguageId “ESP” -Destination .\result\TAB14-ESP-UNICODE.TXT -Encoding Unicode -Force

# Export ONE language (Spanish) from ALL objects into a SINGLE file. 

Export-NAVApplicationObjectLanguage –Source .\original\*.TXT -LanguageId “ESP” -Destination .\result\ALL-ESP.TXT -Force

# Export MULTIPLE languages (Spanish, US English) from ALL objects

Export-NAVApplicationObjectLanguage –Source .\original -LanguageId “ESP”,”ENU” -Destination .\result -Force

# Export ALL languages (Spanish, US English, Danish) from ALL objects into result folder  

Export-NAVApplicationObjectLanguage –Source .\original -Destination .\result -Force

# Export ALL languages (Spanish, US English, Danish) from ALL objects into a SINGLE file

Export-NAVApplicationObjectLanguage –Source .\original -Destination .\result\single.txt -Force

#17. Import Language  

# Import Spanish language from FULL translation file into a single object 

Import-NAVApplicationObjectLanguage –Source .\original\TAB14.TXT -LanguageId “ESP” -LanguagePath .\result\ALL-ESP.TXT -Destination .\result -Force

#18. Remove Language

# Remove Spanish captions from a single object 

Remove-NAVApplicationObjectLanguage –Source .\target\TAB14.TXT -LanguageId “ESP” -Destination .\result\TAB14-ESP-REMOVED.TXT -Force

# Remove all captions from multiple objects, result in a single file 

Remove-NAVApplicationObjectLanguage –Source .\target\TAB14.TXT, .\target\PAGXXXX.TXT -Destination .\result -Force

#19. Test-Languages 

# Test all Spanish captions are present. PowerShell error returned, if translations are missing.

Test-NAVApplicationObjectLanguage –Source .\original\TAB14.TXT -LanguageId ESP

# Test all Danish captions are all present. Catch error situation and report nicely back to the script. 

try

{

Test-NAVApplicationObjectLanguage –Source .\original\TAB14.TXT -LanguageId DAN -ErrorAction Stop

}

catch

{

Write-Host “One or more translations are missing for the DAN language.” -ForegroundColor Yellow

}

# Test all Danish and Spanish captions are all present. With -PassThru a warning is reported and tranlation lines are returned for processing. 

Test-NAVApplicationObjectLanguage –Source .\original\TAB14.TXT -LanguageId ESP,DAN -PassThru

#20. Split or Join Language File

# Split an application translation file into per-object files

Split-NAVApplicationObjectLanguageFile -Source .\result\single.txt -Destination .\result -Force

# Join multiple application translation files into one combined file  

Join-NAVApplicationObjectLanguageFile -Source .\result\*-ESP.TXT -Destination .\result\JOINED-ESP.txt -Force

I will come with more details in my upcoming posts.

Data Model, Development Tips, Excel, How To, PivotTable, PowerPivot, Report

Use hierarchies in PivotTables

Recall from my previous post Create a hierarchy in PowerPivot Data Model, We will continue from where we left our earlier post.

Now we have a Sports hierarchy and Locations hierarchy, we can add them to PivotTables or Power View, and quickly get results that include useful groupings of data.

Prior to creating hierarchies, you had to add individual fields to the PivotTable, and arrange those fields how you wanted them to be viewed.

In this post we will use the hierarchies created in the previous post to quickly refine our PivotTable.

Open the Excel workbook which we used in our previous post and Insert PivotTable as shown in below screen.
ExcelData-17

  • Add field in the PivotTable Medal from Medal Table in the FILTERS area, and Count of Medal from Medal Table in the VALUES area. Your nearly empty PivotTable should look like the following screen.

ExcelData-18

  • From the PivotTable Fields area, drag SDE from the Events table to the ROWS area. Then drag Locations from the Hosts table into the COLUMNS area. Just by dragging those two hierarchies, your PivotTable is populated with a data, all of which is arranged in the hierarchy we defined in the previous steps. Your screen should look like the following screen.

ExcelData-19

  • You can expand any of those Sports in the PivotTable, which is the top level of the SDE hierarchy, and see information in the next level down in the hierarchy (discipline). If a lower level in the hierarchy exists for that discipline, you can expand the discipline to see its events. You can do the same for the Location hierarchy, the top level of which is Season, which shows up as Summer and Winter in the PivotTable.

ExcelData-20

ExcelData-21
By dragging those two hierarchies, you quickly created a PivotTable with interesting and structured data that you can drill into, filter, and arrange.

I will come up with more details and other options on this topic in my upcoming posts. Till then keep learning and practicing.

Development Tips, Excel, How To, Jet Reports, Office Integration, Report

How to Use the Jet Report Scheduler

Overview

The Jet Scheduler is a powerful tool that allows users to schedule reports to be automatically run by the Windows Task Scheduler. The user can also control where the output file is saved to, if the report should be emailed once it has been generated, and the output format of the report.

Creating a New Scheduled Task

To set up a scheduled report, open the report in Excel, click the Jet ribbon, and click the Schedule button.

JetSchedule-1

Click the New Task… button to schedule a new task.

JetSchedule-2

The Scheduled Task window will now appear.

Reports Tab

JetSchedule-3

The Reports tab contains general information about the scheduled task.

  • Task Name: This represents the name of the task as it will appear in the Scheduled Task window to the user.
  • Run All Reports in a Folder: This button will enable the user to schedule all Jet Reports in a full to be run
  • Run a Single Report: This button will enable the user to schedule a single Jet Report to be run
  • Input: This represents the folder and file name of the report that will be run
  • Output: This represents the folder and file name of where the finished report will be saved

Schedule Tab

JetSchedule-4

This tab will define the frequency of how often the report will be run as well as if the task is currently disabled and if the report should be run when the user is logged off.

The available options for the frequency are:

  • Once: The report will only be run one time
  • Daily: The report will be run every day (it is possible to set on the next tab the number of days to wait between runs)
  • Weekly: The report will be run every week (it is possible to set on the next tab the days of the week for the report to be run on)
  • Monthly: The report will be run every month (it is possible to set on the next tab the months for the report to run on and the days of the month for the report to be run on)
  • When Idle: The report will run every time that the computer goes into idle mode
  • At Startup: The report will be run each time that the computer is turned on
  • At Logon: The report will be run each time that the user logs on to the computer

Frequency Tab

JetSchedule-5

The name of this tab will change depending on the frequency specified on the Schedule tab.

In the screenshot above a Weekly frequency has been specified.

  • Start Date and Time: This represents the first date that the report will run and the time that it will run for this and subsequent schedules
  • Weeks between report runs: This specifies how many weeks the Scheduler will wait between report runs before running the report again
  • Days to run report: This represents the days of the week that the report is scheduled to run on

Email Tab
JetSchedule-6
The Email tab allows the user to define who the report will be sent to if emailing is desired.

  • Send email: If this box is checked it will enable the report to be emailed to recipients
  • Mail properties: This dropdown will allow the user to specify whether the report will be emailed using Outlook or a generic SMTP protocol. SMTP must be configured in the Jet Essentials Application Settings in order for it to be used.
  • Message: This allows the user to specify a custom subject or body to be sent as part of the email
  • Attach report to email: If this box is checked the report will be attached to the email. If the box is unchecked the report will not be attached. This can be used as a type of notification when used in conjunction with the subject and body of the email to allow a user to know that the report has been run
  • Recipients: Email addresses will be specified here for all recipients of the report. Email addresses should be separated by a semi-colon.
  • Get recipients from Excel Named Range: It is possible to also define the email addresses in the report itself and then assign an Excel named range to the cell(s). If there are named ranges in the report then they will appear in the dropdown below the checkbox. The Output tab allows the user to define how the file should be saved once it is finished running. This tab also enabled the user to turn on logging to troubleshoot errors with the Scheduler process as well as use Batch File Generation for the reports.

Output Tab
The Output tab allows the user to define how the file should be saved once it is finished running. This tab also enabled the user to turn on logging to troubleshoot errors with the Scheduler process as well as use Batch File Generation for the reports.

JetSchedule-7

  • Output Format: This dropdown list will allow the user to define the format of the finished report. The available options are:
    • Jet Workbook: This will save the report as a normal Excel file with all Jet Reports functions still in the report
    • Values Only Workbook: This will save the report as an Excel file with all Jet Reports functions removed. The recipient would not be able to refresh the report as it will be a static Excel file
    • Web Page: This will save the report as a HTML file with a single sheet. This should be used when there is a single sheet in the report
    • Web Page by Sheet: This will save the report as a HTML file with multiple sheets embedded in it. This should be used when there are multiple sheets in a report
    • PDF: This will save the report as a PDF file (if your version of Excel supports that ability – Excel 2007 and higher)

Remain tuned for more details, I will come up with more details and features in my upcoming posts.

Development Tips

Configuring Web Services to Use SSL (SOAP and OData)

Secure Sockets Layer (SSL) is a cryptographic protocol that helps provide security and data integrity for data communications over a network.

By encrypting your Microsoft Dynamics NAV web services using SSL, you make your data and the network more secure and more reliable.

Microsoft Dynamics NAV Web Services and SSL

Microsoft Dynamics NAV supports SSL authentication for SOAP and OData web services.

The server authenticates itself to the client, but the client does not authenticate itself to the server.

When the web service client connects to the Microsoft Dynamics NAV Server instance, the server replies by sending its digital certificate to the client. This certificate contains the server’s public encryption key and the name of the authority that granted the certificate. The client verifies the certificate using the authority’s public key.

We have covered above top related to Creating and Implementing Certificates for Microsoft Dynamics NAV Server. If not seen please follow below links for better understanding:

How to create a root CA and a private key file by using the makecert.exe utility

How to create certificate revocation list for the root certification authority

How to create and install a test certificate for the Microsoft Dynamics NAV Server computer

How to grant access to the certificate’s private key to the service account for the Microsoft Dynamics NAV Server

Implementing Security Certificates.

Configuring Microsoft Dynamics NAV Web Services to Use SSL

The first step is to prepare Microsoft Dynamics NAV to use SSL. This involves configuring the relevant Microsoft Dynamics NAV Server instance to specify SSL.

The following procedure uses Microsoft Dynamics NAV Server Administration tool to configure the Microsoft Dynamics NAV Server instance.

  • Choose the Start button, and in the Search programs and files box, type Microsoft Dynamics NAV Administration, and then choose the related link.
  • In Microsoft Dynamics NAV Server Administration tool, in the left pane, under Console Root, expand the node for the Microsoft Dynamics NAV Server computer. This is typically named Microsoft Dynamics NAV (Local), which is the local computer.

The Microsoft Dynamics NAV Server instances on the computer appear in the left pane and center panes.

In the left pane, choose the relevant instance to display settings for that instance in the center pane.

UseSSL-1

  • At the bottom of the center pane, choose Edit.
  • To configure SOAP web services to use SSL, expand the SOAP Web Services tab, and then select the Enable SSL

Make a note of the port that is used by SOAP web services. You will need the port number later on in this walkthrough.

UseSSL-2

  • To configure OData web services to use SSL, expand the OData Web Services tab, and then select the Enable SSL

Make a note of the port that is used by OData web services. You will need the port number later on in this walkthrough
UseSSL-3

  • Choose Save at the bottom of the center pane.
  • In the right pane, under Actions, choose Login Account.
  • Make a note of the service account information. You will need this information later on in this walkthrough.

UseSSL-4

Configuring the Access Control List and the Web Services Ports for SSL

An access control list (ACL) is part of the Windows security infrastructure and features. The ACL controls who can access resources on a computer.

Note

These procedures use the netsh tool (netsh.exe) for configuring the HTTP server. The netsh tool is supplied with Windows 7 and Windows Server 2008.

By default the netsh tool is located in the c:\Windows\System32 folder.

To configure the ACL

  1. On the computer running Microsoft Dynamics NAV Server, open a command prompt as an administrator as follows:
    1. From the Start menu, choose All Programs, and then choose Accessories.
    2. Right-click Command Prompt, and then choose Run as administrator.
  1. At the command prompt, type the following command to change to the Windows\System32 directory.

cd\Windows\System32

  1. To view the ACL for the web services ports to determine if any entries are already using the relevant host name and port, type the following command:

netsh http show urlacl

  1. Each entry is listed by the Reserved URL field, which has the format http://hostname:port. hostname is the name of the computer running the service and port is the port number the service runs on. A ‘+’ (plus sign) in the Reserved URL field represents localhost, which indicates the computer that you are working on.
  2. By default, SOAP and OData web services in Microsoft Dynamics NAV use ports 7047 and 7048, respectively, and connect to a Microsoft Dynamics NAV Server instance named DynamicsNAV80. The default reserved URL entries for these services are: http://+:7047/DynamicsNAV80/ and http://+:7048/DynamicsNAV80/.
  3. You must delete any entries that use the same port as the SOAP or OData web services.

To delete an entry, type the following command:

netsh http delete urlacl url=http://hostname:Port/NAVserver/

Substitute Port with the port number of the SOAP or OData web service and NAVserver with the name of the Microsoft Dynamics NAV Server instance.

For example, to delete the default entries for SOAP and OData, use the following two commands:

netsh http delete urlacl url=http://+:7047/DynamicsNAV80/

netsh http delete urlacl url=http://+:7048/DynamicsNAV80/

  1. To register the ports for the SOAP and OData web service with https, type the following command for each service:

netsh http add urlacl url=https://hostname:port/navserver user=DOMAIN\user

  1. Substitute the following options with the proper values:
Option Description
hostname The name of the computer running Microsoft Dynamics NAV Server. Use + for localhost.
port The port that is used by the web service.
navserver The name of the Microsoft Dynamics NAV Server instance to use with the web service. The default is DynamicsNAV80.
DOMAIN\username The domain and user name of the service account for Microsoft Dynamics NAV Server. If the service account for Microsoft Dynamics NAV Server is Network Service, then use “NT AUTHORITY\NETWORK SERVICE”.
  1. For example, if the service account for Microsoft Dynamics NAV Server has the domain ABC and the user name xyz, and then the command for the SOAP web service is as follows:

netsh http add urlacl url=https://+:7047/DynamicsNAV80 user=”NT AUTHORITY\NETWORK SERVICE”

  1. If the service account for Microsoft Dynamics NAV Server is Network Service, then the command is as follows:

netsh http add urlacl url=https://+:7047/DynamicsNAV80 user=”NT AUTHORITY\NETWORK SERVICE”

  1. To verify that your port has been registered, repeat step 3.

To configure the port to use the SSL certificate

  1. At the command prompt, type the following command to view the current port configurations:

netsh http show sslcert

  1. All port bindings to SSL certificates are listed. Each entry is indicated by the IP:port field, where IP is the IP address that uses the port (0.0.0.0 indicates all IP addresses) and port is the port number.
  2. If SSL is already configured on the address and port that you want to use for SOAP or OData web services, then use the following command to delete the entry:

netsh http delete ssl ipport=ipaddress:port

  1. Substitute ipaddress and port with the IP address and port number of the entry that you want to delete.
  2. For example, to delete the entry on the default SOAP port, use the following command:

netsh http delete ssl ipport=0.0.0.0:7047

  1. To bind an SSL certificate to the SOAP or OData web service port, use the following command:

netsh http add sslcert ipport=ipaddress:port certhash=thumbprint appid={id}

  1. Substitute the following options with the proper values:
Option Description
ipaddress The IP address that can use the web service. Use 0.0.0.0 to include all IP addresses.
port The port that is used by the web service.
thumbprint The certificate thumbprint that you obtained in previous post.
id A 32-digit hexadecimal number that identifies the Microsoft Dynamics NAV application. The id must be in the format {NNNNNNNN-NNNN-NNNN-NNNN-NNNNNNNNNNNN). If you do not know the appid, then use any value, such as {00112233-4455-6677-8899-AABBCCDDEEFF}.
  1. For example, the following command binds a certificate that has the thumbprint c0d0f27095b03d4317e219841024328cef248779 to port 7047 for all IP addresses:

netsh http add sslcert ipport=0.0.0.0:7047 certhash=c0d0f27095b03d4317e219841024328cef248779 appid={00112233-4455-6677-8899-AABBCCDDEEFF}

Imp Note: – Please replace the port and thumbprint values with your valid values.

Restart the Microsoft Dynamics NAV Server Instance

You can use the Microsoft Dynamics NAV Server Administration Tool to restart the Microsoft Dynamics NAV Server instance.

To restart Microsoft Dynamics NAV Server

  1. In Microsoft Dynamics NAV Server Administration tool, in the left pane, under Console Root, choose the Microsoft Dynamics NAV Server computer.
  2. In the center pane, choose the Microsoft Dynamics NAV Server instance that you have configured, and then in the right pane under Actions, choose Restart.
  3. After the instance restarts, close Microsoft Dynamics NAV Server Administration tool.

Verifying the Configuration

You should now be able to use web services that are encrypted with SSL. To verify this, type the following URL in the address bar for your browser.

https://localhost:7047/DynamicsNAV80/WS/services

The page lists any web services that have been published.