
Tag: Replication
Database Replication – Part V
This post is in continuation to my earlier post. Please check if you missed.
Database Replication – Part II
Database Replication – Part III
Database Replication – Part IV
As committed in this post we will continue to cover practical approach, Next step from last post.
We will create a subscription using SQL Server Management Studio
To create the subscription
- Connect to the Publisher in SQL Server Management Studio, expand the server node, and then expand the Replication folder.
- In the Local Publications folder, right-click the Nav2018ItemTrans publication, and then click New Subscriptions.

The New Subscription Wizard launches.

- On the Publication page, select Nav2018ItemTrans, and then click Next.

- On the Distribution Agent Location page, select Run all agents at the Distributor, and then click Next.

- On the Subscribers page, if the name of the Subscriber instance is not displayed, click Add Subscriber, click Add SQL Server Subscriber, enter the Subscriber instance name in the Connect to Server dialog box, and then click Connect.
- On the Subscribers page, select the instance name of the Subscriber server, and select under Subscription Database.
- On the New Database dialog box/Select from Drop Down List, enter Nav2018ReplDatabase in the Database name box, click OK, and then click Next.

- In the Distribution Agent Security dialog box, click the ellipsis (…) button, enter <Machine_Name>\repl_distribution in the Process account box, enter the password for this account, click OK.

- Click Next.
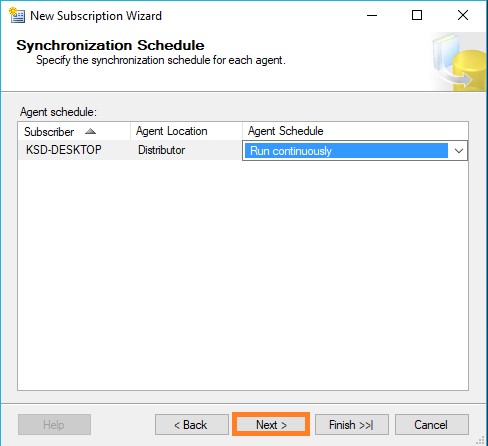
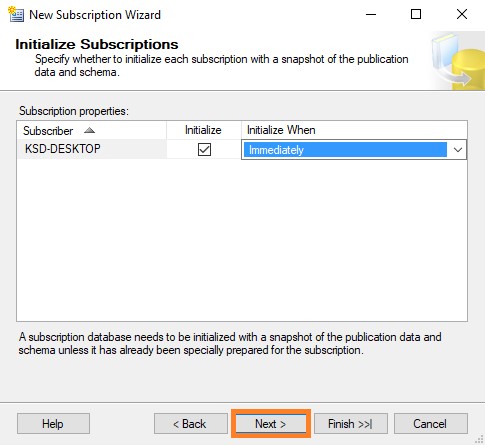
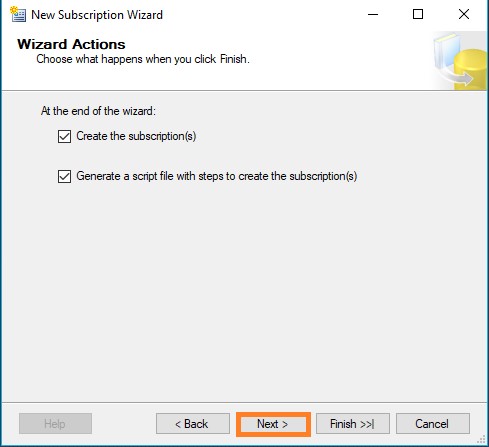
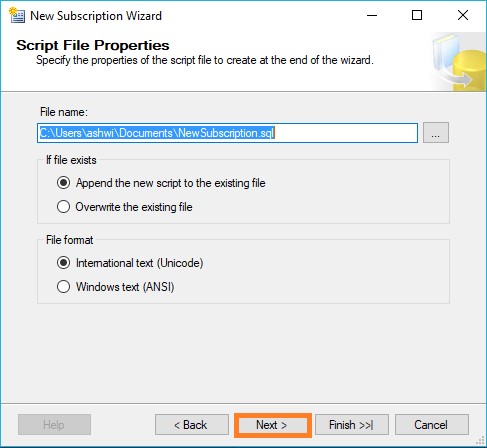
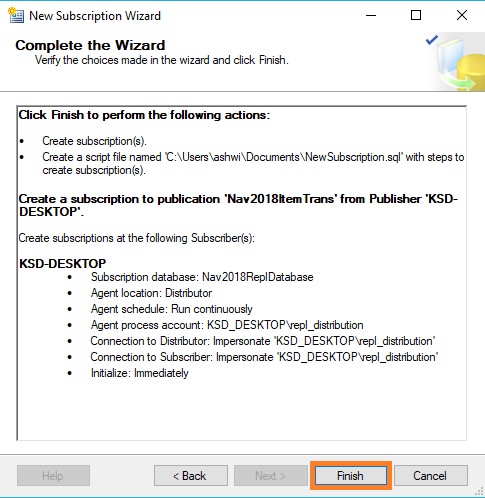
- Click Finish to accept the default values on the remaining pages and complete the wizard.
Setting database permissions at the Subscriber
- Connect to the Subscriber in SQL Server Management Studio, expand Databases, Nav2018ReplDatabase, and Security, right-click Users, and then select New User.
- On the General page, in the User type list, select Windows user.
- Select the User name box and click the ellipsis (…) button, in the Enter the object name to select box type <Machine_Name>\repl_distribution, click Check Names, and then click OK.

- On the Membership page, in Database role membership area, select db_owner, and then click OK to create the user.

When setting up SQL Server replication you might see an error message from the Transactional Replication Log Reader Agent which reads like the following.
Error messages:
- The process could not execute ‘sp_replcmds’ on ”. (Source: MSSQL_REPL, Error number: MSSQL_REPL20011) Get help: http://help/MSSQL_REPL20011
- Cannot execute as the database principal because the principal “dbo” does not exist, this type of principal cannot be impersonated, or you do not have permission. (Source: MSSQLServer, Error number: 15517) Get help: http://help/15517
- The process could not execute ‘sp_replcmds’ on ”. (Source: MSSQL_REPL, Error number: MSSQL_REPL22037) Get help: http://help/MSSQL_REPL22037
Often this error message can come from the database not having a valid owner, or the SQL Server is not being able to correctly identify the owner of the database.
Often this is easiest to fix by changing the database owner by using the sp_changedbowner system stored procedure as shown below. The sa account is a reliable account to use to change the ownership of the database to.
USE PublishedDatabase
GO
EXEC sp_changedbowner ‘sa’
GO
Once the database ownership has been changed the log reader will probably start working right away. If it doesn’t quickly restarting the log reader should resolve the problem.
While this does require changes to the production database, there is no outage required to make these changes.
To view the synchronization status of the subscription
- Connect to the Publisher in SQL Server Management Studio, expand the server node, and then expand the Replication folder.
- In the Local Publications folder, expand the Nav2018ItemTrans publication, right-click the subscription in the Nav2018ReplDatabase database, and then click View Synchronization Status.

The current synchronization status of the subscription is displayed.
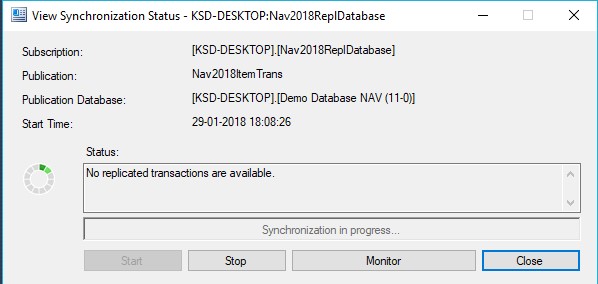
- If the subscription is not visible under Nav2018ItemTrans, press F5 to refresh the list.
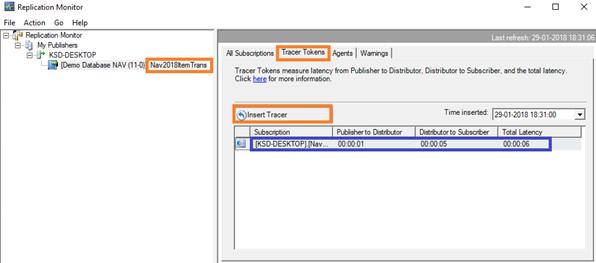
Validating the Subscription and Measuring Latency
We will use tracer tokens to verify that changes are being replicated to the Subscriber and to determine latency, the time it takes for a change made at the Publisher to appear to the Subscriber.
To insert a tracer token and view information on the token
- Connect to the Publisher in SQL Server Management Studio, expand the server node, right-click the Replication folder, and then click Launch Replication Monitor.
- Replication Monitor launches.
- Expand a Publisher group in the left pane, expand the Publisher instance, and then click the Nav2018ItemTrans publication.
- Click the Tracer Tokens tab.
- Click Insert Tracer.
- View elapsed time for the tracer token in the following columns: Publisher to Distributor, Distributor to Subscriber, Total Latency. A value of Pending indicates that the token has not reached a given point.
This way we are done with Database Replication Setup.
Will come up with more topic soon.
Database Replication – Part IV
This post is in continuation to my earlier post. Please check if you missed.
Database Replication – Part II
Database Replication – Part III
As committed in this post we will continue to cover practical approach, Next step from last post.
Publishing Data Using Transactional Replication
We will create a transactional publication using SQL Server Management Studio to publish a filtered subset of the Item table in the Nav 2018 sample database. We will also add the SQL Server login used by the Distribution Agent to the publication access list (PAL).
To create a publication and define articles
Connect to the Publisher in SQL Server Management Studio, and then expand the server node.
Expand the Replication folder, right-click the Local Publications folder, and click New Publication.
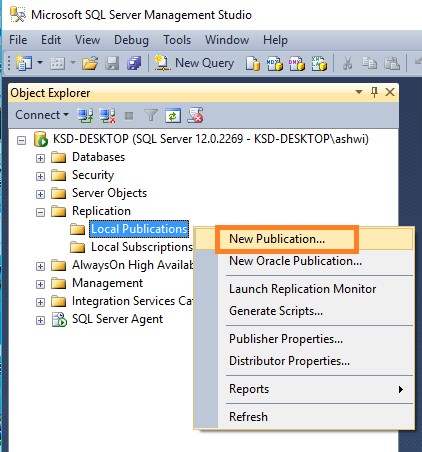
The Publication Configuration Wizard launches.

On the Publication Database page, select Nav 2018 database, and then click Next.

On the Publication Type page, select Transactional publication, and then click Next.

On the Articles page, expand the Tables node, select the check box for table CRONOUS International Ltd_$Item (dbo). Click Next.

On the Filter Table Rows page, click Add.
In the Add Filter dialog box, click the Replenishment System column, click the right arrow to add the column to the Filter statement WHERE clause of the filter query, and modify the WHERE clause as follows:
WHERE [Replenishment System] = 1
Click OK,

Click Next.

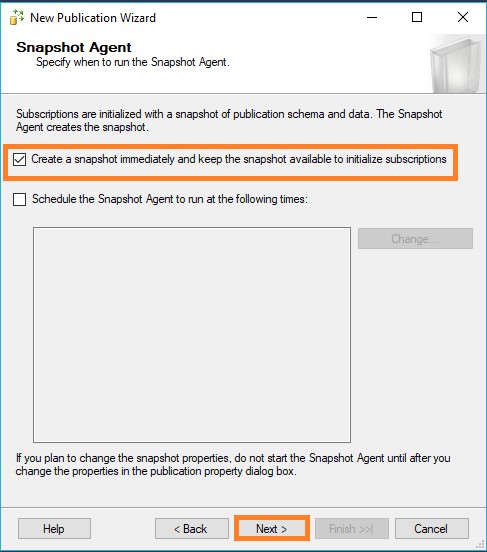
Select the Create a snapshot immediately and keep the snapshot available to initialize subscriptions check box, and click Next.
On the Agent Security page, clear Use the security settings from the Snapshot Agent check box.
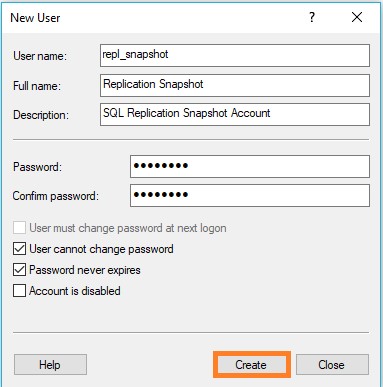
Click Security Settings for the Snapshot Agent, enter <Machine_Name>\repl_snapshot in the Process account box, supply the password for this account, and then click OK.

Repeat the previous step to set repl_logreader as the process account for the Log Reader Agent

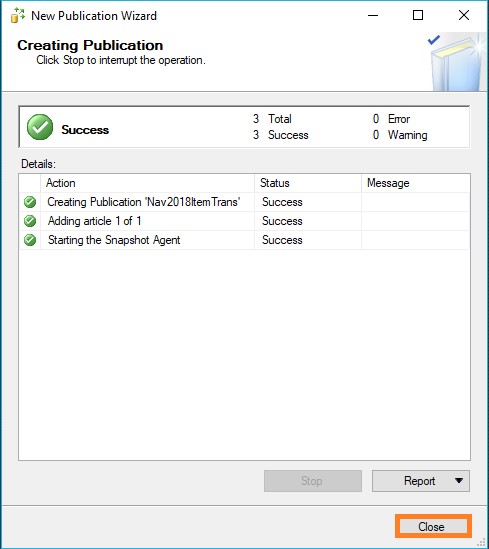
Click Finish.
On the Complete the Wizard page, type Nav2018ItemTrans in the Publication name box, and click Finish.

After the publication is created, click Close to complete the wizard.
To view the status of snapshot generation
- Connect to the Publisher in SQL Server Management Studio, expand the server node, and then expand the Replication folder.
In the Local Publications folder, right-click Nav2018ItemTrans, and then click View Snapshot Agent Status.
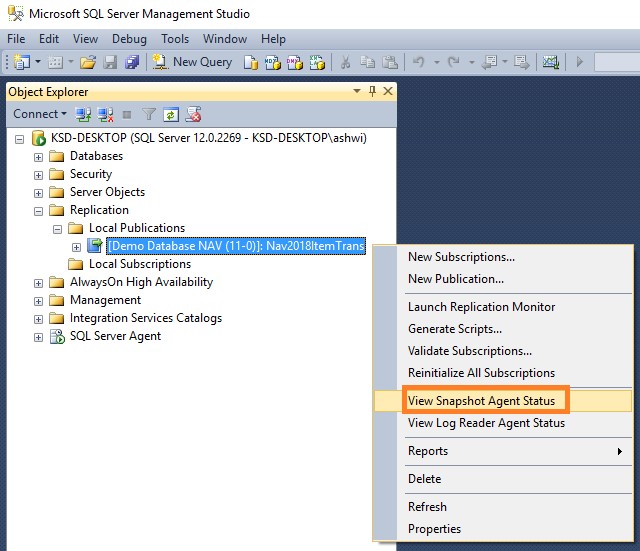
The current status of the Snapshot Agent job for the publication is displayed. Verify that the snapshot job has succeeded.

To add the Distribution Agent login to the PAL
- Connect to the Publisher in SQL Server Management Studio, expand the server node, and then expand the Replication folder.
- In the Local Publications folder, right-click Nav2018ItemTrans, and then click Properties.
- The Publication Properties dialog box is displayed.
- Select the Publication Access List page, and click Add.
In the Add Publication Access dialog box, select <Machine_Name>\repl_distribution and click OK. Click OK.

We will discuss Next step in our upcoming post.
Database Replication – Part III
This post is in continuation to my earlier post. Please check if you missed.
Database Replication – Part II
As committed in this post we will continue to cover practical approach, Next step from last post.
Configuring Distribution
We will configure distribution at the Publisher and set the required permissions on the publication and distribution databases. If you have already configured the Distributor, you must first disable publishing and distribution before you begin this process. Do not do this if you must retain an existing replication topology.
Configuring a Publisher with a remote Distributor is outside the scope of this Post.
If you have connected to SQL Server using localhost rather than the actual server name you will be prompted with a warning that SQL Server is unable to connect to server ‘localhost’. Click OK on the warning dialog. In the Connect to Server dialog change the Server name from localhost to the name of your server. Click Connect.
Configuring distribution at the Publisher
- Connect to the Publisher in SQL Server Management Studio, and then expand the server node.
- Right-click the Replication folder and click Configure Distribution.

- The Distribution Configuration Wizard launches.
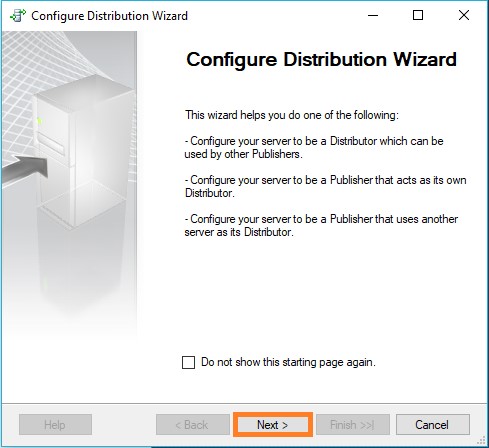
- On the Distributor page, select ‘ServerName’ will act as its own Distributor; SQL Server will create a distribution database and log, and then click **Next.

- If the SQL Server is not running, on the SQL ServerAgent Start page, select Yes, configure the SQL Server Agent service to start automatically. Click Next.
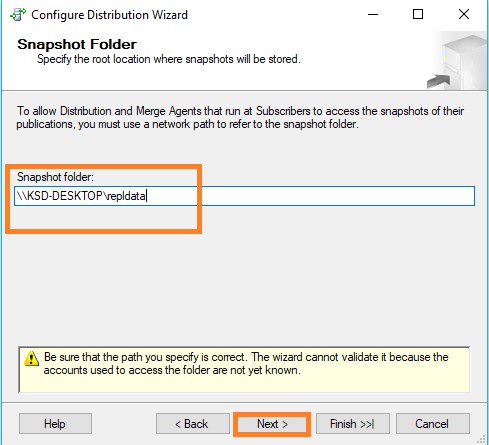
- Enter \\<Machine_Name>\repldata in the Snapshot folder text box, where <Machine_Name> is the name of the Publisher, and then click Next.
- Accept the default values on the remaining pages of the wizard.
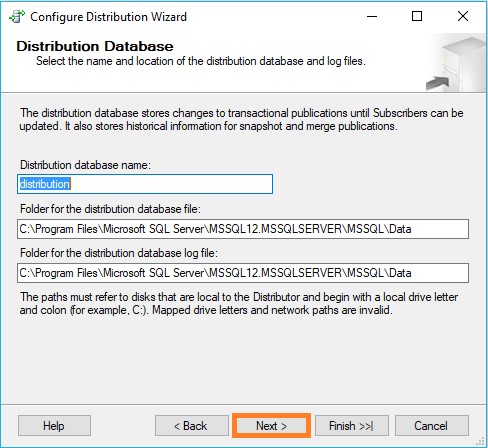
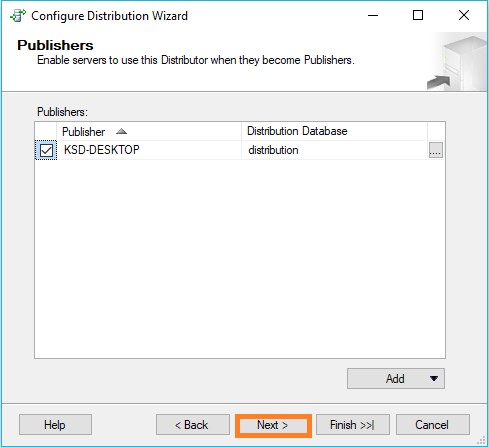
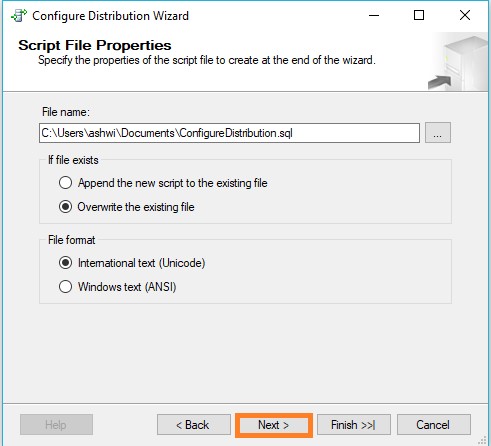
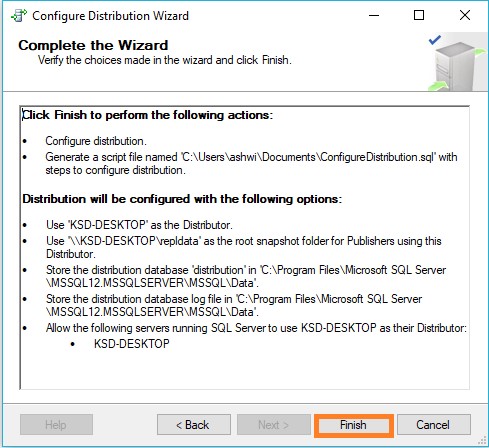
- Click Finish to enable distribution.

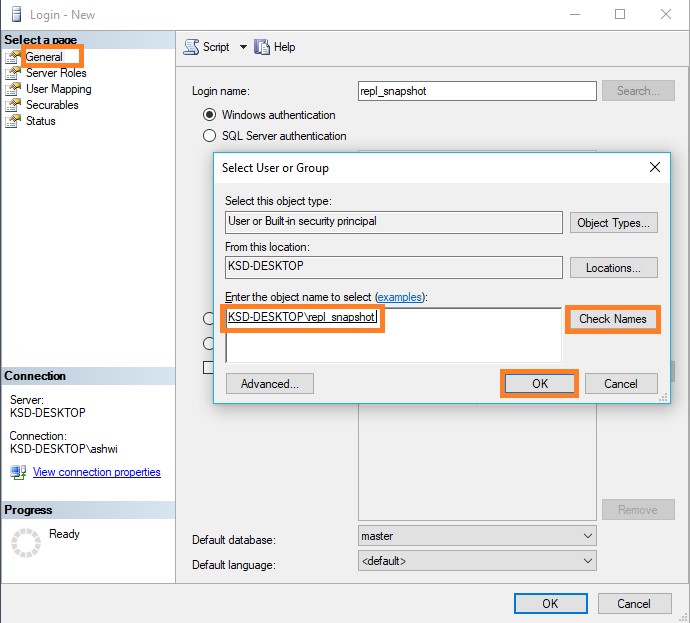
Setting database permissions at the Publisher
- In SQL Server Management Studio, expand Security, right-click Logins, and then select New Login.

- On the General page, click Search, enter <Machine_Name>\repl_snapshot in the Enter the object name to select box, where <Machine_Name> is the name of the local Publisher server, click Check Names, and then click OK.
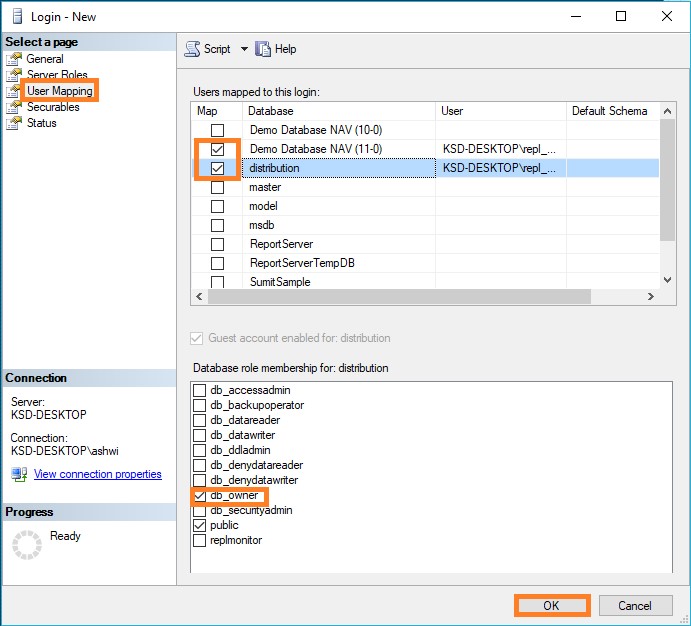
- On the User Mapping page, in the Users mapped to this login list select both the distribution and required database (in my case Nav 2018 database).
- In the Database role membership list select the db_owner role for the login for both databases.
- Click OK to create the login.
- Repeat steps 1-4 to create a login for the local repl_logreader account. This login must also be mapped to users that are members of the db_owner fixed database role in the distribution and required databases.
- Repeat steps 1-4 to create a login for the local repl_distribution account. This login must be mapped to a user that is a member of the db_owner fixed database role in the distribution database.
- Repeat steps 1-4 to create a login for the local repl_merge account. This login must have user mappings in the distribution and required databases.

Here we complete configuring our Distribution at Publisher.
We will see next step in our next post.
Database Replication – Part II
This post is in continuation to my earlier post. Please check if you missed.
As committed in this post we will cover practical approach.
Creating Windows Accounts for Replication
We will create a separate Windows account on the local server for the following agents:
| Agent | Location | Account name |
| Snapshot Agent | Publisher | <machine_name>\repl_snapshot |
| Log Reader Agent | Publisher | <machine_name>\repl_logreader |
| Distribution Agent | Publisher and Subscriber | <machine_name>\repl_distribution |
| Merge Agent | Publisher and Subscriber | <machine_name>\repl_merge |
In my case the Publisher and Distributor share the same instance of SQL Server. The Publisher and Subscriber may share the same instance of SQL Server, but it is not a requirement. If the Publisher and Subscriber share the same instance, the steps that are used to create accounts at the Subscriber are not required.
To create local Windows accounts for replication agents at the Publisher
- At the Publisher, open Computer Management from Administrative Tools in Control Panel.
- In System Tools, expand Local Users and Groups.
- Right-click Users and then click New User.

- Enter repl_snapshot in the User name box, provide the password and other relevant information, and then click Create to create the repl_snapshot account.
- Repeat the previous step to create the repl_logreader, repl_distribution, and repl_merge accounts.


- Click Close.

To create local Windows accounts for replication agents at the Subscriber
If using different computer, else this step can be skipped.
- At the Subscriber, open Computer Management from Administrative Tools in Control Panel.
- In System Tools, expand Local Users and Groups.
- Right-click Users and then click New User.
- Enter repl_distribution in the User name box, provide the password and other relevant information, and then click Create to create the repl_distribution account.
- Repeat the previous step to create the repl_merge account.
- Click Close.
Preparing the Snapshot Folder
To create a share for the snapshot folder and assign permissions
- In Windows Explorer, navigate to the SQL Server data folder. The default location is C:\Program Files\Microsoft SQL Server\MSSQL.X\MSSQL\Data.
- In my case I am using SQL Replication folder on C: drive
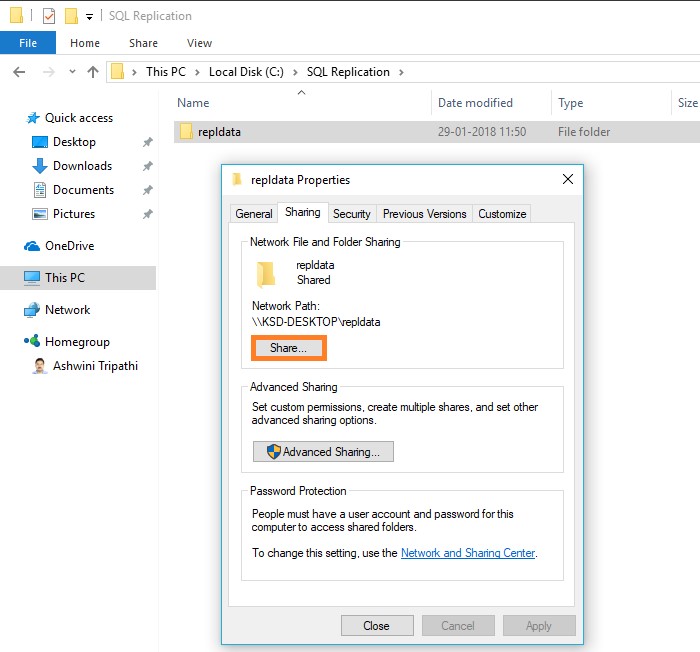
- Create a new folder named repldata.
- Right-click this folder and click Properties.
- On the Sharing tab in the repldata Properties dialog box, click Share.
- In the File Sharing dialog box, click Share, and then click Done.
- On the Security tab, click Edit.
- In the Permissions dialog box, click Add. In the Select User, Computers, Service Account, or Groups text box, type the name of the Snapshot Agent account created in previous step above, as <Machine_Name>\repl_snapshot, where <Machine_Name> is the name of the Publisher. Click Check Names, and then click OK.

- Repeat the previous step to add permissions for the Distribution Agent, as <Machine_Name>\repl_distribution, and for the Merge Agent as <Machine_Name>\repl_merge.
- Verify the following permissions are allowed:
repl_snapshot – Full Control
repl_distribution – Read
repl_merge – Read

- Click OK to close the repldata Properties dialog box and create the repldata share.
Today we have covered initial setup required to start with SQL Database Replication.
We will continue with next step in our next post.
Database Replication – Part I
One of my reader had requested to write post on this topic. I have gone through some posts and prepared a step by step process to demonstrate how we can configure Database Replication in SQL.
I will be covering the topic in couple of posts, this is first post in this series.
Today I will be covering basic theory behind the topic and then move to practical approach in my next post.
Brief extract of Topic
Database replication can be done in at least four different ways:
- Snapshot replication: Data on one server is simply copied to another server, or to another database on the same server.
- Merging replication: Data from two or more databases is combined into a single database.
- Transactional replication: Users receive full initial copies of the database and then receive periodic updates as data changes.
- Peer-to-Peer publication: Peer-Peer publication enables multi-master replication. The publisher streams transactions to all the peers in the topology. All peer nodes can read and write changes and the changes are propagated to all the nodes in the topology.
A distributed database management system ensures that changes, additions, and deletions performed on the data at any given location are automatically reflected in the data stored at all the other locations. Therefore, every user always sees data that is consistent with the data seen by all the other users.
REPLICATION ENTITIES
SQL Server replication is based on the “Publish and Subscribe” metaphor. Let us look at each of the individual components in detail.
Publisher
- It is a source database where replication starts. It makes data available for replication.
- Publishers define what they publish through a publication.
Article
- Articles are the actual database objects included in replication like tables, views, indexes, etc.
- An article can be filtered when sent to the subscriber.
Publication
- A group of articles is called publication.
- An article can’t be distributed individually. Hence publication is required.
Distributor
- It is intermediary between publisher and subscriber.
- It receives published transactions or snapshots and then stores and forwards these publications to the subscriber.
- It has 6 system databases including distribution.
Subscriber
- It is the destination database where replication ends.
- It can subscribe to multiple publications from multiple publishers.
- It can send data back to publisher or publish data to other subscribers.
Subscription
- It is a request by a subscriber to receive a publication.
- We have two types of subscriptions – push and pull.
Push Subscriptions
- With this subscription, the publisher is responsible for updating all the changes to the subscriber without the subscriber asking those changes.
- Push subscriptions are created at the Publisher server.
Pull Subscriptions –
- With this subscription the subscriber initiates the replication instead of the publisher.
- The subscriptions are created at the Subscriber server.
Detailed Description on Types of Replication
Snapshot Replication
Snapshot replication simply takes a “snapshot” of the data on one server and moves that data to another server (or another database on the same server). After the initial synchronization snapshot, replication can refresh data in published tables periodically—based on the schedule you specify. Although snapshot replication is the easiest type to set up and maintain, it requires copying all data each time a table is refreshed.
Between scheduled refreshes, data on the publisher might be very different from the data on subscriber. In short, snapshot replication isn’t very different from emptying out the destination table(s) and using a DTS package to import data from the source.
Transactional Replication
Transactional replication involves copying data from the publisher to the subscriber(s) once and then delivering transactions to the subscriber(s) as they occur on the publisher. The initial copy of the data is transported by using the same mechanism as with snapshot replication: SQL Server takes a snapshot of data on the publisher and moves it to the subscriber(s). As database users insert, update, or delete records on the publisher, transactions are forwarded to the subscriber(s).
To make sure that SQL Server synchronizes your transactions as quickly as possible, you can make a simple configuration change: Tell it to deliver transactions continuously. Alternatively, you can run synchronization tasks periodically. Transactional replication is most useful in environments that have a dependable dedicated network line between database servers participating in replication. Typically, database servers subscribing to transactional publications do not modify data; they use data strictly for read-only purposes. However, SQL Server does support transactional replication that allows data changes on subscribers as well.
Merge Replication
Merge replication combines data from multiple sources into a single central database. Much like transactional replication, merge replication uses initial synchronization by taking the snapshot of data on the publisher and moving it to subscribers. Unlike transactional replication, merge replication allows changes of the same data on publishers and subscribers, even when subscribers are not connected to the network. When subscribers connect to the network, replication will detect and combine changes from all subscribers and change data on the publisher accordingly. Merge replication is useful when you have a need to modify data on remote computers and when subscribers are not guaranteed to have a continuous connection to the network.
REPLICATION AGENTS
Replication process works in the background with the help of jobs.
These jobs are also called as agents. These jobs internally uses respective .exe files present in …………….. \110\COM folder.
All the agents’ information is present in Distribution db in the following tables.
dbo.MSxxx_agents
dbo.MSxxx_history
Snapshot Agent
- It is an executable file that prepares snapshot files containing schema and data of published tables and db objects.
- It stores the files in the snapshot folder, and records synchronization jobs in the distribution database.
Distribution Agent
- It is used with snapshot and transactional replication.
- It applies the initial snapshot to the Subscriber and moves transactions held in the Distribution db to Subscribers.
- It runs at either the Distributor for push subscriptions or at the Subscriber for pull subscriptions.
Log Reader Agent
- It is used with transactional replication, which moves transactions marked for replication from the transaction log on the publisher to the distribution db.
- Each db has its own Log Reader Agent that runs on the Distributor and connects to the Publisher.
Merge Agent
- It is used with merge replication.
- It applies the initial snapshot to the Subscriber and moves incremental data changes that occur.
- Each merge subscription has its own Merge Agent that connects to both the Publisher and the Subscriber and updates both.
- It captures changes using triggers.
Queue Reader Agent
- It is used with transactional replication with the queued updating option.
- It runs at the Distributor and moves changes made at the Subscriber back to the Publisher.
- Unlike Distribution Agent and Merge Agent, only one instance of the Queue Reader Agent exists to service all Publishers and publications for a given distribution db.
We will continue on same topic in my next post.

You must be logged in to post a comment.