
This post is in continuation to my earlier post. Please check if you missed.
As committed in this post we will cover practical approach.
Creating Windows Accounts for Replication
We will create a separate Windows account on the local server for the following agents:
| Agent | Location | Account name |
| Snapshot Agent | Publisher | <machine_name>\repl_snapshot |
| Log Reader Agent | Publisher | <machine_name>\repl_logreader |
| Distribution Agent | Publisher and Subscriber | <machine_name>\repl_distribution |
| Merge Agent | Publisher and Subscriber | <machine_name>\repl_merge |
In my case the Publisher and Distributor share the same instance of SQL Server. The Publisher and Subscriber may share the same instance of SQL Server, but it is not a requirement. If the Publisher and Subscriber share the same instance, the steps that are used to create accounts at the Subscriber are not required.
To create local Windows accounts for replication agents at the Publisher
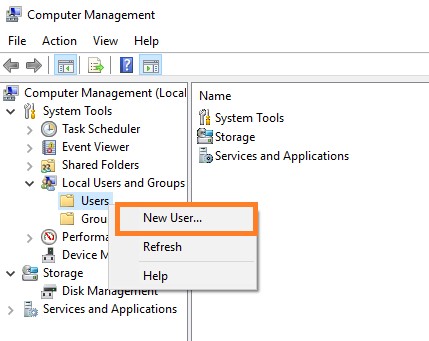
- At the Publisher, open Computer Management from Administrative Tools in Control Panel.
- In System Tools, expand Local Users and Groups.
- Right-click Users and then click New User.
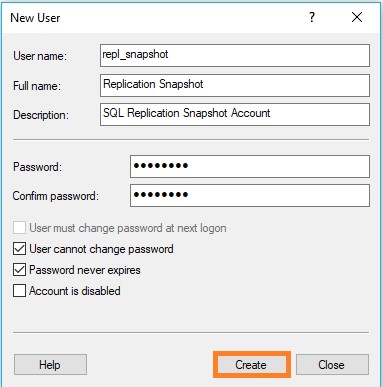
- Enter repl_snapshot in the User name box, provide the password and other relevant information, and then click Create to create the repl_snapshot account.
- Repeat the previous step to create the repl_logreader, repl_distribution, and repl_merge accounts.


- Click Close.

To create local Windows accounts for replication agents at the Subscriber
If using different computer, else this step can be skipped.
- At the Subscriber, open Computer Management from Administrative Tools in Control Panel.
- In System Tools, expand Local Users and Groups.
- Right-click Users and then click New User.
- Enter repl_distribution in the User name box, provide the password and other relevant information, and then click Create to create the repl_distribution account.
- Repeat the previous step to create the repl_merge account.
- Click Close.
Preparing the Snapshot Folder
To create a share for the snapshot folder and assign permissions
- In Windows Explorer, navigate to the SQL Server data folder. The default location is C:\Program Files\Microsoft SQL Server\MSSQL.X\MSSQL\Data.
- In my case I am using SQL Replication folder on C: drive
- Create a new folder named repldata.
- Right-click this folder and click Properties.
- On the Sharing tab in the repldata Properties dialog box, click Share.
- In the File Sharing dialog box, click Share, and then click Done.

- On the Security tab, click Edit.
- In the Permissions dialog box, click Add. In the Select User, Computers, Service Account, or Groups text box, type the name of the Snapshot Agent account created in previous step above, as <Machine_Name>\repl_snapshot, where <Machine_Name> is the name of the Publisher. Click Check Names, and then click OK.
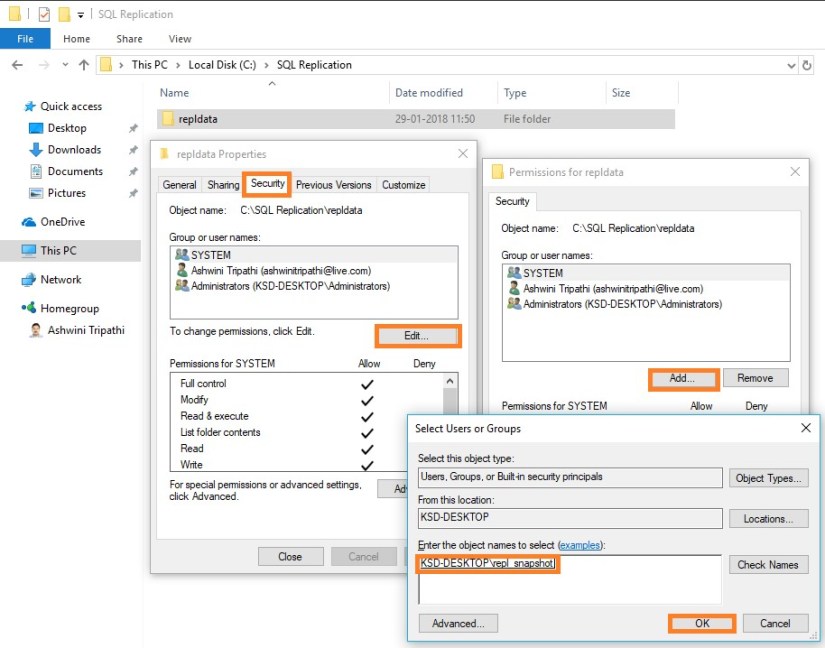
- Repeat the previous step to add permissions for the Distribution Agent, as <Machine_Name>\repl_distribution, and for the Merge Agent as <Machine_Name>\repl_merge.
- Verify the following permissions are allowed:
repl_snapshot – Full Control
repl_distribution – Read
repl_merge – Read

- Click OK to close the repldata Properties dialog box and create the repldata share.
Today we have covered initial setup required to start with SQL Database Replication.
We will continue with next step in our next post.


You must be logged in to post a comment.