
Today we will set up an environment to test integrating certificates into a configuration for connecting computers running the Microsoft Dynamics NAV Windows client or Microsoft Dynamics NAV Web Server components to Microsoft Dynamics NAV Server instances over a wide area network (WAN) with the chain trust configuration.
What all we need to get our today’s exercise done?
To complete this process, we will need:
- The Certificates snap-in for Microsoft Management Console (MMC). If you do not already have this snap-in installed, then follow these steps:
- Choose Start, choose Run, and then type Mmc.exe.
- In the console, on the File menu, choose Add/Remove Snap-in.

- In the Add Standalone Snap-in dialog box, select Certificates, choose Computer Account, choose Local Computer, and then choose Add.


- The makecert.exe utility. The makecert.exe utility is installed with Microsoft Visual Studio and Microsoft Windows SDK.
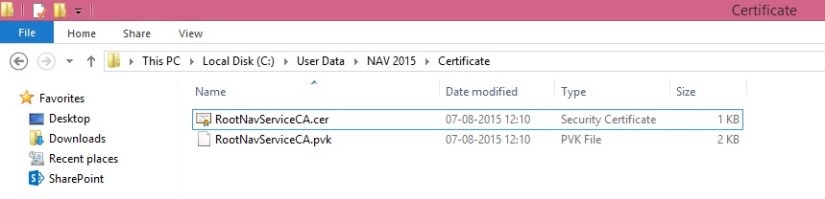
We created and installed a root certification authority (CA) and a server certificate on the computer running Microsoft Dynamics NAV Server in previous posts.
If not please follow below posts and then return here to continue.
Previous Step Link- How to create a root CA and a private key file by using the makecert.exe utility
Previous Step Link- How to create certificate revocation list for the root certification authority
Previous Step Link- How to create and install a test certificate for the Microsoft Dynamics NAV Server computer
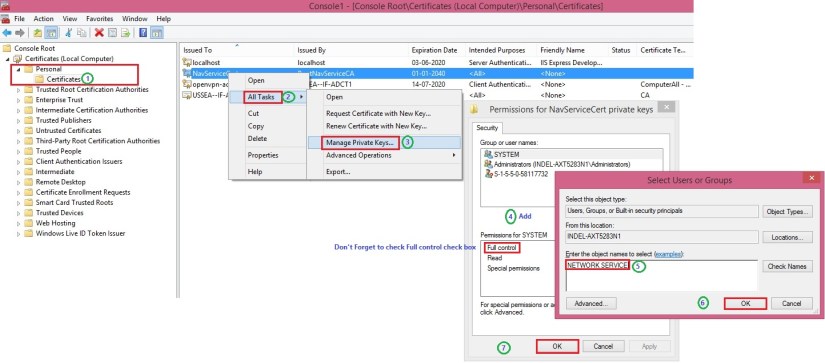
Previous Step Link- How to grant access to the certificate’s private key to the service account for the Microsoft Dynamics NAV Server
How to modify the Microsoft Dynamics NAV Server configuration file to support login over a WAN
- Start the Microsoft Dynamics NAV Server Administration tool.
- Stop the Microsoft Dynamics NAV Server instance.
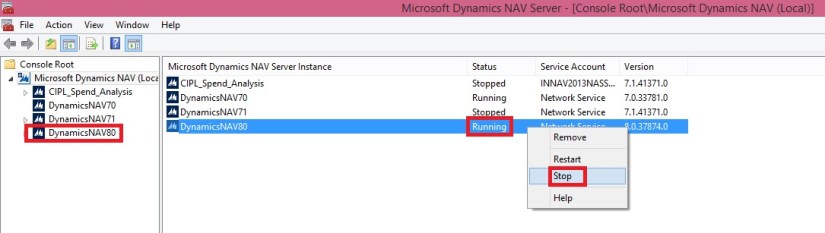
- Modify the following settings for the Microsoft Dynamics NAV Server instance in the Microsoft Dynamics NAV Server Administration tool.
| Key | New value | Description |
| ClientServicesCredentialType(General tab) | NavUserPassword or Username | This parameter is on the General tab in the Microsoft Dynamics NAV Server Administration tool. The default value is Windows. When you change it to NavUserPassword or Username, client users who connect to the server are prompted for user name and password credentials. |
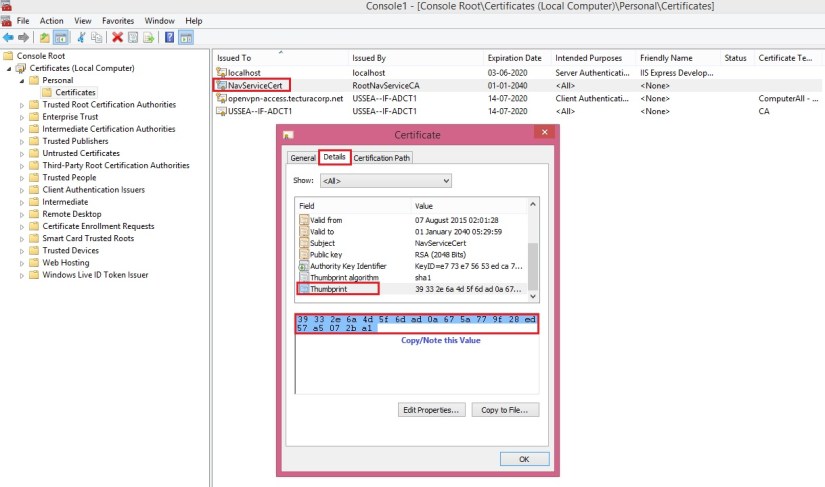
| CertificateThumbprint(Client Services tab) | Value of the Thumbprint field in the previous post | The default value is <key>. Remove any leading or trailing spaces in the thumbprint. |
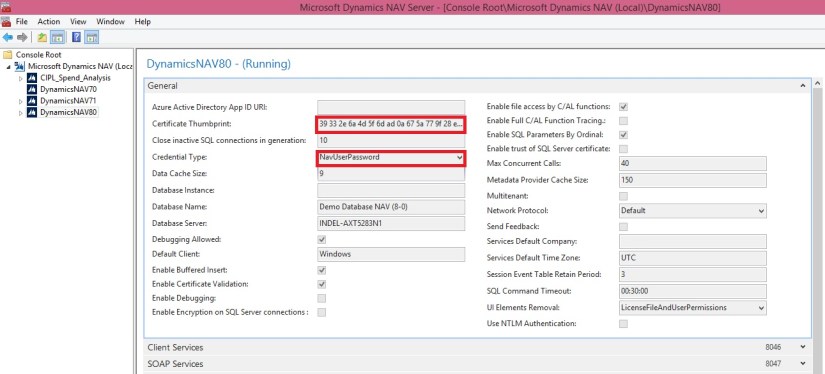
- Choose Save.
- Restart the Microsoft Dynamics NAV Server instance.
To modify the Microsoft Dynamics NAV Windows client configuration file to add certificate information
- Open the ClientUserSettings.config configuration file.
The location of this file is Users\<username>\AppData\Roaming\Microsoft\Microsoft Dynamics NAV.
By default, this file is hidden. Therefore, you may have to change your folder options in Windows Explorer to view hidden files.

- Modify the following settings.
| Key | New value | Description |
| ClientServicesCredentialType | NavUserPassword or Username | The default value is Windows. When you change it to NavUserPassword or Username, client users who connect to the server are prompted for user name and password credentials |
| DnsIdentity | The subject name of the service certificate | The default value is <identity>.For this exercise, set the key to NavServiceCert. |

I am using NavUserPassword as credential Type in this example.
- Save and close the ClientUserSettings.config file.
When you start the client, you are prompted for a valid user name and password for the server domain.

Enter your User Name and Password to Login, I have created one for my testing as below:

To modify the Microsoft Dynamics NAV Web client configuration file to add certificate information
- On the computer that is installed the Microsoft Dynamics NAV Web Server components, open the installation folder for the Microsoft Dynamics NAV Web client. By default, the folder is C:\Program Files\Microsoft Dynamics NAV\80\Web Client.
- Open the web.config file in a text editor, such as Notepad.
- Find the <DynamicsNavSettings> element, and then change the following settings:
| Key | New value | Description |
| ClientServicesCredentialType | NavUserPassword or Username | The default value is Windows. When you change it to NavUserPassword or Username, client users who connect to the server are prompted for user name and password credentials. |
| DnsIdentity | The subject name of the service certificate | For this exercise, set the key to NavServiceCert. |
- Save the web.config file.
This too works as above, credentials will be asked when you open WebClient.
While writing this post I am not having Web Client installed on my computer so unable include screen shots for same.


You must be logged in to post a comment.