Corfu Navision 2016, Functional Tips, How To, Information, Tip & Tricks

Create Production Orders for/from Sales Order

One of my reader have requested to demonstrate how he can create Sales Order which is directly associated with Sales Order.

Let us start with creating a Sales Order:

ProdOrder-1

Here you can see we don’t have Available Inventory to fulfil the demand of this Order.

ProdOrder-2

To fulfil the demand we will create Production Order for this Order.

Select Planning from Action TAB on Ribbon.

Sales Order Planning Window Opens, Select Create Production Order.

ProdOrder-3

Select the Status for Production Order as desired.

For Order Type you have 2 Options

  1. Item Order – Production Order is created for each Item on Lines
  2. Project Order – Single Production order for Entire Order

Select the desired option and respond to Yes.

ProdOrder-4

I have Selected Released & Project Order in my case.

ProdOrder-5

You can check that Quantity to be produced is reserved for this Order.

There could be the situation where you may have few Inventory available, in that case you need to reserve the quantity from Function before creating Production Order else all quantity will be created. In other case only short quantity will be a quantity of Production Order.

ProdOrder-6

Select the line from available lines in Item Ledger Entries (e.g. on hand inventory) and by using the ‘Reserve from Current Line’ function you can reserve those against the sales order line.  The ‘Reserved Quantity’ then gets updated and you can see the rest in the ‘Unreserved Quantity’ field.

ProdOrder-7

Although in this case entire line is already reserved from the Production Order.

But in case you want to reserve from any available Inventory in hand from Ledger entry.

This was one of the way how you can perform Creating Production Order and Reserving for Sales Order.

We can do the same by another way as below, directly creating Production Order for this Sales Order.

ProdOrder-8

Create a Production Order Select Source Type as Sales Header and Source No as Sales Order No.

Then Refresh the Production Order.

ProdOrder-9


ProdOrder-10


This way we can create and Reserve the Item for required demand.

I will come with more details in my upcoming posts.


Corfu Navision 2016, Demand, Development Tips, Functional Tips, How To, Information, Inventory, MPS, MRP, Tip & Tricks

Basics of Demand, Forecast, MPS & MRP

What is MPS?

MPS term is used for Master Production Schedule. It is used to plan items which have direct demand. Like Sales Order, Service Orders and Forecasts. It is run Weekly based on Orders and forecasts for that period.

What is MRP?

MRP term is used for Material Requirements Planning. It is used to plan items which have dependent demand. Like sub items used to produce FG or are defined in BOM. It is run Daily to expedit parts required to produce the plan.

What is Forecast?

Forecasting allows your company to create “what if” scenarios and efficiently and cost-effectively plan for and meet demand. Accurate forecasting can make a critical difference in customer satisfaction levels with regard to order promising dates and on-time delivery.

The forecasting functionality in the program can be used to create sales or production forecasts, in combination or independently.

What is Demand?

Calculation is done order-by-order, meaning that the order that includes the demand line with the earliest due date or shipment date is considered first, and all other demand lines in that production order, irrespective of their individual due dates or shipment dates, are also calculated for that order. When the calculation is completed, all unfulfilled demand is displayed as planning lines, sorted by the earliest demand date, with the various quantity fields filled in.

Actual demand is calculated from Sales Order, Service Orders, Components Needed, Job Planning Lines.

This demand is compared with the Forcasted demands like defined in Production Forecast.

Regenerative Plan is calculated as per Period, MPS, MRP and other provided parameters.

Lets understand this via a simple Example:

Step-1

Define Forecast for Item A as requirement of 1000 Qty for Jan Month.

Step -2

Run the Regenerative Plan, you will get the Planning for Item A with due date as 1st Jan of 1000 Qty.

Let us see what happens under different demand levels.

Scenario-1

When demand is less than Forecast for the month.

Let us Make a Sales Order for 200 Qty of Item A.

Lets see the impact of this on our Plan.

Sales demand is for 200 Qty

Forecast demand will be for 800 Qty (1000 – 200)

Actual demand in this case is of 200 Qty

If we run our Plan 2 lines will be created as below

a) 200 Qty with due date equivalent to Sales Order date

b) 800 Qty with due date as 1st Jan from Forecast

If we see our Total demand is still 1000 Qty

Scenario-2

When demand is equal to Forecast for the month.

Let us Make a Sales Order for 1000 Qty of Item A.

Lets see the impact of this on our Plan.

Sales demand is for 1000 Qty

Forecast demand will be for 0 Qty (1000 – 1000)

Actual demand in this case is of 1000 Qty

If we run our Plan 1 line will be created as below

a) 1000 Qty with due date equivalent to Sales Order date

If we see our Total demand is still 1000 Qty

Scenario-3

When demand is greater than Forecast for the month.

Let us Make a Sales Order for 1500 Qty of Item A.

Lets see the impact of this on our Plan.

Sales demand is for 1500 Qty

Forecast demand will be for 0 Qty

Actual demand in this case is of 1500 Qty

If we run our Plan 1 line will be created as below

a) 1500 Qty with due date equivalent to Sales Order date

If we see our Total demand is now 1500 Qty

Will comeup with more details in my upcomming posts.

Corfu Navision 2016, Development Tips, How To, Information, Inventory, Tip & Tricks

How Inventory is Calculated in Navision 2016

Today we will see terms used for Inventory and how Inventory is calculated in Navision.

InvProj-1

You can find details of Inventory on Item Card itself. Also how much Inventory is available or required at different area in ERP.

InvProj-2

If you open Item Availability by Location you will find in more details. When you drilldown you can find in more details from where these figure comes from.

Scheduled Receipts:

Here all the entries from below area is included:

a) Purchase Orders

b) Transfer Orders

c) Firm Planned Production Order

d) Release Production Order

e) Assembly Orders

How Navision calculates?

AvailType::”Scheduled Order Receipt”:
BEGIN
InsertEntry(DATABASE::”Purchase Line“,Item.FIELDNO(“Qty. on Purch. Order”),PurchLine.TABLECAPTION,Item.”Qty. on Purch. Order“);
InsertEntry(DATABASE::”Prod. Order Line“,Item.FIELDNO(“FP Order Receipt (Qty.)”),STRSUBSTNO(Text002,ProdOrderLine.TABLECAPTION),Item.”FP Order Receipt (Qty.)“);
InsertEntry(DATABASE::”Prod. Order Line“,Item.FIELDNO(“Rel. Order Receipt (Qty.)”),STRSUBSTNO(Text003,ProdOrderLine.TABLECAPTION),Item.”Rel. Order Receipt (Qty.)“);
InsertEntry(DATABASE::”Transfer Line“,Item.FIELDNO(“Qty. in Transit”),Item.FIELDCAPTION(“Qty. in Transit”),Item.”Qty. in Transit“);
InsertEntry(DATABASE::”Transfer Line“,Item.FIELDNO(“Trans. Ord. Receipt (Qty.)”),Item.FIELDCAPTION(“Trans. Ord. Receipt (Qty.)”),Item.”Trans. Ord. Receipt (Qty.)“);
InsertEntry(DATABASE::”Sales Line“,0,SalesLine.TABLECAPTION,Item.”Qty. on Sales Return“);
InsertEntry(DATABASE::”Assembly Header“,Item.FIELDNO(“Qty. on Assembly Order”),AssemblyHeader.TABLECAPTION,Item.”Qty. on Assembly Order“);
END;

Planned Receipts:

Here all the entries from below area is included:

a) Planned Production Order

b) Planning Worksheet

c) Requisition Worksheet

How Navision calculates?

AvailType::”Planned Order Receipt”:
BEGIN
InsertEntry(DATABASE::”Requisition Line“,Item.FIELDNO(“Purch. Req. Receipt (Qty.)”),ReqLine.TABLECAPTION,Item.”Purch. Req. Receipt (Qty.)“);
InsertEntry(DATABASE::”Prod. Order Line“,Item.FIELDNO(“Planned Order Receipt (Qty.)”),STRSUBSTNO(Text000,ProdOrderLine.TABLECAPTION),Item.”Planned Order Receipt (Qty.)“);
END;

Gross Requirement:

Here all the entries from below area is included:

a) Sales Order

b) Transfer Order

c) Firm Planned Production Order Components

d) Released Production Order Components

e) Job Planning Lines

f) Service Orders

g) Assembly Orders Components

How Navision calculates?

AvailType::”Gross Requirement”:
BEGIN
InsertEntry(DATABASE::”Sales Line“,Item.FIELDNO(“Qty. on Sales Order”),SalesLine.TABLECAPTION,Item.”Qty. on Sales Order“);
InsertEntry(DATABASE::”Service Line“,Item.FIELDNO(“Qty. on Service Order”),ServLine.TABLECAPTION,Item.”Qty. on Service Order“);
InsertEntry(DATABASE::”Job Planning Line“,Item.FIELDNO(“Qty. on Job Order”),JobPlanningLine.TABLECAPTION,Item.”Qty. on Job Order“);
InsertEntry(DATABASE::”Prod. Order Component“,Item.FIELDNO(“Scheduled Need (Qty.)”),ProdOrderComp.TABLECAPTION,Item.”Scheduled Need (Qty.)“);
InsertEntry(DATABASE::”Planning Component“,Item.FIELDNO(“Planning Issues (Qty.)”),PlanningComponent.TABLECAPTION,Item.”Planning Issues (Qty.)“);
InsertEntry(DATABASE::”Transfer Line“,Item.FIELDNO(“Trans. Ord. Shipment (Qty.)”),Item.FIELDCAPTION(“Trans. Ord. Shipment (Qty.)”),Item.”Trans. Ord. Shipment (Qty.)“);
InsertEntry(DATABASE::”Purchase Line“,0,PurchLine.TABLECAPTION,Item.”Qty. on Purch. Return“);
InsertEntry(DATABASE::”Assembly Line“,Item.FIELDNO(“Qty. on Asm. Component”),AssemblyLine.TABLECAPTION,Item.”Qty. on Asm. Component“);
END;

Planned Order Releases:

How Navision calculates?

AvailType::”Planned Order Release”:
BEGIN
InsertEntry(DATABASE::”Requisition Line“,Item.FIELDNO(“Purch. Req. Release (Qty.)”),ReqLine.TABLECAPTION,Item.”Purch. Req. Release (Qty.)“);
InsertEntry(DATABASE::”Prod. Order Line“,Item.FIELDNO(“Planned Order Release (Qty.)”),STRSUBSTNO(Text001,ProdOrderLine.TABLECAPTION),Item.”Planned Order Release (Qty.)“);
InsertEntry(DATABASE::”Requisition Line“,Item.FIELDNO(“Planning Release (Qty.)”),ReqLine.TABLECAPTION,Item.”Planning Release (Qty.)“);
END;

Finally we can calculate Projected Available Inventory as below formula:

Inventory + Scheduled Receipts + Planned Receipts – Gross Requirement

thats all for today, will come with more information in my upcomming posts.


Cumulative Updates, Tip & Tricks

Cumulative Update 8 for Microsoft Dynamics NAV 2016 released in June 2016

Cumulative Update 8 includes all application and platform hotfixes and regulatory features that have been released for Microsoft Dynamics NAV 2016.

Where to find Cumulative Update 8

You can download the cumulative update from KB 3166287 – Cumulative Update 8 for Microsoft Dynamics NAV 2016 (Build 46045).

Warning

Before you install a cumulative update in a production environment, take the following precautions:

  1. Test the cumulative update in a non-production environment.
  2. Make a backup of the system or computer where the cumulative update is to be installed.

Additional Information

For information about how to install the cumulative update, see How to Install a Microsoft Dynamics NAV 2016 Cumulative Update.

For a list of all cumulative updates for this version, see Released Cumulative Updates for Microsoft Dynamics NAV 2016.

Corfu Navision 2016, Development Tips, How To, Information, Instalation & Configuration, Server, Tip & Tricks

Multilanguage across Conflicting Text Encoding Formats

For more details please see my earlier posts:

Managing Multilanguage support in Navision Overview

How do I translate my ResX Files?

Working with Partner Translation Toolkit

To support users with translated strings across conflicting text encoding formats, you must save the translations to a text file in UTF-8 text encoding format.

This converts the file to Unicode, which Microsoft Dynamics NAV Development Environment cannot import. Instead, you add the files to a dedicated Translations folder on the Microsoft Dynamics NAV Server computer.

The default location of this folder is

C:\Program Files\Microsoft Dynamics NAV\90\Service\Translations.

When you have more than one service instance, there is a Translations folder for each service instance, such as

C:\Program Files\Microsoft Dynamics NAV\90\Service\Instances\MyInstance\Translations.

Microsoft Dynamics NAV Server adds any strings in text files that you place in the relevant Translations folder to the metadata for Microsoft Dynamics NAV.

To add translated strings for a conflicting text encoding format:

In the development environment, export the strings for the objects that you want to translate.

Translate-1

Select the Objects you wish to add translation, Export and save as text file.

Translate the strings in the resulting text file into desired Language by using your preferred translation process.

Translate-2

I have translated following Captions in Khmer language:

  1. For Field Name & Search Name in Table Customer (18)
  2. TextConstant in Report CustList (50000) to display Caption for Name & Search Name
  3. Caption for User defined variable in Page Customer Card (21)

When translations are complete, save the translated strings into a text file in the UTF-8 text encoding format. The extension of the file must be .txt.

It is recommend that you remove the other Language strings from the Unicode file before you copy it to the Microsoft Dynamics NAV Server computer.

Microsoft Dynamics NAV Server queries the Translations folder for updated strings, and for performance reasons the folder should only contain strings that you cannot import into the development environment because of conflicting codepages.

Copy the UTF-8 file to the equivalent of

C:\Program Files\Microsoft Dynamics NAV\90\Service\Translations

on the Microsoft Dynamics NAV Server computer.

When you have more than one service instance, there is a Translations folder for each service instance, such as

C:\Program Files\Microsoft Dynamics NAV\90\Service\Instances\MyInstance\Translations.

Restart the Microsoft Dynamics NAV Server instance.

Microsoft Dynamics NAV Server adds the translated strings in the file to the metadata store for the Microsoft Dynamics NAV deployment.

Now Users of this Microsoft Dynamics NAV Server session can now change the user interface language from English to required Language.

The metadata store is updated whenever you add new strings to the Translations folder and then restart the Microsoft Dynamics NAV Server service instance. Cached strings are not deleted from the metadata store when you restart the service instance.


Let us see the effect of this translation. Let’s run the RTC to see the net effect of same.

[A] Customer List in English However Data Stored in Khmer Language

Translate-3

B] Two Captions Changed in Khmer Language for Name & Search Name

Translate-4

[C] Customer Card in English Language. Selected Captions are changed in Khmer Language

Translate-5

[D] Caption Changed for Name & Search Name to Support Khmer Language also for Field not available in Table the Test Caption

Translate-6

[E] Report Caption in English Language however data in Khmer Language

Translate-7

[F] Report Caption Changed to Khmer Language for Name & Search Name

Translate-8

You can manage Languages using above trick for translate strings across conflicting text encoding formats.

Will comeup with more details in my upcomming posts.


Corfu Navision 2016, Development Tips, How To, Information, Instalation & Configuration, License, Server, Tip & Tricks, Virtual

Working with Partner Translation Toolkit

In my earlier post I have given the overview of Managing Multilanguage support in Navision continuing from same today I will discuss about how to create Language Module for the Languages not available from Microsoft.

Although still we will not be having direct support for all Languages but using this process you can create one.

To be very fair it will not be easy task for all Languages but for few it could help you much to get you work done with little ease.

See few helpful links which will help you getting done your task:-

Platform strings maintained in managed assemblies and fin.stx and fin.etx files

Configuring Microsoft Dynamics NAV Help Server

To work with Partner Translation Toolkit you will require below, make sure you have all before you start with using this Tool:

  1. Visual Studio
  2. WiX Toolset
  3. Microsoft Translator for ResX
  4. Azure Data Market account
  5. Microsoft Translator data service subscribed
  6. Your NAV License File
  7. Finally your efforts

Visual Studio:

If you don’t have make sure you install the latest version of the same.

WiX Toolset:

You will require the WiX Toolset to start with you can download from here. Install WiX Toolset version 3.8 or 3.9

PTT-1

Install the WiX Toolset according to the instructions. In my case it is already installed on my system so getting option for Uninstall.

Building the project you require that you have the WiX Toolset version 3.8 or 3.9 installed on the computer.

Microsoft Translator for ResX:

See my previous post for more details here.

Azure Data Market account / Microsoft Translator data service:

See my previous post for more details here.

Steps to get ready for Translation tool:

See my previous post for more details here. 

Let’s start with building our project:

Step -1:

Run the “Microsoft.MCSUK.RESXTranslator.exe” Tool

See my previous post for more details here.

Step -2:

Run the “Visual Studio” with opening project solution PartnerTranslations.sln

PTT-8

You will see all the projects discussed above is having their own folder in this solution.

Add your all the translated resx files obtained in Step-1 post Translation to respective projects.

PTT-9

Right click on the project folder and choose Add and then Existing Item.

Select the resx file which we translated in Step-1.

In my case I select “Common.Language.Lang.hi-IN.resx”

Similarly you will add these translated files to your all other projects. Be cautious few may have 2-3 files add them all.

PTT-10

The properties of the installation determine which folders are created during the installation of the language packs and what files are placed in the folders. The properties can be found in the Locals.wxi file located in the root directory of the translation kit. Open the Locals.wxi file and change the following properties:

• CountryRegionCode, to one of the country/region codes in Globals.wxi or create a new.

• ModuleLanguage, to the language of your choice.

• LocalLangFolder, to the .Net culture of the satellite assemblies.

• LocalIsoFolder, to the three letter ISO code for your language.

PTT-11

PTT-12

Step -3:

Build the project PartnerTranslations.sln

To build the PartnerTranslation solution from inside Visual Studio, choose Build Solution from the Build menu. This will pick up all translated artifacts, and create three installer files (.msi):

  • Server.msi – Located in the Server\Bin\Debug folder.
  • RTC.msi – Located in the RTC\Bin\Debug folder.
  • WebClient.msi – Located in the WebClient\Bin\Debug folder.

Step-4:

Copy your Language Module Files and install on desired Server & Client

PTT-13

Install – Add your language pack to the W1 version

If have not already done so, install the W1 version of Microsoft Dynamics NAV 2016 from the product media.

Install the new language Pack

Next, install the new language pack on the same computer. To do this, select and click each of the three .msi files listed below, one after the other. The order is not significant:

  • Server\Bin\Debug\Server.msi
  • RTC\Bin\Debug\RTC.msi
  • WebClient\Bin\Debug\WebClient.msi

Each installer quickly shows a dialog, which disappears when the installer has completed.

The language pack is now installed, but you must make some final configuration.

I will comeup with more details in my next posts.


Corfu Navision 2016, Development Tips, How To, Information, Instalation & Configuration, Tip & Tricks

How do I translate my ResX Files?

In my earlier post I have given the overview of Managing Multilanguage support in Navision continuing from same today I will discuss about how to translate the resx files for the Languages not available from Microsoft. 

Microsoft Translator for ResX:

To translate resx file you require to download Microsoft Translator for ResX you can use this link to download.

This will help you to translate your required .resx files

Azure Data Market account / Microsoft Translator data service:

You will need an Azure Data Market account, subscribe to Microsoft Translator data service and a register a developer application in order to use the tool.

You can start setting this up here: https://datamarket.azure.com/developer/applications/

Microsoft Translator is a service on the Windows Azure Marketplace that translates text between many languages. This is a billed service that comes with many different pricing plans. For example, one plan allows the translation of 2,000,000 characters per month for free.

PTT-2

Steps to get ready for Translation tool:

  1. Get an account on the Azure Data Market with your Microsoft Live ID.
  2. Login into the Azure Data Market (ADM).
  3. Subscribe to the Microsoft Translator Service
  4. Create an application on top of this service in order to use the service in the ResX Translator tool.
  5. Go the developer application registration
  6. Choose the Register button to create a new application.
  7. Enter your information and choose the Create button.

Make sure you note your Client ID and Client Secret, you will need this if you wish to Translate Resx files using Microsoft Translator Service.

If you remember I have shared the link from where you can download Translation Tool. You will require Customer/Partner Source.

Download the Translation Tool (NAV2016PartnerTranslationsToolkit) and extract the zip file.

Scan the extracted Folder here few important files which will help identifying purpose of these files:

  1. Microsoft.MCSUK.RESXTranslator.exe
  2. Microsoft.MCSUK.RESXTranslator.exe.xml
  3. NAV 2016 Creating Custom Platform Translations.pdf
  4. PartnerTranslations.sln

PTT-3

Each project contains the platform resource files (.resx) for all languages shipped by Microsoft.

The Visual Studio solution file, PartnerTranslations.sln, contains a project for each of the platform assemblies that contain translatable resources. In order to create a custom translation, you add the respective resource files with custom translations to the respective project.

Let us see the directory structure of “NAV2016PartnerTranslationsToolkit\Microsoft.Dynamics.Nav.Language” similar structure is for other projects too.

PTT-4

For detailed help you can refer to “NAV 2016 Creating Custom Platform Translations.pdf” file.

Let’s start with translating our resx files:

Run the “Microsoft.MCSUK.RESXTranslator.exe” Tool

PTT-5

Switch to Advanced Tab.

Enter the Client ID and Client Secret obtained in above step when we registered the Application.

Click on Save.

PTT-6

Switch to Single File Tab.

Browse the .resx file for source language in my case if have selected “Common.Language.Lang.en-US.resx

Translate To choose desired language available from the drop down. In my case I have selected “Hindi”.

Select the Language 3 char code in my case I have selected “hi-IN [HIN] Hindi (India)

Click on Translate Now.

Once resx file is translated you will get the summary of result, click ok to return.

Similarly you translate the rex files for each projects listed above.


PTT-7

Post this step you are ready with all of you resx file translated to desired language.


Corfu Navision 2016, Development Tips, How To, Information, Instalation & Configuration, Tip & Tricks

Managing Multilanguage support in Navision Overview

language

Microsoft Dynamics NAV is Multilanguage enabled, which means that you can display the user interface (UI) in different languages.

A Multilanguage version of Microsoft Dynamics NAV is not the same as a localized version.

  • A localized version is a version that is adapted to a local market. All text that is displayed to the user is translated into the local language, and all functional areas are adapted to the requirements of the local market.
  • A Multilanguage version is a localized version that you can run in different languages, but all local functionality remains the same.


Language Module:

To be able to run a localized version in multiple languages, you must install language modules.

Language Module contains translated text strings of Logs & error reporting for:

  • Translated strings for the UI in the Microsoft Dynamics NAV Windows client.
  • Translated strings for the database.
  • Translated strings for Microsoft Dynamics NAV Server, such as for logs and error reporting.
  • Translated strings for the Microsoft Office Outlook Add-in for Microsoft Dynamics NAV.
  • Translated strings for charts on Role Centers in the Microsoft Dynamics NAV Windows client.
  • Localized versions of the client Help.

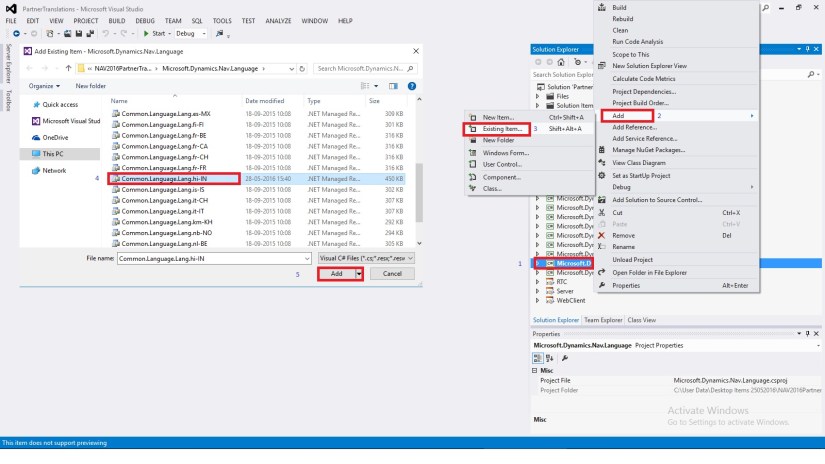
Language Modules are Binary Files which can’t be changed by any external tools for this you will require Partner Translation Tool Project and Visual Studio.

You can install language modules so that you can view text in the user interface in different languages.

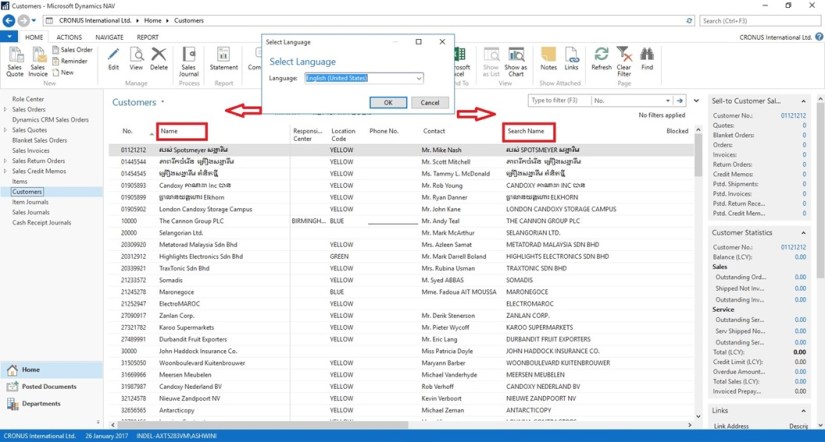
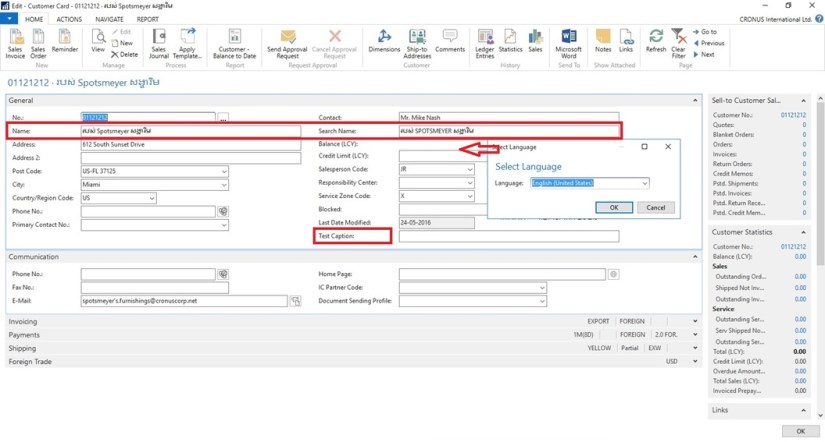
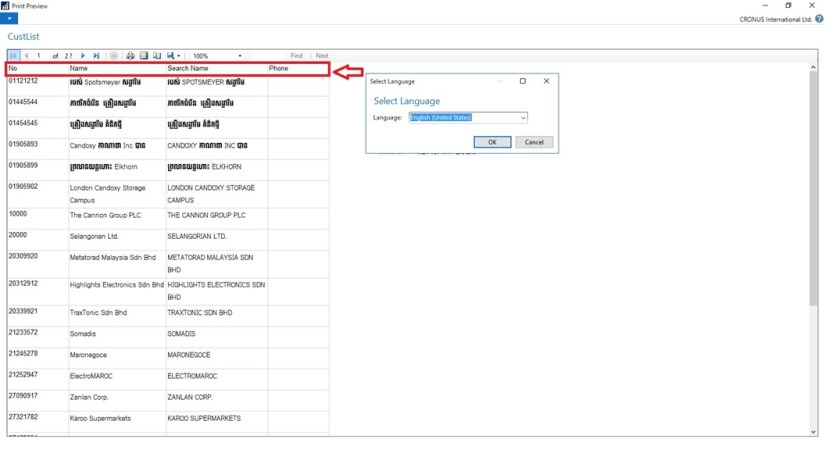
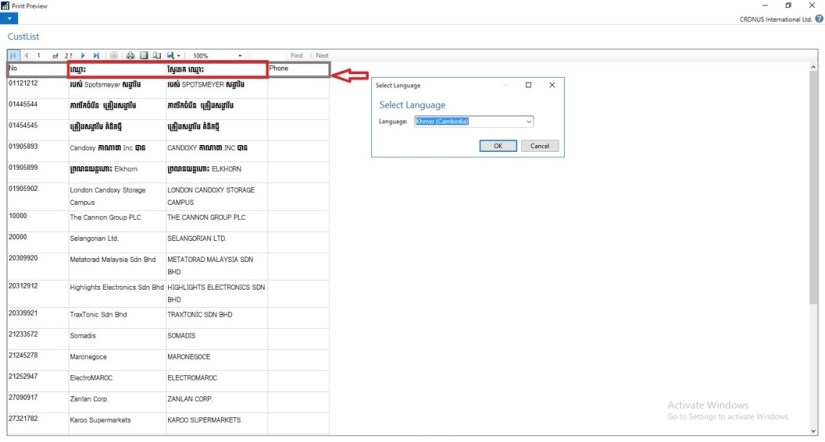
Once you have installed a language module, you can select that language on the Select Language page in the UI to change the language of all text that is displayed in the UI in captions for text boxes, on command buttons, in menus, and so on.

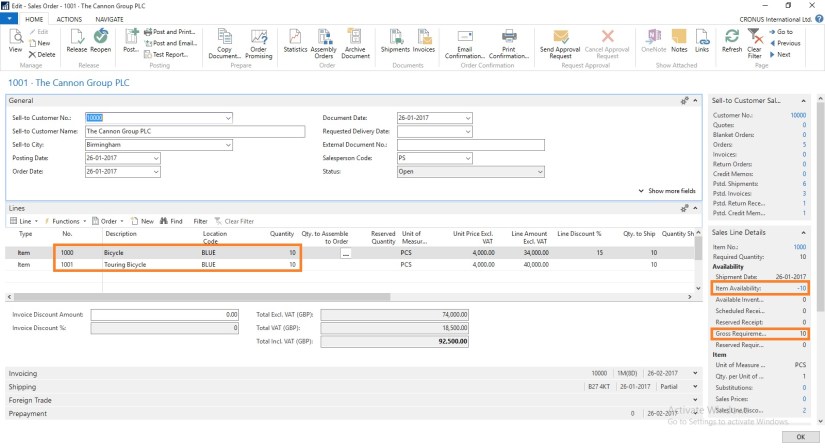
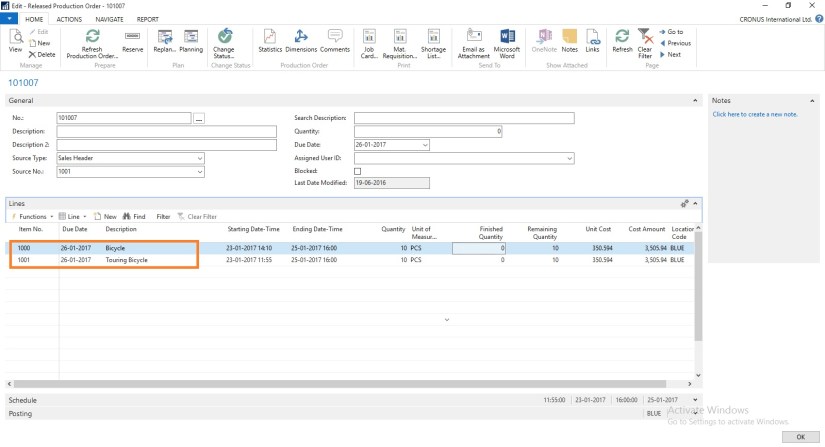
Imp: When you change the language of Microsoft Dynamics NAV, you are not changing the language of the data that is stored in Microsoft Dynamics NAV. Changing the text that is stored as application data is not part of the language modules.

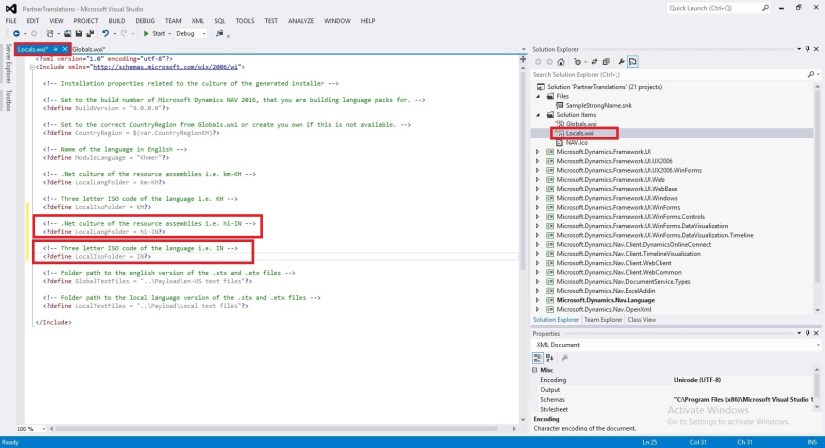
When you install a language module, a subdirectory for the language is created in the Microsoft Dynamics NAV directory structure. The .stx, .etx, .chm, and .hh files for each language are automatically installed in the subdirectory. The name of the subdirectory is the three-letter language code (Abbreviated Name) that is used by Windows for the particular language.

You can use this link to access NAV 2016 downloads for Available – Product, Translation Tool & Language Modules. https://mbs.microsoft.com/customersource/Global/NAV/downloads/product-releases/msdnav2016download


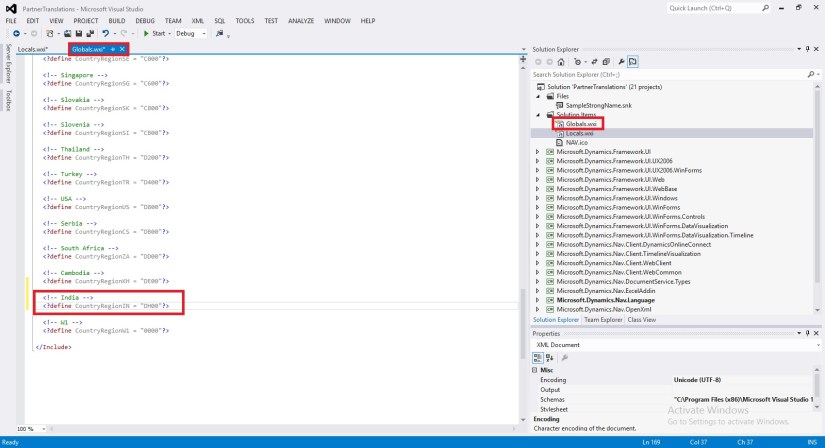
There are 3 main parts for creating translations that works in Dynamics NAV.

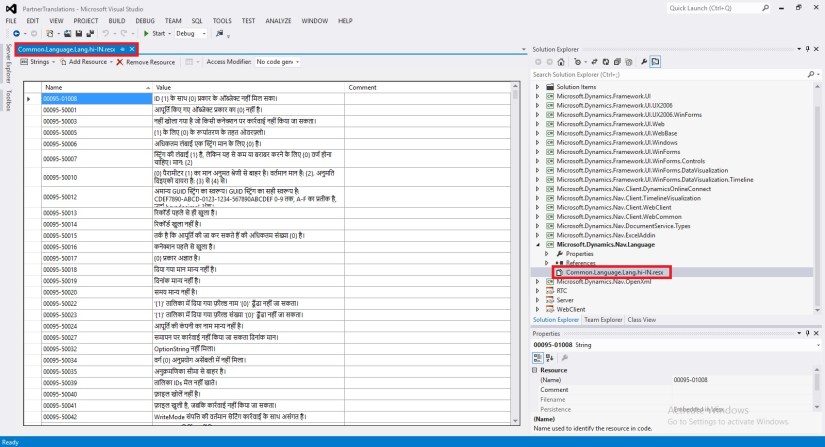
  1. Translate the platform by translating the resource file for each DLL file.
  2. Translate all the captions by adding a new language into captionML in each object
  3. Localize development environment by translating .stx and .etx files. These 2 files have to be sent to the Microsoft regional office and sealed by Microsoft. (Only required if you want the Development Environment to be in Unsupported Language as well)


Common available resources for supported/available Language Module.

To work with Language Modules what else you required to know about: You can check below links on MSDN.

  1. Windows Language Virtual Table
  2. How to: Install Language Modules
  3. How to: Add Translated Strings By Importing and Exporting Multilanguage Files
  4. How to: Add Translated Strings By Using the Multilanguage Editor
  5. How to: Uninstall Language Modules
  6. How to: Delete Translated Strings
  7. Multilanguage Development
  8. Viewing the Application in Different Languages


Translated User Interface Strings:

In Microsoft Dynamics NAV, the user interface includes the following types of translatable user interface strings:

Captions for application objects, such as pages, tables, reports, option fields, icons, menus, and so on, that are defined in the CaptionML property for an object. Text messages that are defined in the development environment, such as text constants and error messages that are defined in the C/AL Globals window or the C/AL Locals window.

Text messages and strings that are defined in Microsoft Dynamics NAV Server and Microsoft Dynamics NAV Windows client.

To add a language to the text messages that are defined in the resource files for Microsoft Dynamics NAV Server and Microsoft Dynamics NAV Windows client, special tools are required.

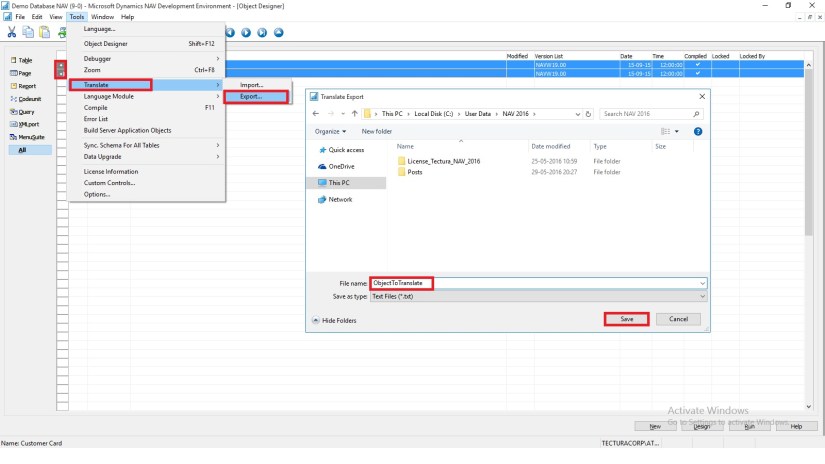
You can manage translations by using text files. In the development environment, you can export all strings for the specified objects to a text file, translate the strings in a translation tool of your choice, and then import the new translations. Then, when you compile the updated objects, the new translations are available to users in the Microsoft Dynamics NAV Windows client.


Multilanguage across Conflicting Text Encoding Formats:

To support users with translated strings across conflicting text encoding formats, you must save the translations to a text file in UTF-8 text encoding format.

This converts the file to Unicode, which Microsoft Dynamics NAV Development Environment cannot import. Instead, you add the files to a dedicated Translations folder on the Microsoft Dynamics NAV Server computer.

The default location of this folder is:

C:\Program Files\Microsoft Dynamics NAV\90\Service\Translations.

When you have more than one service instance, there is a Translations folder for each service instance, such as:

C:\Program Files\Microsoft Dynamics NAV\90\Service\Instances\MyInstance\Translations.

Microsoft Dynamics NAV Server adds any strings in text files that you place in the relevant Translations folder to the metadata for Microsoft Dynamics NAV.


To add translated strings for a conflicting text encoding format:

In the development environment, export the strings for the objects that you want to translate.

Translate the strings in the resulting text file into desired Language by using your preferred translation process.

When translations are complete, save the translated strings into a text file in the UTF-8 text encoding format. The extension of the file must be .txt.

It is recommend that you remove the other Language strings from the Unicode file before you copy it to the Microsoft Dynamics NAV Server computer.

Microsoft Dynamics NAV Server queries the Translations folder for updated strings, and for performance reasons the folder should only contain strings that you cannot import into the development environment because of conflicting codepages.

Copy the UTF-8 file to the Microsoft Dynamics NAV Server computer.

C:\Program Files\Microsoft Dynamics NAV\90\Service\Translations

When you have more than one service instance, there is a Translations folder for each service instance, such as:

C:\Program Files\Microsoft Dynamics NAV\90\Service\Instances\MyInstance\Translations.

Restart the Microsoft Dynamics NAV Server instance.

Microsoft Dynamics NAV Server adds the translated strings in the file to the metadata store for the Microsoft Dynamics NAV deployment.

Now Users of this Microsoft Dynamics NAV Server session can now change the user interface language from English to required Language.

The metadata store is updated whenever you add new strings to the Translations folder and then restart the Microsoft Dynamics NAV Server service instance. Cached strings are not deleted from the metadata store when you restart the service instance.

I will comeup with more details in my upcomming post soon.

Corfu Navision 2016, Cumulative Updates, How To, Information, Instalation & Configuration, Tip & Tricks

Cumulative Update 7 for Microsoft Dynamics NAV 2016 – Released in May 2016

Cumulative Update 7 includes all application and platform hotfixes and regulatory features that have been released for Microsoft Dynamics NAV 2016.

The cumulative update includes hotfixes that apply to all countries and hotfixes specific to the following local versions:

  •   AU – Australia
  •   AT – Austria
  •   BE – Belgium
  •   CH – Switzerland
  •   CZ – Czech Republic
  •   DE – Germany
  •   DK – Denmark
  •   ES – Spain
  •   FI  – Finland
  •   FR – France
  •   IS – Iceland
  •   IT – Italy
  •   NA – North America
  •   NL – Netherlands
  •   NO – Norway
  •   NZ – New Zealand
  •   RU – Russia
  •   SE – Sweden
  •   UK – United Kingdom

Where to find Cumulative Update 7

You can download the cumulative update from KB 3157492 – Cumulative Update 7 for Microsoft Dynamics NAV 2016 (Build 45834).

Warning

Before you install a cumulative update in a production environment, take the following precautions:

  1. Test the cumulative update in a non-production environment.
  2. Make a backup of the system or computer where the cumulative update is to be installed.

Additional Information

For information about how to install the cumulative update, see How to Install a Microsoft Dynamics NAV 2016 Cumulative Update.

For a list of all cumulative updates for this version, see Released Cumulative Updates for Microsoft Dynamics NAV 2016.

Cumulative Updates, How To, Information, Instalation & Configuration, Tip & Tricks

Cumulative Update 31 for Microsoft Dynamics NAV 2013 R2 – Released in May 2016

Cumulative Update 31 includes all application and platform hotfixes and regulatory features that have been released for Microsoft Dynamics NAV 2013 R2.

The cumulative update includes hotfixes that apply to all countries and hotfixes specific to the following local versions:

  •   AU – Australia
  •   AT – Austria
  •   BE – Belgium
  •   CH – Switzerland
  •   CZ – Czech Republic
  •   DE – Germany
  •   DK – Denmark
  •   ES – Spain
  •   FI  – Finland
  •   FR – France
  •   IS – Iceland
  •   IT – Italy
  •   NA – North America
  •   NL – Netherlands
  •   NO – Norway
  •   NZ – New Zealand
  •   RU – Russia
  •   SE – Sweden
  •   UK – United Kingdom

Where to find Cumulative Update 31

You can download the cumulative update from KB 3157488 – Cumulative Update 31 for Microsoft Dynamics NAV 2013 R2 (Build 45822).

Warning

Before you install a cumulative update in a production environment, take the following precautions:

  1. Test the cumulative update in a non-production environment.
  2. Make a backup of the system or computer where the cumulative update is to be installed.

Additional Information

For more information about cumulative updates for this version, see Announcement of update rollups for Microsoft Dynamics NAV 2013 R2.

For a list of all cumulative updates for this version, see Released Cumulative Updates for Microsoft Dynamics NAV 2013 R2.

For a list of all hotfixes included in cumulative updates for this version, see the following CustomerSource and PartnerSource pages:

CustomerSource:

PartnerSource