Backup, Development Tips, How To, Information, PowerShell, Schedule, Server, SQL, Tip & Tricks

SQL Server Database Backup using PowerShell

In this post we will see how we can take backup of databases from SQL Server using PowerShell and schedule it as a daily run Plan.

Step-1 : We will create Powershell Script to take backup of Databases in SQL Server.

SCheduleJob-18

Here is the full Script for your ready refrence.

param( $serverName, $backupDirectory )

[System.Reflection.Assembly]::LoadWithPartialName(“Microsoft.SqlServer.SMO”) | Out-Null

[System.Reflection.Assembly]::LoadWithPartialName(“Microsoft.SqlServer.SmoExtended”) | Out-Null

[System.Reflection.Assembly]::LoadWithPartialName(“Microsoft.SqlServer.ConnectionInfo”) | Out-Null

[System.Reflection.Assembly]::LoadWithPartialName(“Microsoft.SqlServer.SmoEnum”) | Out-Null

$server = New-Object (“Microsoft.SqlServer.Management.Smo.Server”) $serverName

$dbs = $server.Databases

foreach ($database in $dbs | where { $_.IsSystemObject -eq $False })

{

$dbName = $database.Name

$timestamp = Get-Date -format yyyy-MM-dd-HHmmss

$targetPath = $backupDirectory + “\” + $dbName + “_” + $timestamp + “.bak”

$smoBackup = New-Object (“Microsoft.SqlServer.Management.Smo.Backup”)

$smoBackup.Action = “Database”

$smoBackup.BackupSetDescription = “Full Backup of “ + $dbName

$smoBackup.BackupSetName = $dbName + ” Backup”

$smoBackup.Database = $dbName

$smoBackup.MediaDescription = “Disk”

$smoBackup.Devices.AddDevice($targetPath, “File”)

$smoBackup.SqlBackup($server)

“backed up $dbName ($serverName) to $targetPath

}

Save this Script file as ps1 extension.

You can create the script using even notepad.


Step 2: We will Create Batch file to call PowerShell scrip and to be used in Windows scheduler.

SCheduleJob-18

Save as .BAT file. Here is the batch script for ready refrence:

powershell -ExecutionPolicy RemoteSigned

-File “C:\User Data\SQL Backup\Tools\SQLServerBackupAllDatabase.ps1”

-serverName “INDEL-AXT5283NB”

-backupDirectory “C:\User Data\SQL Backup”

>> “C:\User Data\SQL Backup\LOG\\%date%.log”

Step 3 : Create a Windows Scheduler

Open Windows Task Scheduler.

Create New Task as shown below :

SCheduleJob-18

Enter Name & Description on General Tab as shown below:

SCheduleJob-18

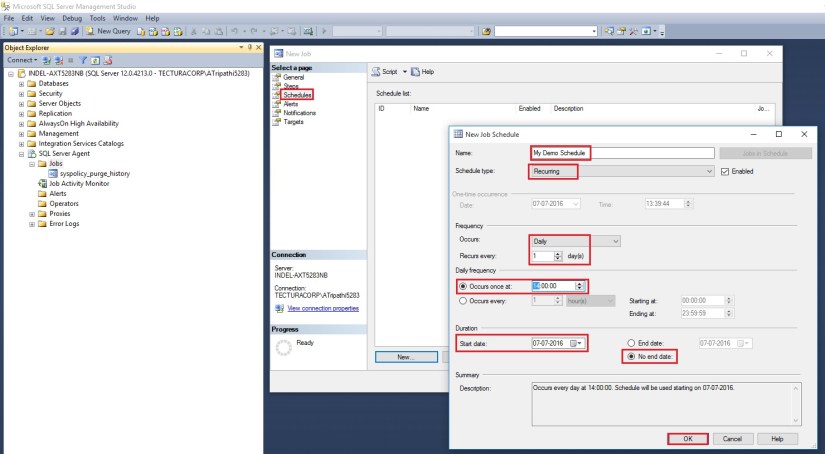
On Trigger Tab create New Trigger and enter details as shown below :
SCheduleJob-18

On Action Tab Create Action and enter information as shown below : Here Select the batch file created in Step 2.

SCheduleJob-18

In Settings Tab do the setting as shown Below :

SCheduleJob-18

Click on OK to Save the Task and return to Task Scheduler Window.

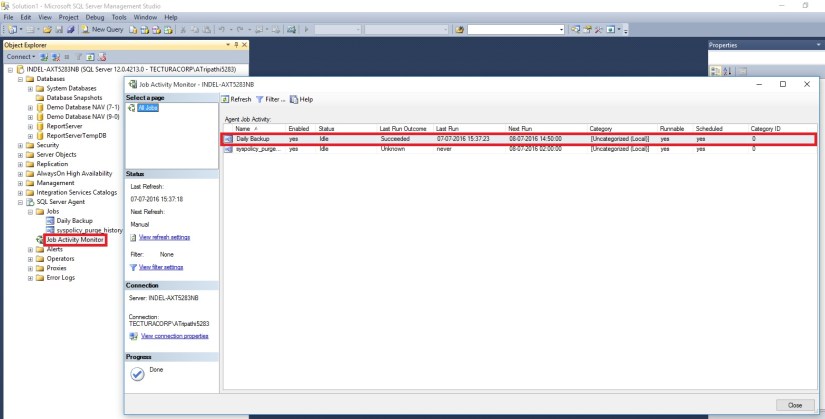
Here you can see the newly created Task.

SCheduleJob-18

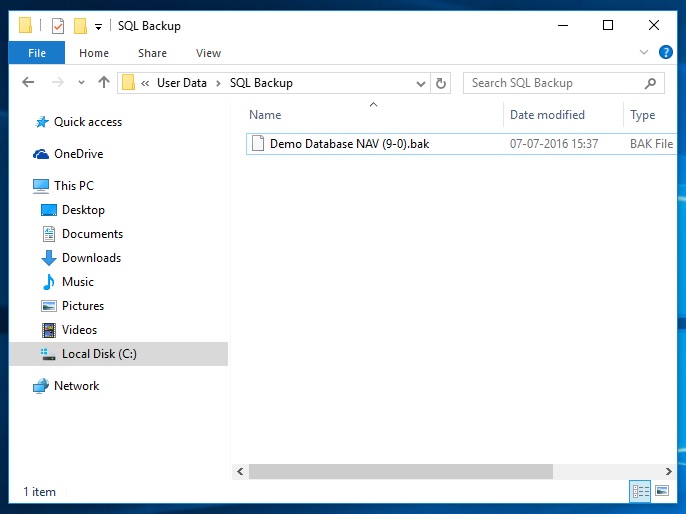
When Task is executed you will find the backup of databases at defined path in the script.

SCheduleJob-26

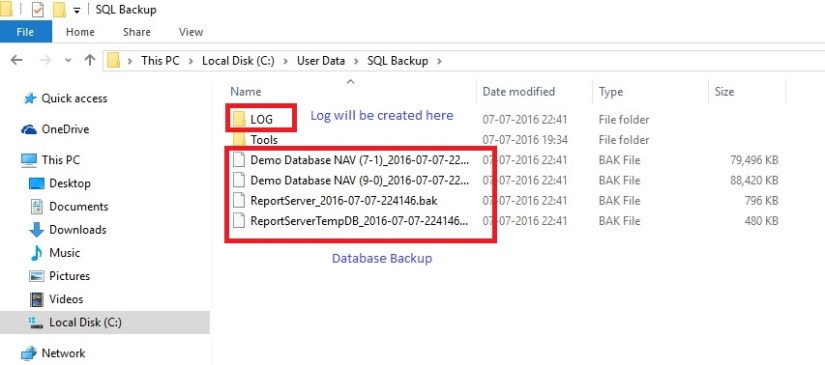
You can also find Log file at the path defined in batch.

SCheduleJob-27

Thats all for this post, will come up will more information in my up comming posts.

Backup, Corfu Navision 2016, How To, Information, Job, Schedule, SQL, Tip & Tricks

Schedule SQL Job for SQL Database Backup


Today we will see how we can schedule to take daily backup of our database.

Before i start explaining the step i am confirming the version of SQL based on which i am writing this post.

Process will remain same may be screen bit different in different versions of SQL.

SCheduleJob-1

At first we will ensure that SQL Server Agent is running, in case it is not right click and Start it.

SCheduleJob-1

Expand the SQL Server Agent Folder, Select Jobs, Right click and select New Job.

SCheduleJob-1

Provide Name & Description to your New Job.

SCheduleJob-1

Select Page Steps & New from Bottom of the page to define Step for your Job.

SCheduleJob-1

Give name to the Step.

Select Type as Transact Script (T-SQL).

Select Database Name in my case i am selecting Demo Database NAV (9-0)

Write the Script as shown below:

SCheduleJob-1

Here is the Script for your ready reference:

{– Script Start

SET QUOTED_IDENTIFIER off

select getdate() “Start Time”

set nocount on
declare @dbname varchar(36),@cmd varchar(255)

declare dbname_cursor cursor
for select name from master..sysdatabases where name = ‘Demo Database NAV (9-0)’
order by name

open dbname_cursor
fetch dbname_cursor into @dbname

while @@fetch_status = 0
begin
DECLARE @DATE VARCHAR(36)
SELECT @DATE = (select CONVERT(char(8),DATEADD(dd,-30,GETDATE()),112))
if DATABASEPROPERTYEX(@dbname,’Status’) = ‘ONLINE’
begin
select @cmd =’backup database [‘+@dbname+’] to DISK=”C:\User Data\SQL Backup\’+@dbname+’.bak” with init’;
print @cmd
execute (@cmd)
end
fetch dbname_cursor into @dbname
end

close dbname_cursor

deallocate dbname_cursor

select GETDATE() “End Time”

–Script End}

Although above script is for multipurpose like if you want to backup all database on your SQL Server, you can make small tweaking and you are done.

If you would like to backup all the databases on a particular SQL Server, then make the following changes to the code above.

Replace following line of code:

for select name from master..sysdatabases where name = ‘Demo Database NAV (9-0)’

with the following line of code:

for select name from master..sysdatabases where name != ‘tempdb’

This will create a backup file for each database on the server, except for the temp database.

Next : Switch to Advanced Page.

Define other parameters as shown in below screen as per your requirement.

SCheduleJob-1

On Selecting OK, you will return to Job window.

SCheduleJob-1

Select Schedule Page:

Define your Schedule as per your requirement.

SCheduleJob-1

Select OK to return to Job Page.

SCheduleJob-1

Select OK to close and save the JOB.

Now our Job is  created and scheduled.

You can see defined Jobs and its Status using Job Activity Monitor.

Before Job is executed

SCheduleJob-1

After executed you can see the Status as.

SCheduleJob-1

Post execution of Job here is the backup file created at defined path in the Script. Above script will overwrite the file on next execution.

If you want to create new file on every execution you need to modify the script for file name by adding timestamp or any other logic you desire.

SCheduleJob-1

I will come up with more information in my upcomming posts.

thats all for this post.


Dynamics 365, Information

Insights from the Engineering Leaders behind Microsoft Dynamics 365 and Microsoft AppSource detailed information 

Microsoft Dynamics 365 is the next generation of business apps in the cloud. These apps bring together the full power of Microsoft across productivity, advanced analytics, Power BI and IoT, with the strength of Azure and a new application platform and common data model. As such, the new name reflects the significance of the offering and the coming together of the two worlds structured business processes and unstructured personal productivity so our business customers can achieve more.
Microsoft Dynamics 365 is a cloud service so it will not be available, as is, on premises or in private clouds.

Microsoft Dynamics 365 will bring together the best of our CRM and ERP cloud offerings into one cloud service with specific, purpose built, apps for each of your key business processes – like Finance, Sales, Customer Service, etc.

Dynamics 365 apps will also provide you with a modern and familiar experience with built in insights, intelligence and workflow. To ensure interoperability and extensibility they also use a common data model and consistent application platform.

To know more about Dynamics 365 see this link :-

https://community.dynamics.com/b/msftdynamicsblog/archive/2016/07/06/insights-from-the-engineering-leaders-behind-microsoft-dynamics-365-and-microsoft-appsource

Dynamics 365, Information

Dynamics 365 – primary information 

Read this blog from Microsoft for more details. 

Turning business process into business advantage for organizations everywhere

https://blogs.microsoft.com/blog/2016/07/06/turning-business-process-into-business-advantage-for-organizations-everywhere/#sm.000uq7ph617pheoosdl13azz02719

Development Tips, Functional Tips, How To, Information, Jet Reports, Tip & Tricks

Gaining the Competitive Advantage with BI

See how a robust business intelligence solution can help you leverage technology in order to gain new visibility on your business that will enable profitable, data-driven decisions on a daily basis.

Video-1

Video-2

Development Tips, Functional Tips, How To, Information, Jet Reports, Tip & Tricks

Finding the Right Business Intelligence Solution for your Company

Get answers to the most commonly asked questions around what to look for in a business intelligence solution and provider, including implementation expectations, important features to look for (that you probably didn’t know you need), and different options for report and dashboard distribution.

Watch Video here :

Development Tips, How To, Information, PowerShell, Tip & Tricks

More about Loops in PowerShell

Do Until

The logic of this loop is to execute the Do {block} until (the condition is true).

As usual in PowerShell, pay close attention to the style of brackets, the curly brackets or parentheses guides you to write the correct code.

PS-L-1

Note: Don’t try: Until ($strQuit = “N”).  You need here to use -eq, this is PowerShell’s way of comparing two values.

Do While

The logic of ‘Do … While’ is the opposite of the Do Until. {Execute the block statement} while the (condition is true)
PS-L-1

Note: There are difference between until & while in above two examples: Until ($strQuit -eq “N”) While ($strQuit -ne “N”)


‘While’ on Its Own – No Explicit ‘Do’

This method is the more traditional way with the (condition) followed by the {Block command}.  Clearly, PowerShell’s While loop is simpler and more basic than the ‘Do … While’ construction in above two examples.

PS-L-1

Note: In this example the ‘While’ clause is at the beginning instead of the end.


‘For’ Loop

Below example is a simple method using the keyword ‘For’. As usual there is a (condition) and {Block Statement}.

The speciality of this loop is the <init> and <repeat> sections.

Here is the syntax:

For (<init>; <condition>; <repeat>) {<command_block>}

Example: Times Table for 25

PS-L-1

One side-effect of the For loop is that it always returns the <init> before it tests for the condition.

The <repeat> modifies the $i variable, which is then tested inside the <condition> of the next cycle.


‘Foreach’ loop

The PowerShell ‘Foreach’ loop is more complex, and has more arguments than the ‘for’ and ‘Do While’ loops.  The key feature is that the loop interrogates an array, known as a collection.  It then applies a {Statement Block} to each iteration.  In addition to the position and the type of bracket, observe the tiny, but crucial keyword – ‘In’.


PS-L-1


PS-L-1

# PowerShell ForEach loop to display files in C:\Program files

$Path = “C:\Program Files\” “{0,10} {1,-24} {2,-2}” -f ` ” Size”, “Last Accessed”, “File Name ” Foreach ($file in Get-Childitem $Path -recurse -force) {If ($file.extension -eq “.txt”)     {     “{0,10} {1,-24} {2,-2}” -f `     $file.length, $file.LastAccessTime, $file.fullname     } }


# PowerShell ForEach-Objcet piping into block statement

Clear-Host $Path = “C:\Program Files\” Get-Childitem $Path -recurse -force | Foreach-Object {If ($_.extension -eq “.txt”) {Write-Host $_.fullname        } }


PS-L-1


PS-L-1


I will come up with more stuffs in my upcoming posts.

Till then keep practicing and stay tuned for more details.

Development Tips, How To, Information, PowerShell, Tip & Tricks

An Introduction to PowerShell – Profile

PowerShell is a great way to automate almost anything in Windows.

However, it’s not just a scripting language.

If you find yourself using it as a command line shell it may be useful to store your functions and customizations in a profile that gets loaded every time you load the Console.

The first thing we do here is check if we already have a profile. There is an automatic variable, $Profile, that stores the fully qualified location of the PowerShell profile. An easy way to check if any profile exists is to use the Test-Path cmdlet on the $Profile variable.

Test-Path $Profile

PS-18

As you can see no profile file yet created for me, so we will create one, we can easily do that with the New-Item cmdlet.

New-Item –Path $Profile –Type File –Force

Using the force parameter will cause a profile to be created even if already we have one. This means our old profile will be overwritten and new will be created.

PS-19

Profile can be edit using notepad, which can be easily started using PowerShell.

notepad $Profile

PS-20

You can put any commands, functions, alias’s and even module imports into your PowerShell profile.

I normally work on PowerShell for Navision so I would prefer loading module whenever I launch the PowerShell command, so I include my cmdlets for loading the same in my profile.

PS-21

Save the Profile and close the PowerShell. Next time I launch PowerShell this Module get loaded for me by default.

Finally, I would like to also have some customizations to the console. One is it basically determines if you have opened an elevated PowerShell console and changes the font colour, this way I will always remember that I am running with elevated privileges.

Let us Save the Profile and check the effect of this Profile.

PS-22

That’s all for today.

I will come up with more stuffs in my upcoming posts.

Till then keep practicing and stay tuned for more details.


Development Tips, How To, Information, PowerShell, Tip & Tricks

An Introduction to PowerShell – Execution Policies

PowerShell has something called Execution Policies, which stop you from just running any old script. In fact, by default, you can’t run any scripts and need to change your execution policy if you want to be allowed to run them. There are 4 notable Execution Policies:

  • Restricted: This is the default configuration in PowerShell. This setting means that no script can run, regardless of its signature. The only thing that can be run in PowerShell with this setting is an individual command.
  • AllSigned: This setting does allow scripts to run in PowerShell. The script must have an associated digital signature from a trusted publisher. There will be a prompt before you run the scripts from trusted publishers.
  • RemoteSigned: This setting allows scripts to be run, but requires that the script and configuration files that are downloaded from the Internet have an associated digital signature from a trusted publisher. Scripts run from the local computer don’t need to be signed. There are no prompts before running the script.
  • Unrestricted: This allows unsigned scripts to run, including all scripts and configuration files downloaded from the Internet. This will include files from Outlook and Messenger. The risk here is running scripts without any signature or security. It is recommenced that you never us this setting.

To see what your current Execution Policy is set to, open a PowerShell Console and type:

Get-ExecutionPolicy

PS-14

Set-ExecutionPolicy RemoteSigned

PS-15

To run this command you need to run the PowerShell with Administrative rights. Right click on icon and select Run as Administrator and try the command again.

PS-16

When i run PowerShell as Administrator, now i am able to execute the command successfully as in below screen.

PS-17

The proper term for a PowerShell command is a cmdlet, and from now on we will use this correct terminology. It just felt more appropriate to call them commands for this introduction.

I will come up with more stuffs in my upcoming posts.

Till then keep practicing and stay tuned for more details.


Development Tips, How To, Information, PowerShell, Tip & Tricks

An Introduction to PowerShell – ForEach

ForEach simply looks at a set of list and pulls out one at a time to look at them and then, perform some type of action or set of commands on it.

One different part of a ForEach loop is the keyword in that lives within that parenthetical statement. That tells PowerShell to create a single variable to hold the values that come out, one at a time, for your list.

Let’s define a variable with list of Fruits

$names = “Apple”,”Banana”,”Grape”,”Orange”,”Chiku”

When we make a list within a variable, we have created an array, which is simply a sort of matrix thing that PowerShell holds in memory that lets it store a lots of things at one time.

Let’s also initialize a count variable so we get a feel of how the loop is going.

$count = 0

Let’s use a ForEach loop to count how many names we have. Remember our keyword in we have to create a new variable that we can call FruitName. This holds each single name that comes out of that list of names we have stored in the variable $names.

ForEach ($FruitName in $names)

{

$count += 1

Write-Host “$FruitName”

}


Finally, I’ll add a simple Write-Host line after the end (after the right curly brace, that is) to display the count, so we can actually give us the count of names in the list of Fruits.

Write-Host “The total number of names is $count.”


Here is the output of above script.

PS-13

I will come up with more stuffs in my upcoming posts.

Till then keep practicing and stay tuned for more details.