
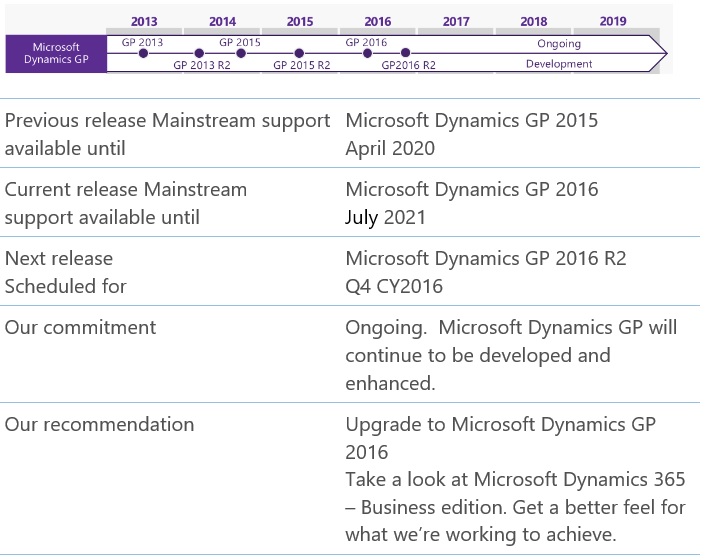
This cumulative update includes all hotfixes and regulatory features that have been released for Microsoft Dynamics NAV 2015, including hotfixes and regulatory features that were released in previous cumulative updates.
Note You must convert the database if you are upgrading to this cumulative update from a cumulative update earlier than cumulative update 9 (build 41779). For more information, see Converting a Database (https://msdn.microsoft.com/en-us/library/dn271650(v=nav.80).aspx) in Help for Microsoft Dynamics NAV.
This cumulative update replaces previously released cumulative updates. You should always install the latest cumulative update.
It may be necessary to update your license after implementing this hotfix to gain access to new objects included in this or a previous cumulative update (this only applies to customer licenses).
For a list of cumulative updates released for Microsoft Dynamics NAV 2015, see released cumulative updates for Microsoft Dynamics NAV 2015
(https://support.microsoft.com/kb/3014609/ ) .
Cumulative updates are intended for new and existing customers who are running Microsoft Dynamics NAV 2015.
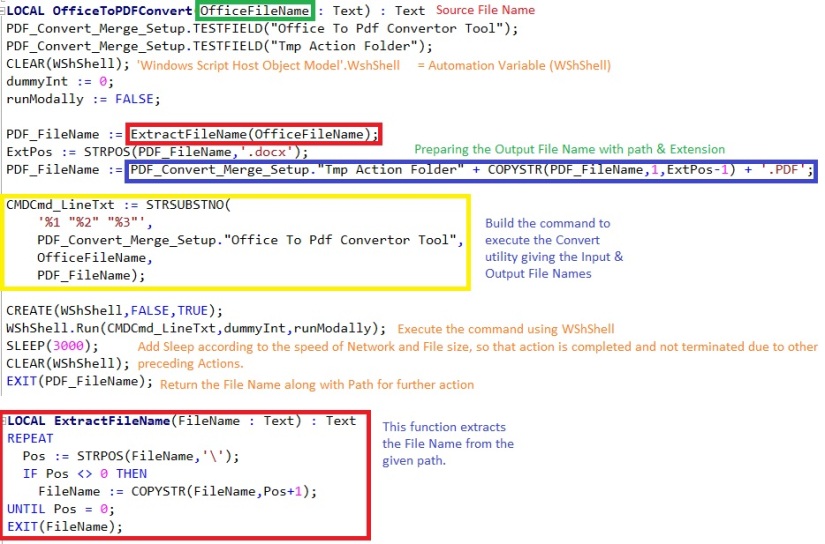
For more details see : https://mbs2.microsoft.com/Knowledgebase/kbdisplay.aspx?scid=kb,en-us,3188239
46765 – https://mbs2.microsoft.com/Knowledgebase/kbdisplay.aspx?scid=kb,en-us,3188239
Local versions included : AT, AU, BE, CH, CZ, DE, DK, ES, FI, FR, IS, IT, NA, NL, NO, NZ, RU, SE, UK
For download links : https://mbs2.microsoft.com/Knowledgebase/kbdisplay.aspx?scid=kb,en-us,3014609
To access these resource you will be required customer source/ partner source access.


You must be logged in to post a comment.