We have seen how to create Upgrade code unit in our previous post.
Please go through it, if not seen earlier the Data Upgrade Codeunit in Navision 2015 – Part -1 here
Let us continue from where we left our previous post.
We have created the Upgrade code unit to copy the data to upgrade table while performing destructive changes to My Sales Customer table.
We removed certain fields from the My Sales Customer table and the related information was moved to UPG My Sales Customer table.
Now it’s time to move these information to actual table we create for this purpose My Detailed Customer Entry table.
Although in this example this table will be exact copy of UPG My Sales Customer table, so simply we need to copy records to My Detailed Customer Entry table.
But some time we may require to add certain more field’s value while moving the data Like Entry No, Posting date to maintain the data integrity. Like think of some Service type of information you are maintaining then the same set of record may repeat number of times on different dates, then in this case we will require to add certain fields like Entry No. and Posting Dates.
Let us assume we will be maintain data of My Detailed Customer Entry in incremental way as of situation on every transaction. Balances will be maintained as of when transaction was performed.
Although this example is not feasible or practice but still we are continuing to just see how to write Upgrade Function for such purpose.
Our today’s task is to design and run data upgrade function to move data from the upgrade table to its new location.
Now the fields are deleted from the My Sales Customer table and the data is saved in the UPG My Sales table. The next step is to create the new table where the data will reside (My Detailed Customer Entry) and move the data into that table.
Let’s create the table to be used for recording of all future Customer Balances and to accommodate the data we already had in the My Sales Customer table and which we moved into the UPG My Customer table.
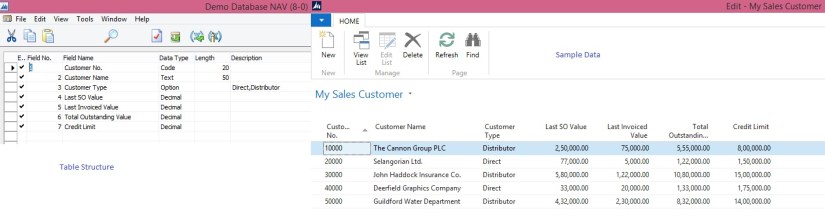
- In the Object Designer select the Tables button and then select New button to create a new table
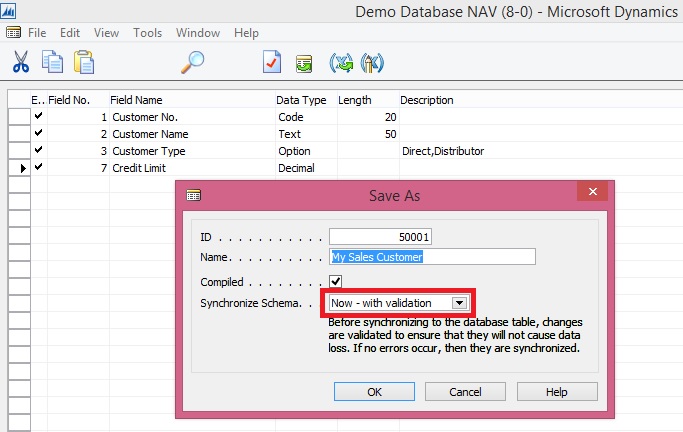
- Define the table layout based on the layout shown in the Screenshot.
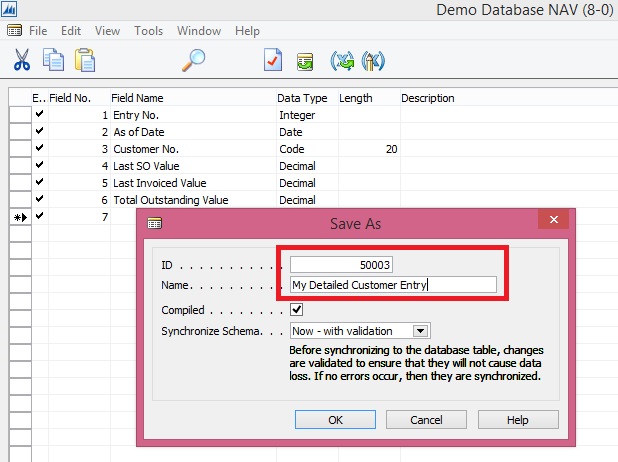
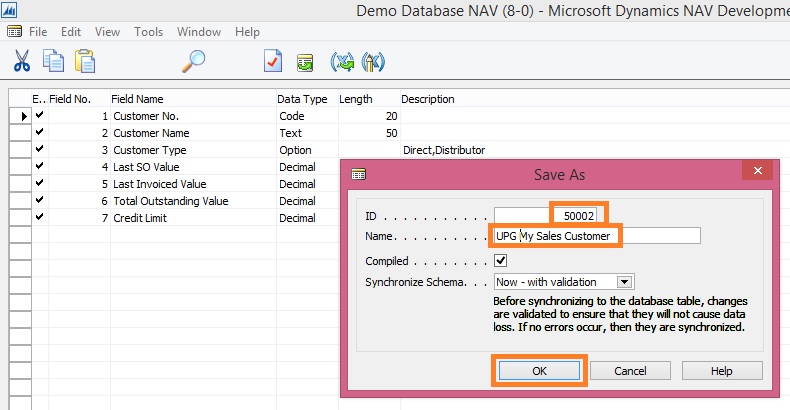
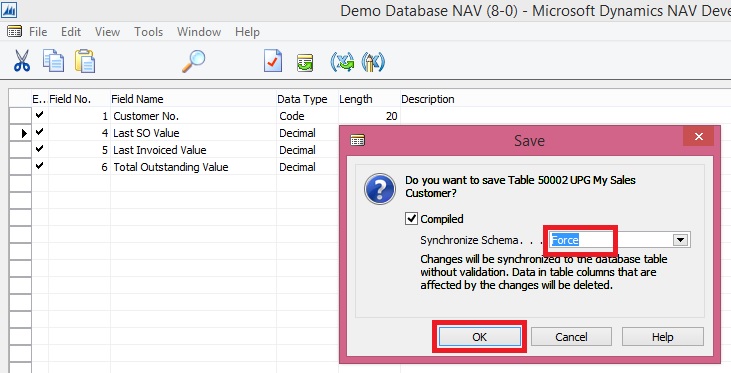
- In the Dev. Environment menu, select File-Save action to save the table.
- On the Save dialogue, define ID, Name = My Detailed Customer Entry, and select OK to save the table.
- Close the table editor.
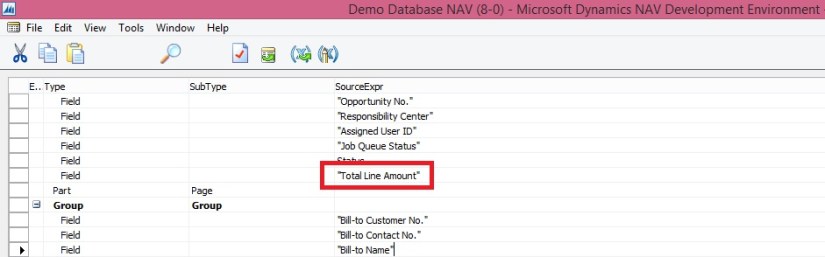
We will now create a new function which will contain the code to migrate the data from the upgrade table to the new table.
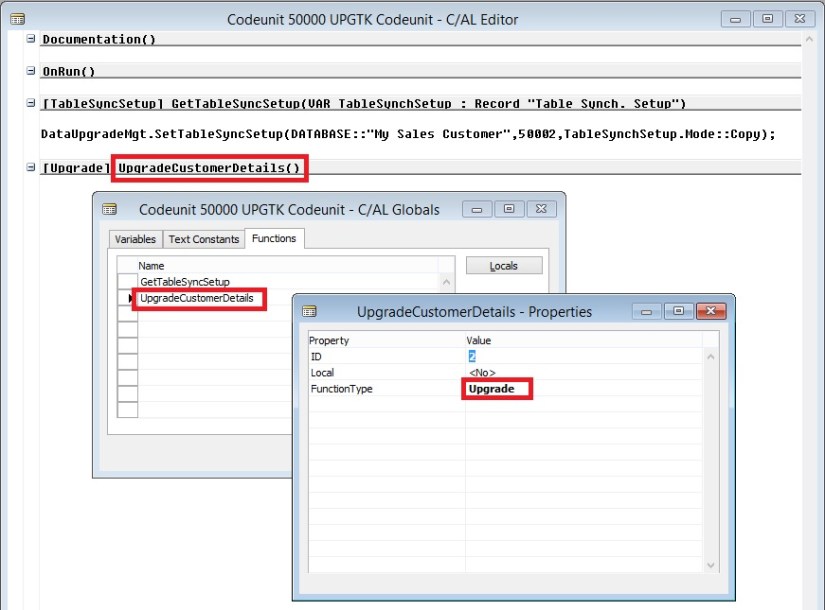
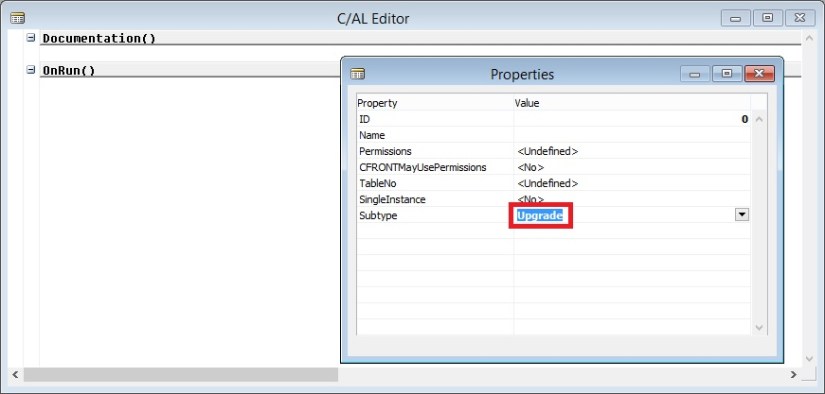
Note that the FunctionType property of the newly created function is set to “Upgrade”. This is how the NAV server can later figure out which function from the upgrade codeunit it must execute.
The function marked as “Upgrade” function can call functions marked as “Normal” if necessary.
- In the Object Designer select the Codeunits button, select codeunit 50000 UPGTK Codeunit and then select the Design button.
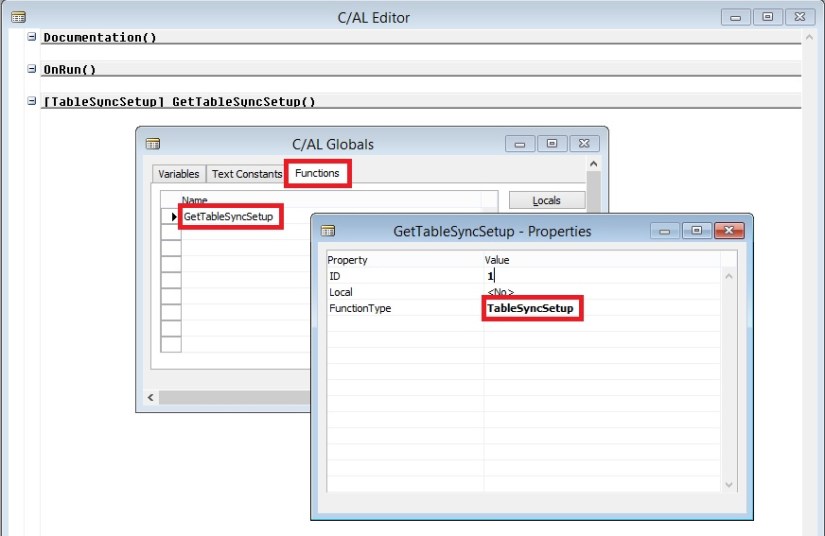
- In the Dev. Environment menu, select View-C/AL Globals action and in the form which is opened select the Functions tab.
- Enter the name of the function, e.g. UpgradeCustomerDetails
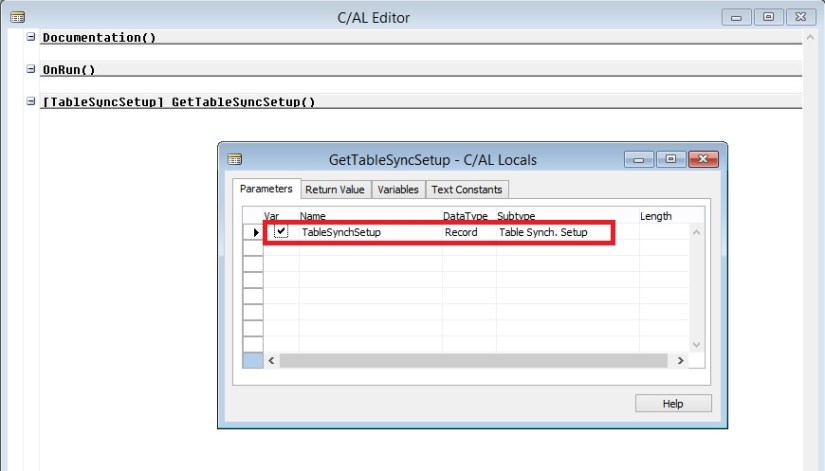
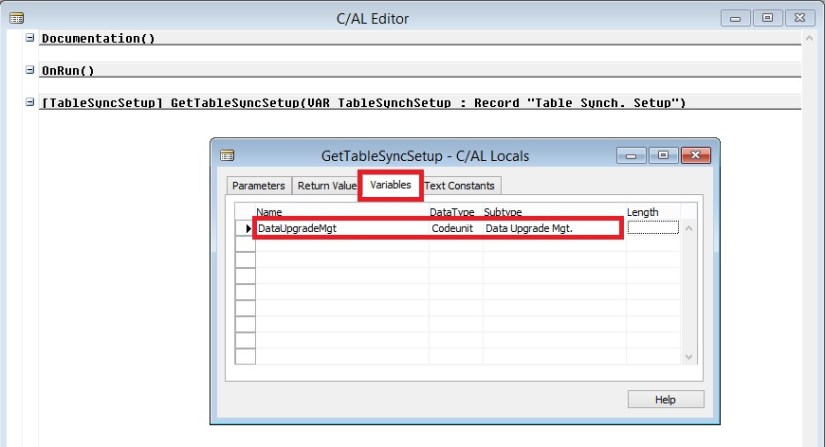
- Select the UpgradeCustomerDetails function on the Functions tab and then select the Locals button to define function parameters.
- On the C/AL Locals form, select Variables tab and add 3 local variables as shown in the Screenshot section.
- Close the C/AL Locals and C/AL Globals forms to return to the C/AL Editor.

The code we add to the UpgradeCustomerDetails function will copy the data from the UPG My Sales Customer table to the My Detailed Customer Entry table and then clean up the UPG Vehicle table.
- Code like the Screenshot into the UpgradeCustomerDetails function.
//>> Upgrade Code
EntryNo := 1;
WITH UpgCustomer DO BEGIN
IF FINDSET THEN
REPEAT
DetailedCustomerEntry.INIT;
DetailedCustomerEntry.”Entry No.” := EntryNo;
DetailedCustomerEntry.”Customer No.” := “Customer No.”;
DetailedCustomerEntry.”As of Date” := today;
DetailedCustomerEntry.”Last SO Value” := “Last SO Value”;
DetailedCustomerEntry.”Last Invoiced Value” := “Last Invoiced Value”;
DetailedCustomerEntry.”Total Outstanding Value” := “Total Outstanding Value”;
DetailedCustomerEntry.INSERT;
EntryNo := EntryNo + 1;
UNTIL NEXT = 0;
DELETEALL;
END;
//<<Upgrade Code
- In the Dev. Environment menu, select File-Save action to save the codeunit.
- On the Save dialogue select OK button.
- Close the codeunit editor.

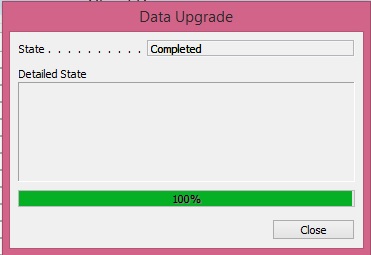
- In the Dev. Environment menu select Tools – Data Upgrade – Start… action.
- Agree to the confirmation dialogue.
- In the Start Data Upgrade window select the OK button.
You can start the data upgrade process from the Dev. Environment, or from Microsoft Dynamics NAV 2015 Administration Shell, using Start-NAVDataUpgrade cmdlet.
The NAV server will locate all upgrade codeunits and will invoke all upgrade functions within these codeunits for all companies in the database.
If you have multiple upgrade functions in your upgrade codeunit, you can choose to execute them in parallel or in sequence. You can also choose to stop at first error, or continue execution of other functions, see the list of all failed ones, fix them and start them again using the Data Upgrade – Resume… action.
- In the Dev. Environment menu select Tools – Data Upgrade – Start… action.
- Agree to the confirmation dialogue.
- In the Start Data Upgrade window select the OK button.

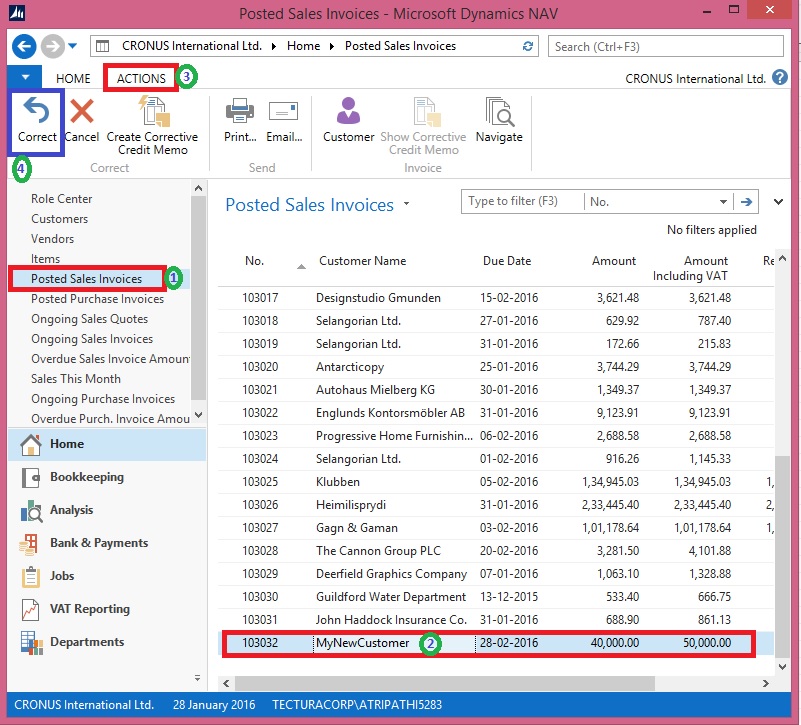
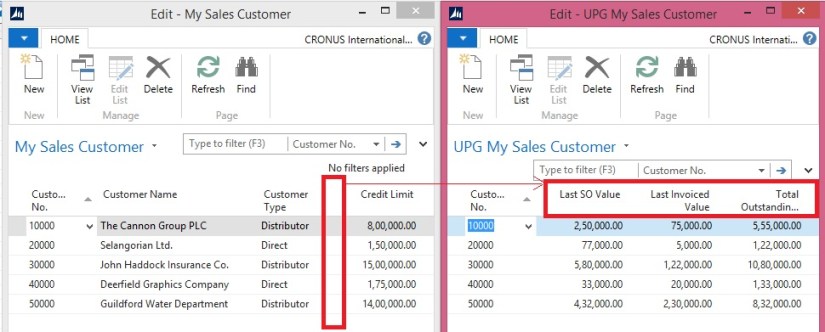
- In the Object Designer select the Tables button, then select table My Detailed Customer Entry and select Run button

You can see that the data from the upgrade table was successfully transferred into the new table.
Now since our data is sitting in its right place, now we can remove objects we are using for Upgrade purpose.
Now the data upgrade is completed and we need to remove the objects used within that process.
Force-delete the upgrade table, since the data was already transferred into the new table.
Delete the upgrade codeunit to make sure the old synchronization instructions defined in it are not used by the NAV server when you decide to change the My Sales Customer table again. Alternatively (if you want to reuse the upgrade codeunit later) you can choose to change the type of the GetTableSynchSetup function to “Normal”.

Now we are done with our Upgrade project.
Conclusion
This set of demonstrations have provide you the insight, new way of running the data upgrade in Microsoft Dynamics NAV 2015 by involving the schema synchronization and upgrade codeunits.
The new approach:
- Simplifies the upgrade environment, since all steps are performed by the latest version of the product.
- Increases the data upgrade performance, since it is possible to parallelize execution of the data upgrade functions within the upgrade codeunit and across companies.
- Reduces the amount of code to be written to handle the data upgrade, since some actions are now executed automatically by the NAV Server.
- Allows data upgrade to be invoked by the NAV server, minimizing the number of manual actions which should be performed during the data upgrade.
- Uses familiar upgrade toolkit design concepts (e.g. upgrade tables, upgrade functions).
22.396428
114.109497


You must be logged in to post a comment.