
Workflows in Dynamics NAV are represented by workflow events and workflow responses.
The smallest workflow is the pairing of a single event with a single response.
“When something happens, do something” pattern. This is the Event/Response model that makes up the simple but effective design of Workflow for Microsoft Dynamics NAV.
The workflow functionality utilizes several other features as listed below of Dynamics NAV.
Few Listed here below:
Job Queues Setup
E-mail Notification Setup
Work date Setup
User Setup
Approval User Setup
SMTP Mail Setup
In particular, approvals and notifications must be set up so that workflows can send approval requests and process approvals.
Dynamics NAV 2016 introduces two new event concepts. Events and Workflow events. The two are distinct but often coupled together to build solutions.
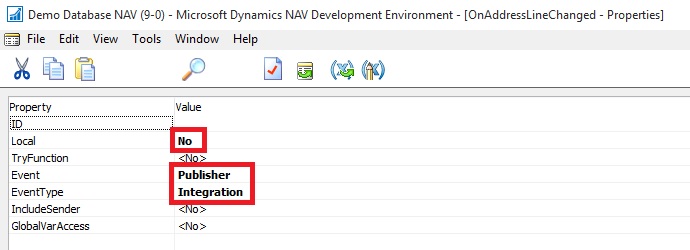
Dynamics NAV Events allow you to write code which will be called when an event occurs – this is called subscribing to an event.
Workflow Events typically use Platform Events as their trigger, but are richer. Workflow events are registered in the workflow engine and show up in the workflow designer. Microsoft recommends that Workflow events be written at a higher level of abstraction than Platform Events.
Sales Invoice is created or Modified could be example of Event Subscriber, whereas Invoice is Release could be good example for Workflow Event.
Event
For the event we need a new codeunit.
Add helper method for binding our event with the workflow engine.
The method is a simple one which returns and identifying code.
Function Signature:
LOCAL OnMyEventCode() : Code[128]
Function Property:

Sample Function Code:
EXIT(UPPERCASE(‘OnMyEvent’));
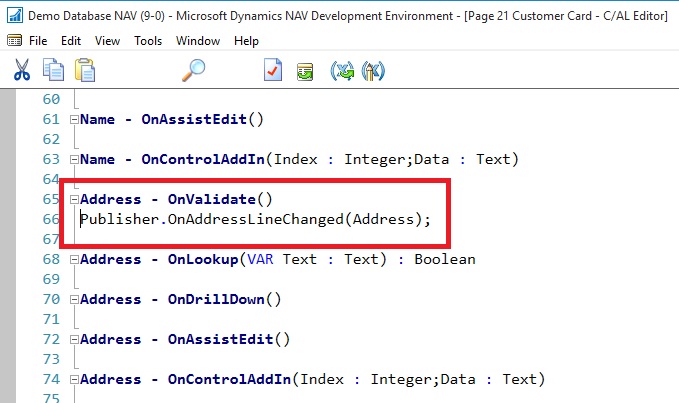
Next we add another method which will be called whenever our Event Occurs
Function Signature:
LOCAL [EventSubscriber] OnMyEvent(VAR Rec Object;VAR xRec Object;RunTrigger : Boolean)
Assuming a table is selected on which the Event is triggered.
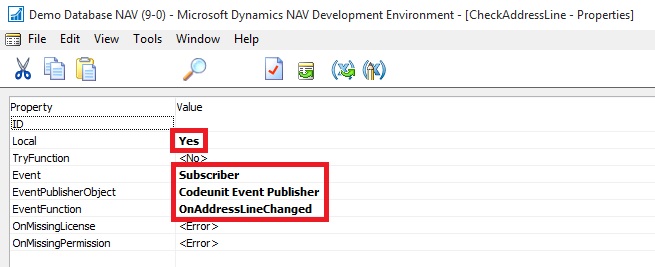
Function Property & Variables:
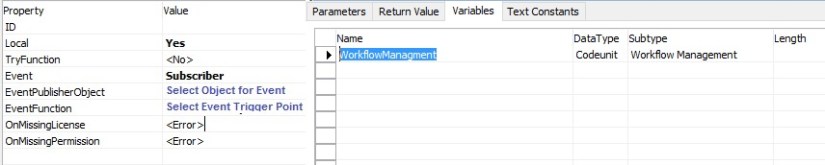
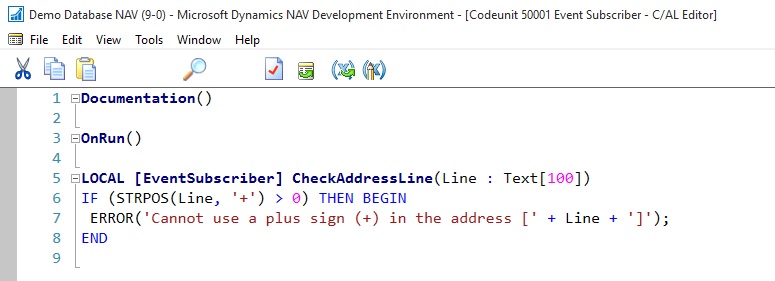
Sample function code:
MESSAGE(‘Event Fired On MyEvent’);
WorkflowManagment.HandleEvent(OnMyEventCode,Rec);
For the code itself, we’ll do two things
- Show a message box so we can see our event did trigger
- Call into the workflow engine to have the NAV Workflow engine process any next steps
Then we need to add another event subscriber method which is responsible for adding our event to the workflow library. The workflow library is the collection of events which can be seen and managed from the Workflow Setup page.
Function Signature:
LOCAL [EventSubscriber] AddEventToLibrary()
Function Property & Variables:

Sample function code:
WorkflowEventHandling.AddEventToLibrary(MyEventCode,DATABASE::Object,OnMyFinishTxt,0,FALSE);
Text Constant for Event Description:
OnMyFinishTxt : This will be listed in Workflow Event Window.

To add a Workflow event we need to do three things:
- Subscribe to the event.
- Define a user readable string which describes the event.
- Call a method in the workflow event handling codeunit, passing in the identifier and the descriptive string.
Save the Codeunit as MyWorkflowEvent with available ID in your Database.
Response
Most of the work is done in the code editor and we will use codeunits for our application objects.
First we’ll make a helper method for binding our response with the workflow engine.
The method is a simple one which returns and identifying code.
Function Signature:
LOCAL RunMyResponseCode() : Code[128]
Function Property:
Sample Function Code:
EXIT(UPPERCASE(‘RunMyResponse’));
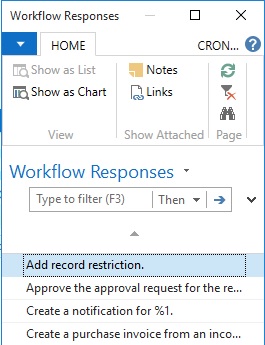
Then we need to add another event subscriber method which is responsible for adding our response to the workflow library. The workflow library includes the collection of responses which can be seen and managed from the Workflow Setup page.
Function Signature:
LOCAL [EventSubscriber] AddResponseToLibrary()
Function Property & Variables:

Sample Function Code:
WorkflowResponseHandling.AddResponseToLibrary(RunMyResponseCode,0,ResponseDescription,’Group 0′);
Text Constant for Response Description:
ResponseDescription : This will be listed in Workflow Responses Window.
To add a Workflow response we need to do three things:
- Subscribe to the event which adds new responses to the workflow library
- Define a user readable string which describes the response
- Call a method in the workflow response handling codeunit, passing in the identifier and the descriptive string.
The earlier functions were used to add the response to the workflow library.
But we need another method that actually listens to when the response needs to be called.
Function Signature:
LOCAL [EventSubscriber] RunReportResponse(VAR ResponseExecuted : Boolean;Variant : Variant;xVariant : Variant;ResponseWorkflowStepInstance : Record “Workflow Step Instance”)
Function Property & Variables:

Sample Function Code:
IF WorkflowResponse.GET(ResponseWorkflowStepInstance.”Function Name”) THEN
CASE WorkflowResponse.”Function Name” OF
RunMyResponseCode:
BEGIN
RunMyFunction;
ResponseExecuted := TRUE;
END;
END;
When this code is called it needs to do two things.
Firstly it needs to evaluate if the response should be called (and it does this by checking the code value) and secondly it should return TRUE if it handles the response.
Finally we will add our Response Handling Function RunMyFunction, which will execute actual action which we want Response of this call.
Enable Workflow in System
First we will create our Category so that our Workflow can be identified uniquely.

Next we will configure our Workflow.

Here my workflow is listed once configured and saved.

Now we are good in position to go for testing of our workflow.
This was the simplest scenario with bare minimum action required of implementing workflow.
You can use existing Template and define or you can implement your own as described above.
I will come up with more details on this topic later in my upcoming posts.


You must be logged in to post a comment.