
Today I will discuss about how we can create control add-in using VS Code & Extensions in Business Central.
We can create a control add-in the same way we created pages or code units. In Visual Studio we can use the code snippet T control add-in to generate a new control add-in.
It will better to create a fresh Extension Project in VS Code for control add in.
Step – 1 : Preparation
Create a New project, and add Folder Structure to arrange your files.
You can find steps in this post : Bare Minimum Steps to Start with fresh Extension Project for Business Central
I will create below Folder:
- ControlAddIn
- Images
- JsScript
- Page
- StyleSheet
Step – 2 : Create Control Add-In
In control add-in folder I’m going to create a new control add-in. So new file.

Use the snippet, T control add-in, to create a control add-in.

Give the name to your control add-in in my example I have used “WeatherControlAddIn”
A control add-in works with JavaScript files that can execute some code. The scripts property is used to reference these JavaScript files. They can be local files or references to external files over http or HTTPS. A very commonly used JavaScript library is jQuery. JQuery makes it a lot easier to write JavaScript code and it reduces the lines of code significantly. In our case any such files will be saved in JsScripts folder under Extension-> Objects Folder as setup above. One file we will create for StartupScript as Start.js.
Now let’s include jQuery. We have to download jQuery from the Internet. So if we open our Web browser and we go to the jQuery website, we can click the download jQuery button over here. But instead of really downloading the jQuery files, we are going to reference them online.
Open the site: https://jquery.com/
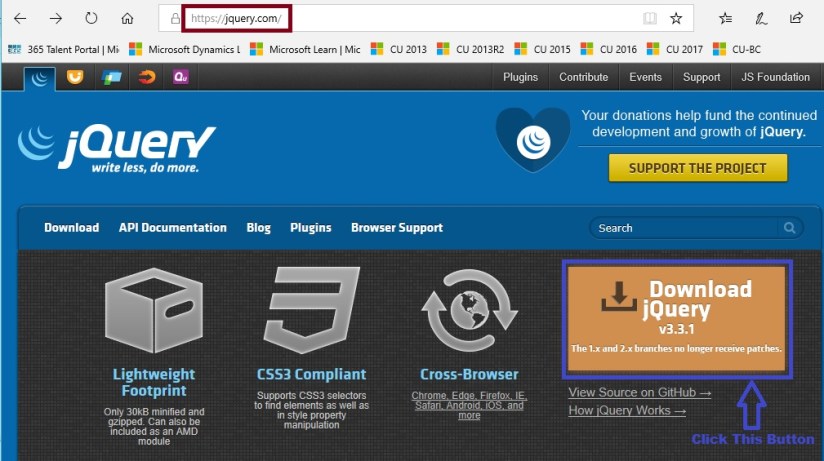
Click on Download jQuery v3.3.1 large button as shown above.
Scroll down to find: – Microsoft CDN (Content Delivery Network)
Microsoft also has a CDN for jQuery. We take that one.
Copy the link to the latest one. Add this to our Scripts property in our control add-in.
Use the URL of jQuery file. There’s also a property start-up script which you can use to call a special script that runs when the page where you have implemented your control add-in is loaded. Now let’s add our start.js script over here. So because it’s in the folder script, we have to “Objects/JsScripts/Start.js”. Now, there’s also a recreate and a refresh script. We are not going to use them in this demo project, so remove them. And with the images and the style sheets properties you can specify additional style to the control add-in.
Scripts = ‘https://ajax.aspnetcdn.com/ajax/jQuery/jquery-3.3.1.js’;
StyleSheets = ‘Objects/StyleSheet/StyleSheet.css’;
StartupScript = ‘Objects/JsScripts/Start.js’;
Images = ‘Objects/Images/Weather.jpg” />
I am using dummy image to display on my control add-in, select your image accordingly and place it in Images folder.
We will look into StyleSheet.css and Start.js later in below post.

This is how your WeatherControlAddIn.al should look like.
Step – 3 : Create Style Sheet
I will be adding a CSS file to this with the name StyleSheet.css. In this CSS file I can apply some layout styles to give my control add-in a color or let it choose a certain font and so on and so on. But remember there are some guidelines on which styles to apply. I’m going to set my image to a width 200 pixels. So in CSS, this is image. Width, 200 pixels, and a margin top of 25 pixels. And then I need to reference it in my style sheet properties. This is ‘Objects/StyleSheet/StyleSheet.css’ and of course in the folder StyleSheet.

You can apply your knowledge about stylesheets to decorate your add-in accordingly, for demo purpose I have just set the width and top margin of the image.
Similarly I have downloaded an image from internet related to weather and copied to Images Folder.
Now set the path of both the files in your control add-in as shown above.
Step – 4 : Create CardPart Page
Now, our control add-in will run in a CardPart. So we have to create a page. Let’s create a new file and call this WeatherCardPart.al. This is a page. So T page. Let’s give it an ID and a name. WeatherCardPart. Now the source table will be customer. And the page type is CardPart.
Your Page should look similar to below:

We have added our ControlAddIn on the CardPart.
Next we will pass data from our Navision to the JQuery Script to process, to do so we have added a local procedure GetCustomer, remember above in control add-in we added signature of this procedure. Now it’s time to implement that function.
We have created a JsonObject to store our data and pass to Control Add-In.
This function gets called from OnAfterGetRecord trigger of the Page.
You may be wondering about function call QueryTempOfCity, this is the same function which we used in our earlier post to call API and get temperature of specified city then updated the Headline of the RC Page.
If you missed you can find that post here: Working with Headline Role Center Page and HTTP Call – Business Central
I have copied some functions from that post and changed a little bit and added to this page, it should be like below:

This function will take City as parameter and query from API and return the current temperature of that city. This function is explained in referenced post above.
Step – 5 : Create Page Extension
CardPart runs in a factbox on a page. So let’s create a page extension on the customer card. So new page. Let’s call this customercardextension.al. which extends the customer card. Add a factbox in the factboxes, and this is a part — let’s give it a name. WeatherCardPart. And this is of type WeatherCardPart. When adding a part or a factbox, then need to set the sub page link. So don’t forget to set the sub page link and this is equal to the number equals field number.

It should be similar to above.
Step – 6 : Create jQuery Script
Here comes the most interesting and difficult part as we are not regular Java Script programmer, but thanks to google, who is always there to help.
We will create our Start.js
You can apply your Java Scripts skill to enhance this, let us keep it simple for learning purpose.
We will extract the information send via GetCustomer function in JsonObject and display in our Control Add-In.

You can say controlAddIn here as main outer container.
We have defined 4 sub containers and with unique id to reference further.
Now we add all this 4 sub-containers to the main container controlAddIn.
Get the values from the Navision CardPard GetCustomer function and decode the JsonObject Customer and extract value from it and assign to these 3 containers.
For 4th we have assigned the image path from Extension using special function Microsoft.Dynamics.NAV.GetImageResource
Step – 7 : Deploy and Test the Control Add-In
So now we are done with Creating of Control Add-In, deploy your extension by using command pallet, Publish you Extension.
Open the Customer Card and you should see your Control Add-In in action.
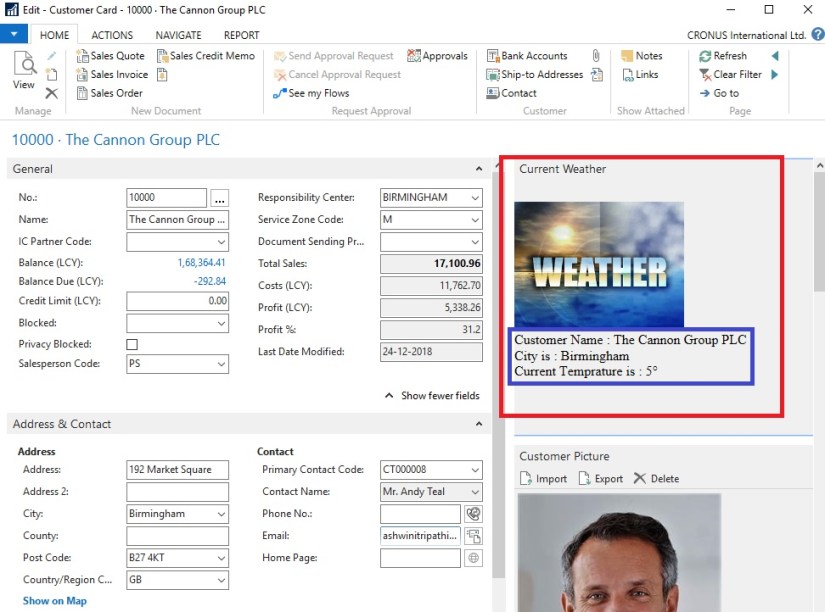
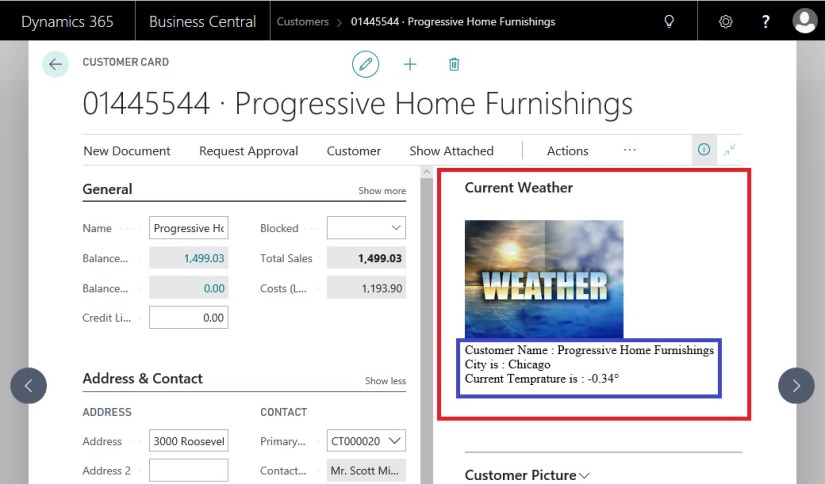
Tested successful. Here we come to the end of our today’s post.
Hope you liked and enjoyed learning the concept in this post.
Will come up with more such interesting concepts in my future posts.
Till then keep exploring and learning. Take Care of yourself.

You must be logged in to post a comment.