Introduction
Today in reply to one of my reader I am giving here steps how we can Export data using XMLPort and transfer data outside Navision using Web Services.
Lets discuss about the technology before I jump to the solution.
Few full forms which may help understanding while reading this post.
W3C – Web Services Architecture Working Group.
SOAP – Simple Object Access Protocol.
REST – Representational State Transfer.
WSDL – Web Service Description Language.
UDDI – Universal Description, Discovery & Integration.
AWS – Arbitrary Web Services.
XML – Extensible Markup Language.
HTTP – Hypertext Transfer Protocol.
What is Web Service?
W3C defines Web Service as : A software system designed to support interoperable Machine-to-Machine interaction over a network.
Web service can be defined as service offered by an electronic devices to another electronic devices, which communicate with each other over www.
W3C defines web services has an interface described in a machine-process able format WSDL.
Other systems I with the web service in a manner prescribed by its description using SOAP messages, typically conveyed using HTTP with an XML serialization in conjunction with other web-related standards.
Later W3C extended the definition:-
REST – compliant web services, in which the primary purpose of the service is to manipulate representations of web resources using a uniform set of stateless operations.
Arbitrary Web Services – the services may expose an arbitrary set of operations.

UDDI defines which software system need to be contacted for which type of data.
Once the system is discovered to be contacted, the contact is established using SOAP.
Service provider system validate the request by referring the WSDL file, process the request and send the data using SOAP protocol.
Web Service is a method of communication that allows two software system to exchange the data over the internet.
- Two systems may use different software which could be using different programming languages.
- Almost all type of software interpret XML tags.
- Web Services can be used to exchange data between two systems in form XML files.

XML is used to tag the data.
SOAP is used to transfer the data.
WSDL is used to describe the services available.
UDDI lists what service are available.
Human to machine communication is utilized for machine-to-machine communication, used for transferring machine readable files such as XML & JSON formats.
Web services use SOAP over HTTP protocol, facilitating to use your existing low-cost internet for implementing Web Service.
Rules for communication between two different systems:
All the rules are defined in WSDL file.
- How request to be send from one system to another.
- What all parameters need to be send while requesting data.
- What structure to be used for generating data (Normally data is exchanged in XML format) which is validated against .xsd file.
- What errors to be generated in case of failure of rule communication set.
Web Services that uses Markup Language:
- JSON-RPC
- JSON-WSP
- Web template
- Web Service Description Language (WSDL)
- XML Interface for Network Services (XINS)
- Web Services Conversation Language (WSCL)
- Web Services Flow Language (WSFL)
- WS-Meta data Exchange
- Representational State Transfer (REST)
- Remote Procedure Call (RPC)
- XML Remote Procedure Call (XML-RPC)
No more theories lets come to our point.
There are other ways too to achieve the same, but here I am specific to the requirement to which I am answering.
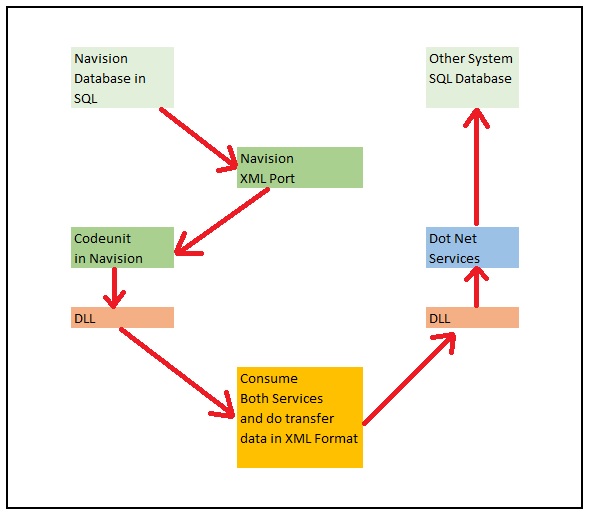
Requirement is the Data in XML format file will be transmitted using Web Service, We will be using Navision Exposed Web Service to Export data using XMLPort and then send the content by consuming another Web Service exposed in Dot Net which will retrieve the XML content and update in some other system.
Assumption is these two endpoints can be two separate databases in same domain or two different companies of same organization operating at two different location sharing information via Web Services.
For the demo purpose I will be using Navision to publish the service for exporting the data and retrieve the data using Web Service exposed in Dot Net.
Since I have not in depth knowledge of Dot Net codes, so I have asked my college to prepare the Web Service for me and I am simply using it to show how we can do it.
Here I will be getting this done through below 5 Steps.
Next Post in this Series will contain:
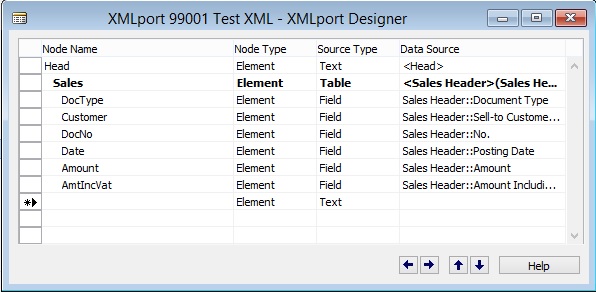
Step 1: Create a XML Port to Export Data in XML Format using XMLPort and save at some specified Location.
Step 2: Create a Codeunit to call XML Port and retrieve data in XML Format in Text Variable.
Step 3: Expose/Publish the Codeunit as web service.
Next Post in this Series will contain:
Step 4: Create a DLL to use as Add-in to consume the Web Service itself in Navision.
And the Final Post in this Series will contain:
Step 5: Create a Codeunit to test Retrieve the data using above DLL and Send data in XML Format using another Web Service exposed in Dot Net.
Please follow my upcoming post for Walkthrough to get above 5 steps done.
To Be Continued……….


You must be logged in to post a comment.