Development Tips, Excel, How To, Office Integration, PowerPivot, Report

PowerPivot Creating a Data Model in Excel 2013

Before you can create a PivotTable, you’ll need some data. Let’s get some data from the Navision database.

In Excel, open a blank workbook.

PowerPivot-1

PowerPivot-2

You have several options for getting data from no of sources.

Recall from my earlier post where we accessed data using web service in Excel.

Viewing Page Data in Excel Using PowerPivot (OData)

Let us see what other options are available to us.
PowerPivot-3

In today’s Example I will be connecting with SQL but will access Navision 2015 Database.

Follow the Steps below:
PowerPivot-4

Give meaningful name to your connection in my case I have used Nav2015DB_SQL_Connection.

Select the SQL Server to which you wish to connect in my case I have used INDEL-AXT5283N1, basically this is the SQL Server installed on my Laptop.
PowerPivot-5

Specify the Login method, I am using Windows Authentication, if required you can use SQL Server Authentication. In later case you will have to specify your User Name & Password.

Select the Database to Connect, I have selected Demo Database NAV (8-0) Std. Database for Navision 2015.

Click the Test Connection button, If everything is ok you will get Connection Succeed Message, as shown in above screen shot.

Press Next for next step.
PowerPivot-6

In this screen you have option to either import data from Tables and Views or you can Write Query to fetch data for import.

In my case for this example I am importing data from tables.

Select option – Select from a list of tables and views to choose the data to import and Press Next for next step.
PowerPivot-7

I have Selected two Tables Cust. Ledger Entry & Customer.

Select Related Tables button ensure to select if any other tables related to this Table.

In my case not applicable. Click Finish to add data to the Data Model/ Import the data of these two tables.
PowerPivot-8
Select Close to return to Data Sheet imported after this operation.
PowerPivot-9
Here you see your Data for these two tables have been imported in two sheets.

What happened?

You might not have realized it yet, but you’ve just created a data model. It’s created automatically when you import or work with multiple tables simultaneously in the same PivotTable report. The model is mostly transparent in Excel, but you can view and modify it directly using the Power Pivot add-in. In Excel, the presence of a data model is evident when you see a collection of tables in the PivotTable Fields list. There are several ways to create a model.

I will come up with more details in my next post.

Development Tips

Filtering on Dimension Values

Microsoft Dynamics NAV supports unlimited dimensions and unlimited dimension values. You can create as many as you want, and you can use those all across the application.

However two of these dimensions have got special treatment by setting them up them as global dimensions.

Why special? Answer could be because the global dimensions values are stored directly on the records they belong to. All other dimension values are stored in a separate table.

This means that you can filter on these two dimensions. In many places in the standard application, these Global Dimension are used on Filter fields that can be used to filter FlowFields.

However, to get any data on any of the other dimensions, you would have to rely on Analysis Views to retrieve the information.

In Microsoft Dynamics NAV 2013 onwards version, the dimensions functionality has been heavily redesigned.

Instead of storing all individual dimension values for each record in separate tables, each unique combination of dimensions and values gets an ID, and this dimension set ID is stored directly on the record that those values belong to.

With this change, all information about dimensions and their values are directly stored on the record.

Since all the required information is stored on the record, though somewhat indirectly, it will now be possible to filter on any dimension and any dimension value. As it turns out, it is, and it’s not that hard to do.

As mentioned, the records contain dimension set IDs, which are integers that represent the combination of dimension values for a specific record. The biggest problem is to convert a typical filter on a dimension into a filter of dimension set IDs.

Fortunately, we already have a few functions in Microsoft Dynamics NAV that can provide that information. With these functions in mind, we can build a logic where you can input any combination of dimensions and dimension values in the form of filters, and you can then calculate the corresponding set of dimension set IDs. With all of these IDs, we can build one long filter string and use it to filter on the dimension set ID field. This enables, with relative ease, direct filtering on Dimension Values.

In Codeunit 408 – DimensionManagement we have functions which can help us getting our task done:

  • GetDimSetIDsForFilter

DimFilter-1

  • GetNextDimSetFilterChunk

DimFilter-2

In Codeunit 46 – SelectionFilterManagement we have functions which can help us getting our task done:

  • GetSelectionFilterForDimensionValue

DimFilter-3

Using these functions we can build our logic to retrieve the required records from tables filtering on Dim Set ID field.

Let’s see the pseudocode of logic to get our work done.

This logic applies to Dimension table. With all values for which filter need to be applied.
DimFilter-4

Before executing above piece of code we have to prepare a Dimension Value record with [Dimension Code + Code (filter)] values with all the required filters we wish to apply filter for.

We can also find out which records do not have a value for one or more dimensions, for this we will add [Dimension Code] but for [Code] we will not provide the value/filter or blank.

Make sure when you define variables of Dimension & Dimension Value don’t forget to set Temporary property to Yes.

Office Integration

OFFICE 365 INTEGRATION IN NAV 2015 – Word/Excel/SharePoint

If you have signed up for Office 365, Microsoft Dynamics NAV can use this service to open and save documents. For example, when you export a report to Excel and save it on Office 365, Microsoft Dynamics NAV can use Excel Online that your Office 365 account uses to open the document.

Before you can use Office 365 and SharePoint Online with Microsoft Dynamics NAV, you must configure the service in Microsoft Dynamics NAV.

If you want to use the same folder to store temporary files for all users, you must specify a shared user account. Otherwise, each user’s temporary files are stored in their personal document repository on the SharePoint site.

Let us first understand the details before we start with Setup for SharePoint Shared Folder.

Your IT can help you configuring and assigning suitable rights to access. Although you can explore and help yourself. Since we are concentrating on Navision so we will not go in details for Share point.

Just to make understand I will be only covering top level information.

In this example I assume you already have up and running site for Document Sharing in SharePoint 2013 – 365 Online.

Here I am logging in to Office 365 – Online registered by me for demo purpose. You can register for free trial to explore the same in more details.

SharePoint-1

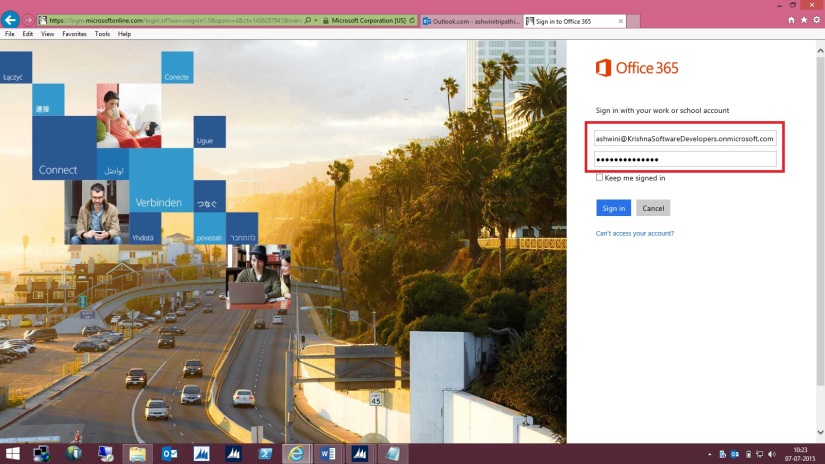
My Opening screen looks as one below.

SharePoint-2

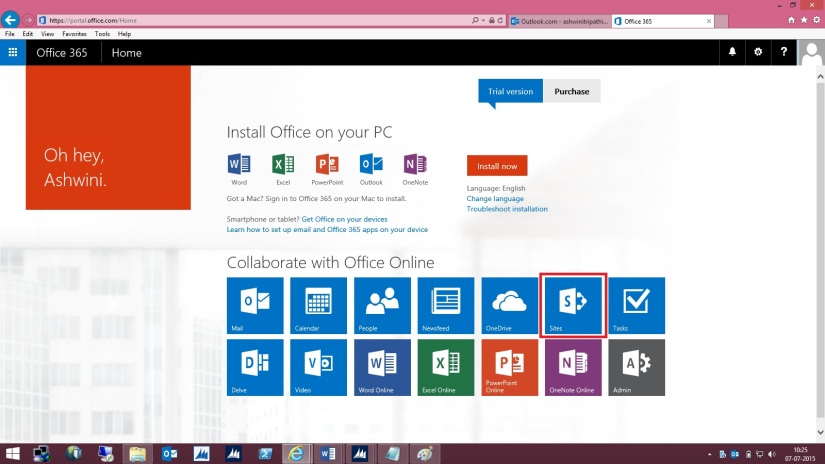
I select SharePoint Site to continue. Below is my SharePoint Opening screen. I will select my site which I have created for this demo and file sharing with other users in my organization.

SharePoint-3

Let us understand different parts which will help configuring our Online Document Storage Configuration in Navision 2015.

SharePoint-4

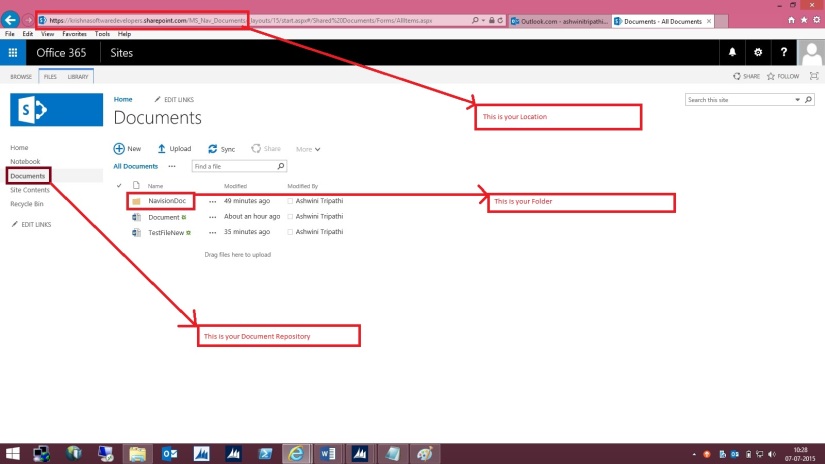
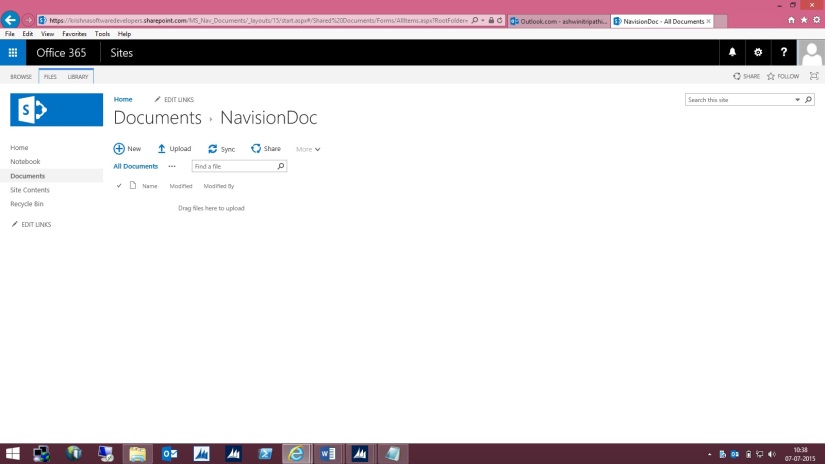
Here I am in my Folder at Lower level where all my files will be stored and shared with my other colleges.

SharePoint-5

Open “Online Document Storage Configuration” from path shown in below screen.

SharePoint-6


Specify the Service Name of your choice or use Default provided by the System.


Fill the Location to your SharePoint site: Specifies the unified resource indicator (URI) for your site on SharePoint Online, such as [https://krishnasoftwaredevelopers.sharepoint.com/MS_Nav_Documents] in my case I will use this.


Fill the Folder field which specifies the folder in the document repository for this document service that you want documents to be stored in.


This field is required. If you have not already created a subfolder in your document repository, you must create one now, and then specify it in the Folder field.


The Document Repository field includes the top-level folder in the document repository that your document service provides. The Folder field specifies a subfolder so that you can keep business documents and drafts separate from pictures and other shared documents.


For example, if the Document Repository field is set to [Documents], the Folder field can be set to [NavisionDoc] as per my example discussed above.


When a user exports data to Excel, for example, Microsoft Dynamics NAV saves the temporary file at the location that is specified in the Document Repository and Folder fields, such as

[https://krishnasoftwaredevelopers.sharepoint.com/MS_Nav_Documents/Documents/NavisionDoc]


Fill Document Repository field: Specifies the name of the document library, such as [Document]


Fill User Name field: Specifies the account that Microsoft Dynamics NAV Server must use to log on to the document service.


I would recommend that you specify a different user name than the administrative account. This helps reduce the risk of users accessing administrative settings, for example. For example, if your user name as an administrator is Administrator@KrishnaSoftwareDevelopers.onmicrosoft.com,

then the user name for Microsoft Dynamics NAV Server can be Nav@KrishnaSoftwareDevelopers.onmicrosoft.com or any of the regular user names that you have created.

SharePoint-7


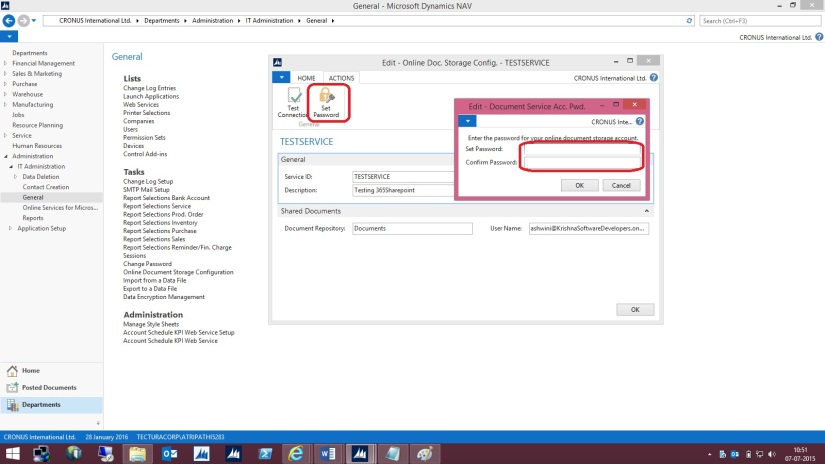
On the Actions tab, in the General group, choose Set Password.


In the window that appears, specify and confirm the password for the account    that you specified in the User Name field. Choose the OK button.


When you have set up the service, you can test whether that configuration is valid.

SharePoint-8


On the Actions tab, in the General group, choose Test Connection.


A message displays the result of the test.

SharePoint-9


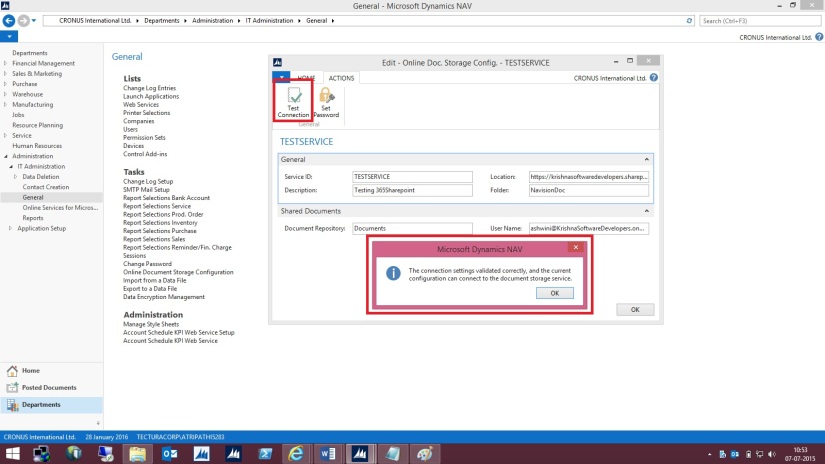
The above message confirms we can now save documents on our SharePoint.


Let us check a sample as below:
Open the Document and Execute the report available.
While Running the Report I specify I want to Print with Microsoft Word.

SharePoint-10


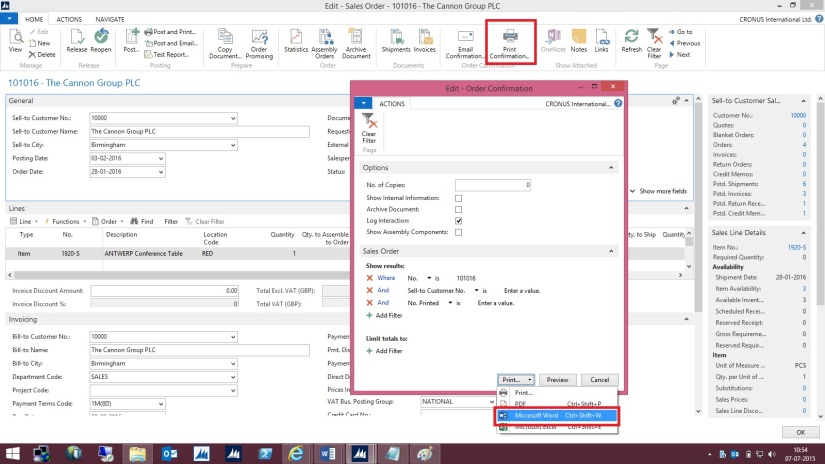
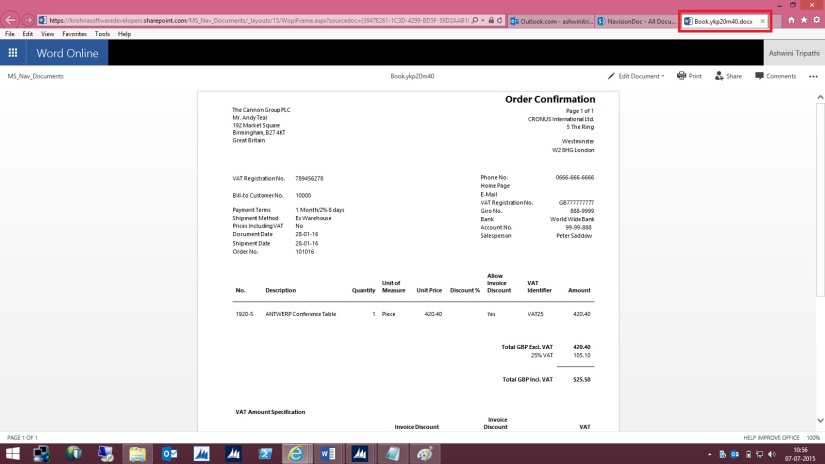
Document will be generated and opened in Word – Office – 365. Temp file name is given to the file. Close the File as it is auto Saved by Office 365 Word Application.

SharePoint-11


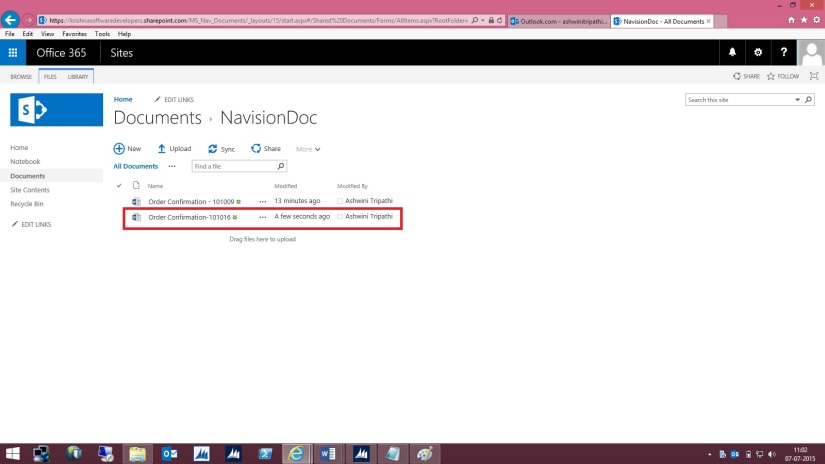
Browse to your SharePoint Folder configured above, you will see the Word file is now available in this Folder.

SharePoint-12


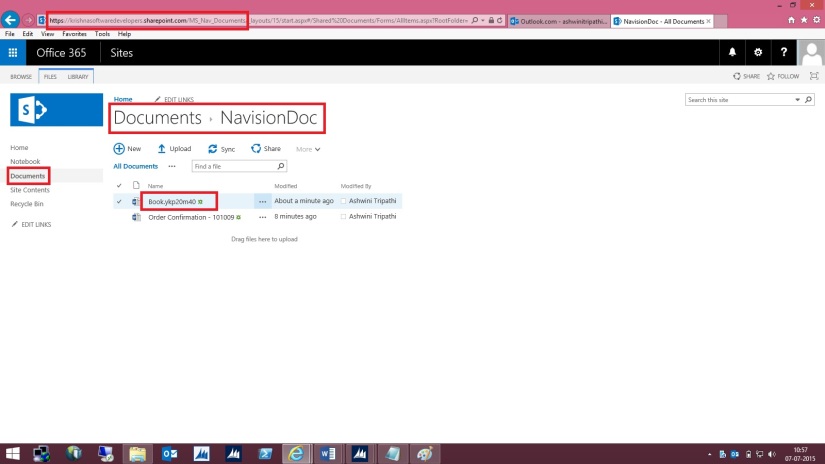
Right Click on Name of the File and Rename with some meaning full Name as shown below.

SharePoint-13


Give the Name to the File and press Save Button.

SharePoint-14


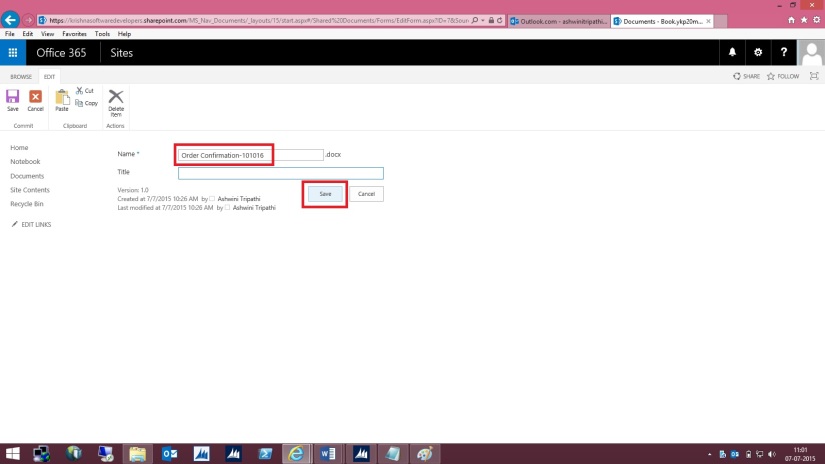
Here is the File after Rename.

SharePoint-15


This way when ever you Print your document from Navision in Word or Excel it will get saved in this Folder.

By setting appropriate access rights you can share the files between you colleges in your Organization.

 Please check SharePoint stuffs with you admin or appropriate authority in your organization.