Development Tips

How to create a certificate revocation list for the root certification authority

To start with this exercise you need to first create certificate, if not yet created refer to previous post.

Previous Step Link- How to create a root CA and a private key file by using the makecert.exe utility

Let’s start with this exercise:

  • On the computer running Microsoft Dynamics NAV Server, create a temporary folder to use when you work with certificates.
  • Open the command prompt as follows:
    • If you have Visual Studio installed on your computer, choose Start, choose All Programs, choose Microsoft Visual Studio 2012, choose Visual Studio Tools, and then right-click Visual Studio Command Prompt and choose Run as Administrator.
    • If you have the Windows SDK installed on your computer, choose Start, choose All Programs, choose Microsoft Windows SDK, and then right-click Windows SDK Command Prompt (2010) (or CMD Shell) and choose Run as Administrator.
  • At the command prompt, locate the temporary directory.
  • At the command prompt, type the following command:

makecert -crl -n “CN=RootNavServiceCA” -r -sv RootNavServiceCA.pvk RootNavServiceCA.crl

  • When you are prompted, enter the password that you used to create the root CA.

Certificate-9
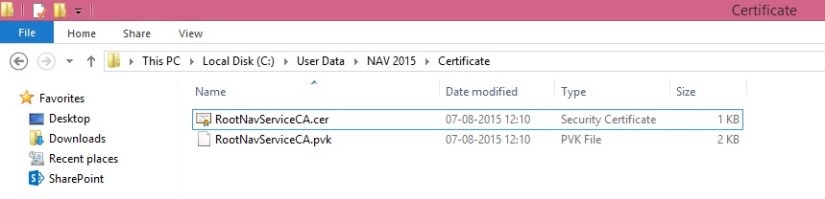
The RootNavServiceCA.crl certificate revocation file is saved in your temporary folder.
Certificate-10
Now we will install the certificate revocation list on the computer running Microsoft Dynamics NAV Server

  • In the Certificates snap-in, in the left pane of MMC, expand the Certificates (Local Computer) node.
  • Expand the Trusted Root Certification Authorities node, right-click the Certificates subfolder, select All Tasks, and then choose Import.
  • In the Certificate Import Wizard, on the Welcome page, choose Next.
  • On the File to Import page, choose Browse.
  • In the File Type field, select Certificate Revocation List (*.crl).
  • Browse to the location of the RootNavServiceCA.crl file, select the file, and then choose Open.
  • On the File to Import page, choose Next.
  • On the Certificate Store page, accept the default selection, and then choose Next.
  • On the Completing the Certificate Import Wizard page, choose Finish.

Certificate-11

  • Select the Trusted Root Certificate Authorities node, and then refresh the snap-in.

A Certificate Revocation List folder that contains the RootNavServiceCA.crl file has been created.
Certificate-12
In next step we will now create and install a test certificate on computer running Microsoft Dynamics NAV Server.

Next Step Link- How to create and install a test certificate for the Microsoft Dynamics NAV Server computer

Development Tips

How to create a root CA and a private key file by using the makecert.exe utility

We will follow below step to create a certificate for Microsoft Dynamics Server. Then we will implement the same for login from WAN to access Navision using Windows and Web Clients.

  • On the computer running Microsoft Dynamics NAV Server, create a temporary folder to use when you work with certificates.
  • Open the command prompt as follows:
    • If you have Visual Studio installed on your computer, choose Start, choose All Programs, choose Microsoft Visual Studio 2012, choose Visual Studio Tools, and then right-click Visual Studio Command Prompt and choose Run as Administrator.
    • If you have the Windows SDK installed on your computer, choose Start, choose All Programs, choose Microsoft Windows SDK, and then right-click Windows SDK Command Prompt (2010) (or CMD Shell) and choose Run as Administrator.
  • At the command prompt, locate the temporary directory.
  • Type the following command.

makecert -n “CN=RootNavServiceCA” -r -sv RootNavServiceCA.pvk RootNavServiceCA.cer

Certificate-4

  • When you are prompted, enter a password.
    • You need this password to create the service certificate.
  • The RootNavServiceCA.cer certificate file and the RootNavServiceCA.pvk private key are saved in your temporary folder.

Certificate-5

Now we will use the Certificates snap-in to install the root CA on the computer running Microsoft Dynamics NAV Server

  • Start the Certificates snap-in for MMC on the computer running Microsoft Dynamics NAV Server, and then add the Certificates snap-in.
  • In the Certificates snap-in dialog box, choose Computer account, and then choose Next.
  • In the Select Computer pane, choose Local computer: (the computer this console is running on), and then choose Finish.
  • Choose OK to close the Add or Remove Snap-ins dialog box.
  • In the left pane of MMC, expand the Certificates (Local Computer) node.

Certificate-2

Certificate-3

  • Expand the Trusted Root Certification Authorities node, right-click the Certificates subfolder, select All Tasks, and then choose Import.

Certificate-6

  • In the Certificate Import Wizard, on the Welcome page, choose Next.
  • On the File to Import page, choose Browse.
  • Browse to the location of the RootNavServiceCA.cer certificate file, select the file, and then choose Open.
  • On the File to Import page, choose Next.
  • On the Certificate Store page, accept the default selection, and then choose Next.
  • On the Completing the Certificate Import Wizard page, choose Finish.

Certificate-7

The RootNavServiceCA certificate is now visible in the list of trusted root CAs.

Certificate-8

In next step we will now create a certificate revocation list for the root certification authority and then install the certificate revocation list on the computer running Microsoft Dynamics NAV Server.

A certificate revocation list is required because WCF applications check the revocation list when validating certificates.

Next Step Link- How to create a certificate revocation list for the root certification authority

Development Tips

How to: Specify the Start ID Offset of Elements on Objects – In Navision 2015

You can specify a start ID for new objects so that elements on these new objects have IDs that are offset by the number that you specified.

For example

You can specify a start ID of 50000 and then create a new page. The first element that you create on the page, for example, a Container control, has ID 50000. The next element that you create on the page, for example, a Group control, has ID 50001. The ID of each element on the page is incremented by 1, starting with the offset that you specified.

If you create variables or text constants on the page, then the first variable or text constant has ID 50000. The ID of each variable or text constant that you create is incremented by 1, starting with the offset that you specified.

If you create functions on the page, then they start with ID 50000. Parameters, return value, local variables, and local text constants of a function start with ID 50000.

Note

In earlier versions of Microsoft Dynamics NAV, you specified the start ID offset by using the GetUidOffset function in codeunit 1.

You can use the start ID to identify a set of elements in your application, for example, to identify the elements in a country/region-specific version.

When you merge changes from different country/region-specific versions, having different start IDs lets you easily identify the country/region-specific version for each element.

If you do not specify a start ID, then the IDs are determined by your license.


To specify the start ID

  • In the development environment, on the File menu, choose Database, and then choose Alter.
  • In the Alter Database window, select the Advanced tab.
  • On the Advanced tab, under Designer, in the Start ID (UidOffset) text box, enter an integer, and then choose the OK button.

Start-Id
Important

Microsoft recommends that you specify a start ID that is greater than or equal to 1000. If you specify a start ID that is less than 1000, then variables and text constants on the object have a starting offset of 1000, not the value that you specified. Other elements on the object have the starting offset that you specified.

  • Create a new table, page, report, codeunit, query, or XMLport. The IDs of the elements on that object are offset by the number that you specified.

Note

To view the ID of an element, select the element in the designer, and then on the View menu, choose Properties.


Report

How many types of Layout is supported in NAV 2015?

In new Microsoft Dynamics NAV 2015, we are introduced in new reporting feature – Word Layout. It means, that now we can use both of layouts, RDLC and Word. Microsoft Dynamics NAV 2015 includes 4 built-in report layouts that are used on reports by default. These are only “mini” sales reports: Sales – Quote (1304), Sales – Confirmation (1305), Sales – Invoice (1306) and Sales – Credit Memo (1307).

By default, all of these reports are configured as ‘RDLC (built-in)’, but we can change it on Report Layout Selection.
ReportLayoutSelection-1
We can also customize these reports using ‘Custom Layouts’ command. But, what if we need more documents report in Word Layout, for example some of purchase documents. The biggest benefit of this feature is that you can give your customers to prepare own documents and don’t spend your time (and their money) on this job. Because of that, we need to be able to create Word Layout for new documents.
ReportLayoutSelection-2