
Dear Friends in this post I will discuss about creating Outlook Appointment from Navision using DotNet Interop. Without going much in theory lets jump to practical approach.
To start with first we need to define some DotNet variables:
| Name | DataType | Subtype |
| OutlookItemType | DotNet | Microsoft.Office.Interop.Outlook.OlItemType. ‘Microsoft.Office.Interop.Outlook, Version=15.0.0.0, Culture=neutral, PublicKeyToken=71e9bce111e9429c’ |
| outlookApplication | DotNet | Microsoft.Office.Interop.Outlook.Application. ‘Microsoft.Office.Interop.Outlook, Version=15.0.0.0, Culture=neutral, PublicKeyToken=71e9bce111e9429c’ |
| outlookApplicationClass | DotNet | Microsoft.Office.Interop.Outlook.ApplicationClass. ‘Microsoft.Office.Interop.Outlook, Version=15.0.0.0, Culture=neutral, PublicKeyToken=71e9bce111e9429c’ |
| outlookAppItem | DotNet | Microsoft.Office.Interop.Outlook.AppointmentItem. ‘Microsoft.Office.Interop.Outlook, Version=15.0.0.0, Culture=neutral, PublicKeyToken=71e9bce111e9429c’ |
I have created a function CreateOutlookAppointment which takes parameters as:

And the code as below:

To call this function I use below code:

The code is itself self-explanatory.
You can add other validations and parameters as per the requirement.
Imp Tip:- Make sure you set for all DotNet Variables RunOnClient = Yes.
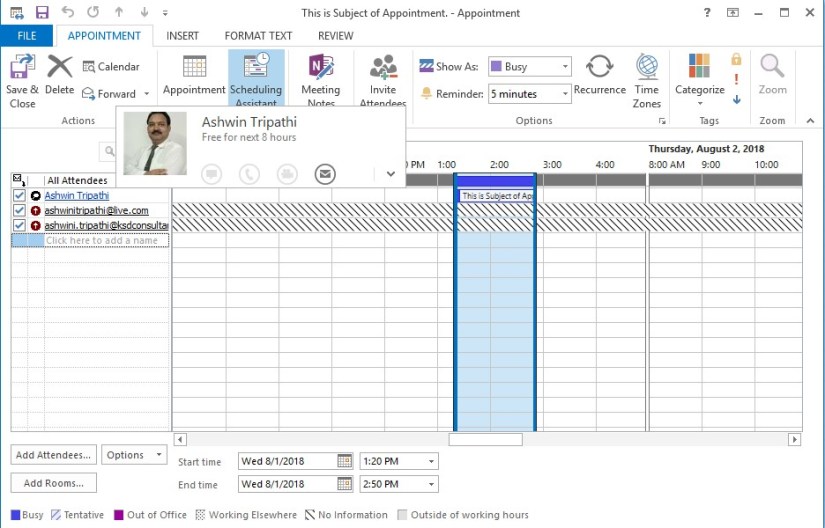
On run the output will be as:

What you are waiting for, go create Appointment and have fun.
See you seen via my next post. Till then keep learning and growing in your career.

You must be logged in to post a comment.