
Continuing from where we left in previous post, if not seen you can visit here.
During development, your resource utilization can grow unorganized with old, outdated, and unused components. Where you may require maintenance to manage, free resources and reclaim for other uses.
Let’s learn few commands which will be useful to work and maintain docker containers, images and other resources.
Today we will learn how to organize a Docker environment by removing Docker images, containers, volumes, and networks.
Using these commands makes Docker container management fast and easy.
A container creates a specific environment in which a process can be executed. As we all are aware of many containers are created over time, tested, and uninhibited during the development lifecycle.
Therefore, it’s important to know how to find unnecessary containers and remove them.
First, you will need to list all Docker containers using the command:
docker container ls -a
This will list all running containers, their IDs, names, images, status and other parameters.
Most of the time you are only interested to have list of all the containers only by their numeric ID’s, that you can obtain running the command:
docker container ls –aq

To stop a specific container, enter the following:
docker container stop [container_id]
Replace [container_id] with the numeric ID of the container from your list.

You can enter multiple container IDs into the same command.
To stop all containers, enter:
docker container stop $(docker container ls –aq)
This forces Docker to use the list of all container IDs as the target of the stop command.
To launch or start a single or multiple stopped Docker containers
docker start [options] container_id

List all Docker Resources
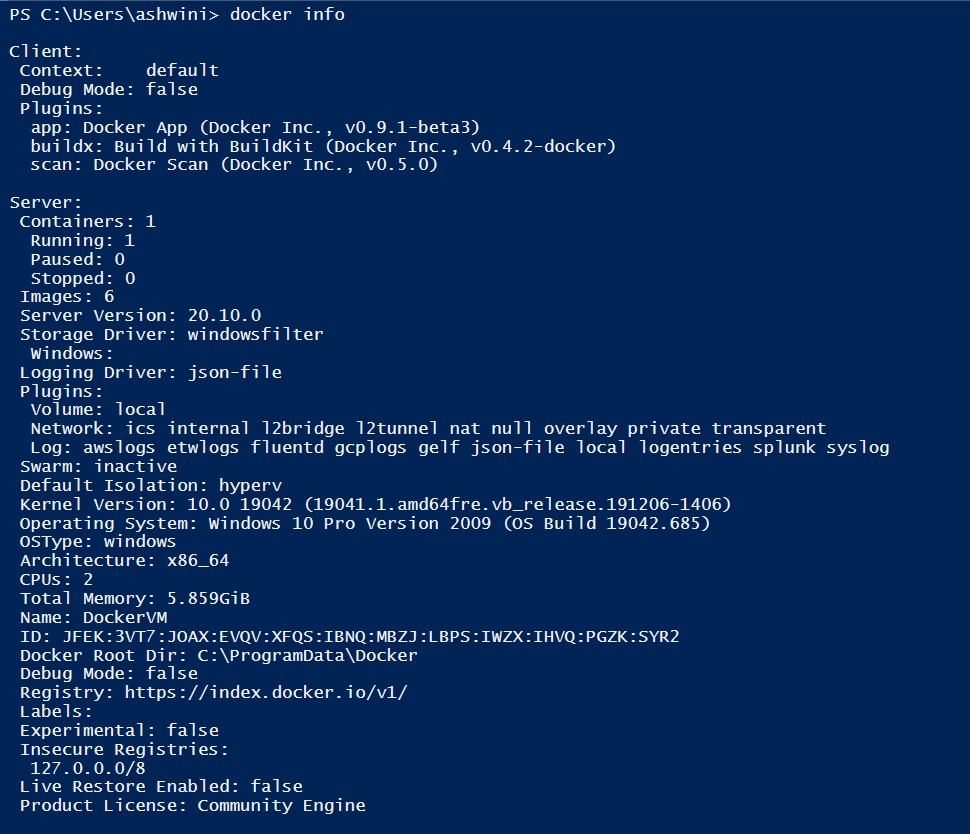
Enter the following commands to display resources:
docker info

docker container ls


docker image ls


docker volume ls


docker network ls


The above-mentioned lists number of containers, images, and information about the Docker installation. These commands can help you locate and identify resources that you want to keep, or that you want to delete.
Remove a Stopped Container
To remove a stopped container, use the command:
docker container rm [container_id]

Remove All Stopped Containers
To remove all stopped containers:
docker container rm $(docker container ls –aq)
Remove All Docker Containers
To wipe Docker clean and start from scratch, enter the command:
docker container stop $(docker container ls –aq) && docker system prune –af ––volumes
Let’s decode above command line as:
docker container ls –aq
will list all containers with their numeric ID
docker container stop
will stop all containers obtained from above list
&& docker system prune –af ––volumes
Will remove all stopped containers and volumes
Here (a) indicates this should apply to all containers &(f) without a required confirmation.
How to Remove Docker Images
Docker images are files, which include multiple layers used to run code within a container.
Images may go through many iterations during development. Old and outdated images can clutter your system, taking up storage space and making searches more difficult.
To remove a Docker image, start by listing all the images on your system:
docker image ls
The output displays the locally available Docker images, as seen below.
Make a note of the IMAGE ID – this is the identifier used to remove the image.
Then, remove the unwanted image(s):
docker image rm [image_id1]

Replace [image_id1] with the image ID you pulled from the first command. You can enter a single Image ID, or multiple IDs for removal.
The system may respond to your request with an error message, that there is a conflict and it is unable to remove the repository reference.
This indicates that a container is using the image. You need to remove the container first before you can remove the image.
How to Remove Docker Volumes
A volume is used to store Docker data.
It helps store and organize data outside containers in a way that it’s accessible to multiple containers.
Use the following command to generate a list of all the available Docker volumes:
docker volume ls
Take note of the VOLUME NAME you want to remove.
Then enter:
docker volume rm VolumeName
Make sure to replace VolumeName with the actual name you generated with the previous command.
If the volume is in use by an existing container, the system responds with an error. This means need to remove the container first.
How to Remove Docker Networks
Docker networks allow different containers to communicate with each other freely while also preventing traffic from outside the network. This is typically done with a Docker bridge network.
The prune command removes all unused networks.
Removing a Single Network
Display a list of all existing Docker networks with the command:
docker network ls
Take note of the NETWORK ID – this is the identifier used to remove a specific network. Then, enter:
docker network rm [networkID]
Replace [networkID] with the ID you captured from the first command.

You may receive an error message that says the network has active endpoints. That means that the network is currently in use by containers. You need to remove the containers that are using the network before you can remove the network.
Remove All Unused Docker Objects
The prune command automatically removes all resources that aren’t associated with a container. This is a streamlined way to clean up unused images, containers, volumes, and networks.
In a terminal window, enter the following:
docker system prune
Additional flags can be included:
–a To include stopped containers and unused images
–f Bypasses confirmation dialog
––volumes Removes all unused volumes

Also, you can specify a single type of object to be removed, instead of the entire environment:
docker container prune
docker image prune
docker volume prune
docker network prune
Running docker system prune -a removes both unused and dangling images. Images used in a container, either currently running or exited, will NOT be affected.
Finally, my docker is clean:


May come with more commands and maintenance tips in future post. While writing this post I was using limited resources, so was unable to attach screen shot for each command. In future may add more scenarios.
Till then keep experimenting & learning.

You must be logged in to post a comment.